Mateminco MT04 Anduril 2 Update Tutorial

Mateminco MT04 Anduril 2 Update Tutorial#
- Introduction
- Anduril 2
- Tools
- Preparing your environment and compiling Anduril 2
- Connect the pins to the pads
- Steps for loading the hex file onto the torch
- Final thoughts
- Product page
Introduction#
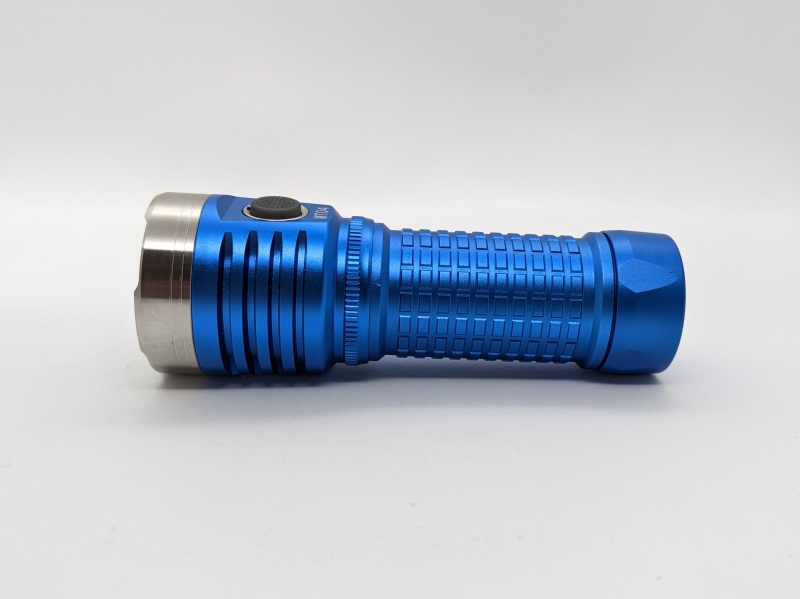
I was browsing the Flashlights Australia Facebook group when I noticed John ask for help with updating the firmware on his Mateminco MT04 torch to Anduril 2 so that he could experience the newest features (e.g. momentary Turbo).
I replied with some relevant posts from reddit:
Updated my new Mateminco MT04 and PD90S to Anduril 2
Astrolux FT03 XHP50.2 &l Anduril
John was keen to do it himself but he wanted the torch updated quickly and safely so he sent me the Mateminco MT04 via express post.
I successfully updated Anduril 2 on his torch and decide to document the process here.
Here is how to compile the latest version of Anduril 2 firmware and load it onto a Mateminco MT04 torch.
Anduril 2#
Wait! What is Anduril 2?
It is an advanced user interface designed for torch enthusiasts by ToyKeeper. Multiple enthusiasts have contributed to the firmware over the years.
There are so many features!
Here is the documentation:
Anduril 2 text manual
Anduril 2 UI diagrams
Tools#
If you follow the instructions on first reddit post above then you could use:
I actually tried that, but I kept running into this error while loading the firmware onto the torch:
avrdude: verification error; content mismatch

Check connection. Setup the adapter in a vice instead.
The connection was too unreliable while holding six pins against the pads with my hand.
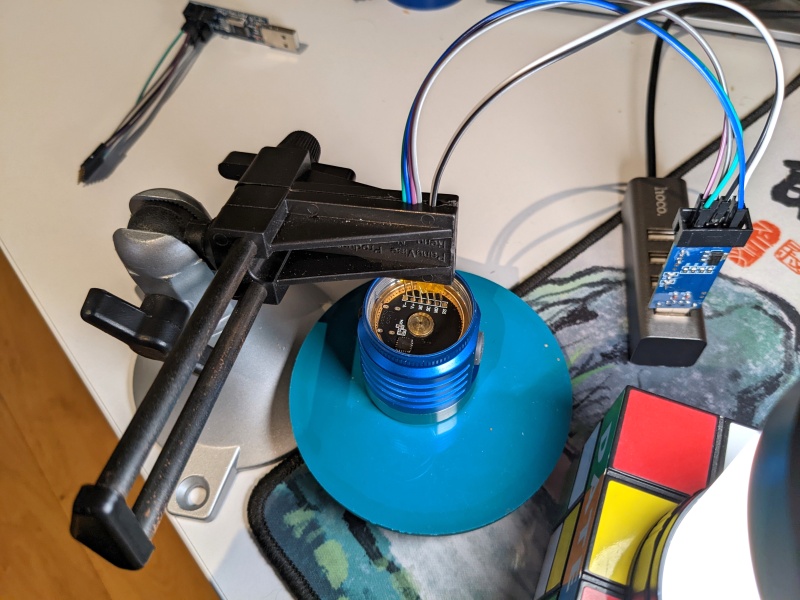
I found it much easier to shove pogo pins into the 2.0mm Female Dupont connectors of six jumper wires and use a vice to hold the pogo pins against the pads of the torch. The connection was much more reliable when I was not holding the jumper wires.
Here are the tools that I successfully used:
- USBasp AVR Programmer
- 2.54mm to 2.0mm Female-Female Jumper Wires
- P50-B1 Pogo Pins or B75-B1 Pogo Pins
- PanaVise Junior 201
Note: I am not affiliated with Core Electronics. I have provided links to products on their website because they are a local electronics business in Australia and I like to support local businesses where possible. I have also bought a VEML7700, TSL2591 and MCP9808 sensors from Core Electronics and used those sensors to review the performance of torches.
Preparing your environment and compiling Anduril 2#
To follow this tutorial, you will need a PC running Linux (e.g. Ubuntu) and a spare USB-A port to plug the USBasp AVR Programmer into. You could use an Android phone with ZFlasher AVR and an OTG adapter but you will need to compile Anduril 2 somewhere or download the hex file (anduril.mateminco-mt35-mini.hex) and transfer it to your phone first. You could also use Windows or macOS (there are more tutorials on budgetlightforum and reddit).
I used a Raspberry Pi 4 running Ubuntu 22.04 LTS.
Install bzr and download the Anduril 2 source code#
sudo apt install bzr
cd ~
bzr branch lp:~ToyKeeper/flashlight-firmware/anduril2 anduril2
Alternatively, the source code is available here:
https://code.launchpad.net/~toykeeper/flashlight-firmware/anduril2
Install dependencies and avrdude#
sudo apt-get install gcc g++ git cmake flex bison libelf libusb libhidapi libftdi1
sudo apt-get install build-essential git cmake flex bison libelf-dev libusb-dev libhidapi-dev libftdi1-dev
sudo apt-get install gcc-avr avr-libc binutils-avr
cd ~
git clone https://github.com/avrdudes/avrdude
cd avrdude
cmake -D CMAKE_BUILD_TYPE=RelWithDebInfo -B build_linux
cmake --build build_linux
sudo cmake --build build_linux --target install
See also:
https://budgetlightforum.com/comment/1873274#comment-1873274
https://github.com/avrdudes/avrdude/wiki/Building-AVRDUDE-for-Linux
You now have the Anduril 2 source code, utilities to compile it, and avrdude to load it onto your torch!
Configure and compile Anduril 2#
Anduril 2 is a little bit too big to compile successfully for the attiny85 microcontroller in the Mateminco MT04 so you will need to disable a feature.
Add #undef USE_SOS_MODE to the end of cfg-mateminco-mt35-mini.h and compile Anduril 2.
cd ~/anduril2/ToyKeeper/spaghetti-monster/anduril
echo "#undef USE_SOS_MODE" >> cfg-mateminco-mt35-mini.h
make
You should now see anduril.mateminco-mt35-mini.hex in the anduril folder.
Connect the pins to the pads#
You will need to understand what the pins and pads connect to and how to hook them up together with jumper wires.
Here is what the pinout looks like for the USBasp programmer and the driver in the torch.
USBasp 10-pin ISP pinout#
Pin 1 starts at the top left where the ISP connector is viewed with the USB plug on the left and there is a little notch half way down the left side of the black ISP connector.
MOSI    1  2  VCC +5V
GROUND  3  4  GROUND
RESET   5  6  GROUND
SCK     7  8  GROUND
MISO    9  10 GROUND
Programming pad pinout#
The MT04 has six programming pads on the driver board near the spring in the head of the torch.
Pad  Type
1    V-
2    V+
3    MI
4    SC
5    MO
6    RS
Wiring#
Connect programming pads to the 10-pin ISP adapter using pogo pins:
| Pad | Type | Pin | Type |
|---|---|---|---|
| 1 | V- | 10 | GROUND |
| 2 | V+ | 2 | VCC +5V |
| 3 | MI | 9 | MISO |
| 4 | SC | 7 | SCK |
| 5 | MO | 1 | MOSI |
| 6 | RS | 5 | RESET |
Here is what that looks like:
Steps for loading the hex file onto the torch#
1. Connect the pins to the pads and test the connection.
sudo avrdude -c usbasp -p t85 -n
avrdude: AVR device initialized and ready to accept instructions

Reading | ################################################## | 100% 0.01s

avrdude: Device signature = 0x1e930b (probably t85)

avrdude done.  Thank you.
2. Backup the current firmware to a file called mateminco-mt04.hex.backup
sudo avrdude -c usbasp -p t85 -Uflash:r:mateminco-mt04.hex.backup:i
3. Load the firmware onto the torch.
sudo avrdude -c usbasp -p t85 -u -Uflash:w:anduril.mateminco-mt35-mini.hex
avrdude: "safemode" feature no longer supported

avrdude: AVR device initialized and ready to accept instructions

Reading | ################################################## | 100% 0.01s

avrdude: Device signature = 0x1e930b (probably t85)
avrdude: NOTE: "flash" memory has been specified, an erase cycle will be performed
         To disable this feature, specify the -D option.
avrdude: erasing chip
avrdude: input file anduril.mateminco-mt35-mini.hex auto detected as Intel Hex
avrdude: reading input file anduril.mateminco-mt35-mini.hex for flash
avrdude: writing 8092 bytes flash ...

Writing | ################################################## | 100% 2.70s

avrdude: 8092 bytes of flash written
avrdude: verifying flash memory against anduril.mateminco-mt35-mini.hex

Reading | ################################################## | 100% 1.93s

avrdude: 8092 bytes of flash verified

avrdude done.  Thank you.
Troubleshooting#
If you get the following error then you may need to make sure that the pogo pins are touching the pads and the jumper wires are not broken:
avrdude: verification error; content mismatch
Final thoughts#
Thank you for reading! I hope that this tutorial helps you with updating the firmware on your own Mateminco MT04.
If you have a different torch, please check out the discussions on budgetlightforum and reddit. There are so many enthusiast who have made helpful tutorials.
Before I updated the firmware I did some basic checks:
- Test to see if the torch turns on and off.
- Measure the beam intensity on Turbo with my DIY lumen tube.
After updating the firmware on the MT04 I did a few more checks:
- Test to see if the torch turns on and off.
- Change the mode from Simple UI to Advanced.
- Test to see if the built-in charger stops at 4.20V (it stopped at 4.15V).
- Test momentary Turbo.
- Test blinky modes.
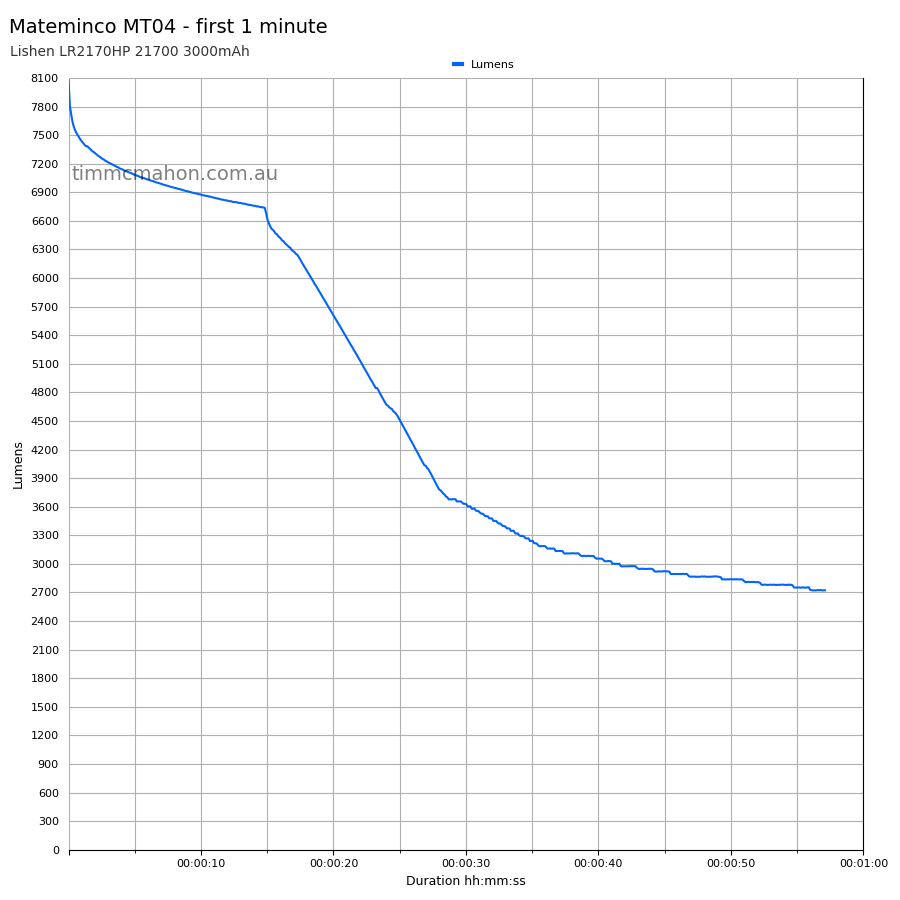
- Measure the beam intensity on Turbo with my DIY lumen tube.
I measured slightly over 8,075 lumens at turn on with a Lishen LR2170HP 21700 3000mAh cell.
Product page#
Promo code: TimMcAU
Promo code: TIMMC
Nealsgadgets.com affiliate link
I may earn a commission if you use an affiliate link or a promo code. This will help fund future torch reviews and tutorials.