Olight O’Pen Glow Review
Olight O’Pen Glow⌗
- Specifications
- Introduction
- Torch in use
- Build quality
- LED, lens and beam
- Size and comparison
- User interface
- Batteries and charging
- Performance
- Beamshots
- Conclusion
- Price
- Product page
Specifications⌗
| Brand/model | Olight O’Pen Glow |
|---|---|
| LED | 5700K (Pen Clip Light), 4000K (Pen Tip Light) |
| Laser pointer | 0.39 mW (Class 1), 510-530 nm (Green) |
| Maximum lumens | 120 lm |
| Maximum beam intensity | 48 cd |
| Maximum throw | 14 m |
| Battery | Built-in 110mAh 3.7V Li-ion |
| Onboard charging | No (USB-C charging base) |
| Material | Aluminium |
| Modes | 4 |
| Blinkies | No |
| Review date | July 2023 |
Introduction⌗
Olight kindly presented me with a bolt-action Olight O’Pen Glow in OD Green when I visited the Olight factory in May. Thank you Adam for arranging my visit to Olight!
I was lucky enough to see and film the Olight O’Pen Glow being assembled.
I have also uploaded a video to YouTube with my initial thoughts on the Olight O’Pen Glow.
Here is my review of the pen from the perspective of a torch enthusiast.
I have not been paid for this review nor have I held back my opinions of this pen.
Packaging⌗
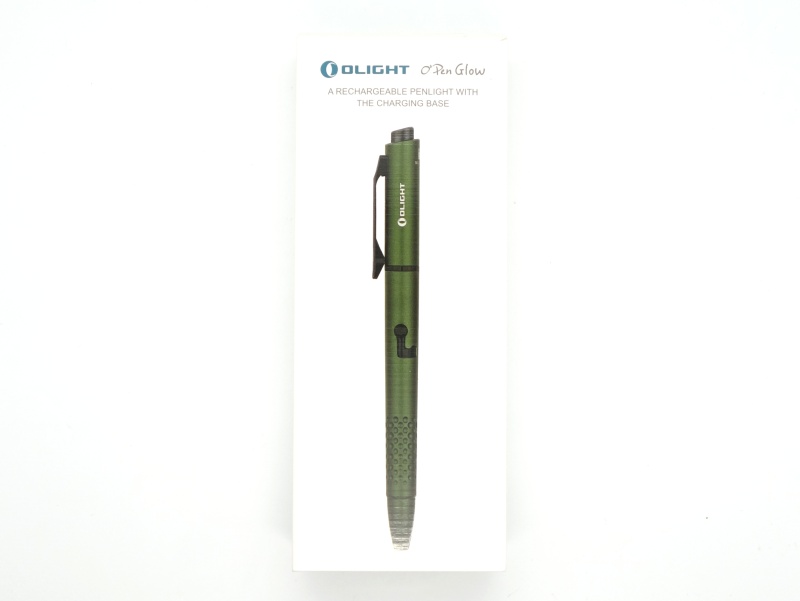
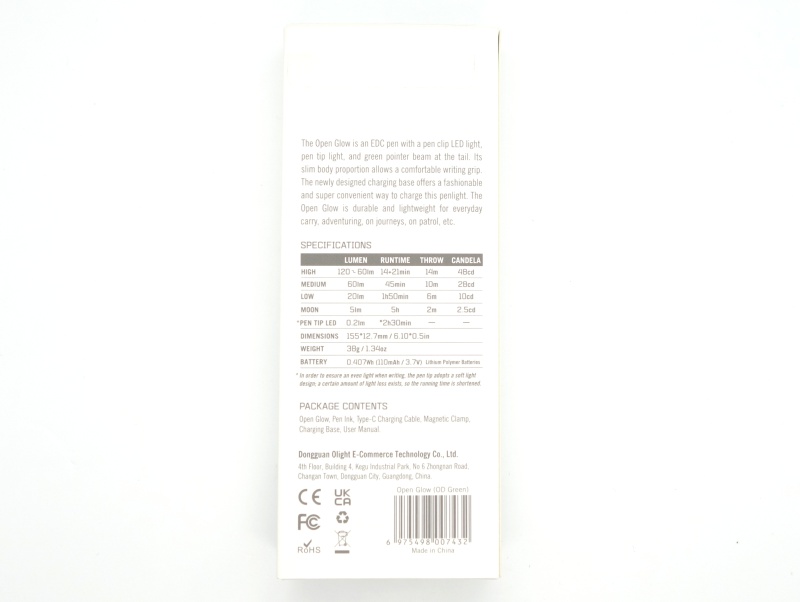
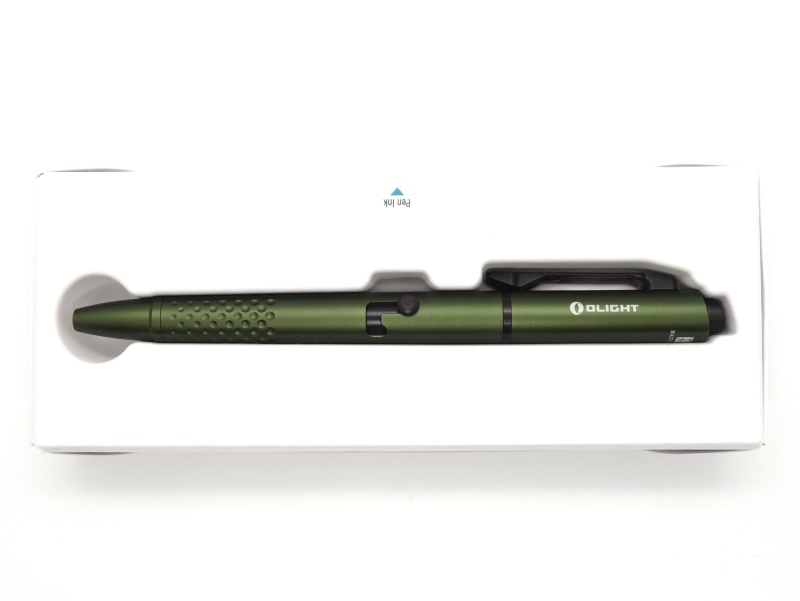
The O’Pen Glow comes in white box with an image of the pen on the front and details about the pen on the back. The texture of the box feels nice. Olight have really nice packaging.
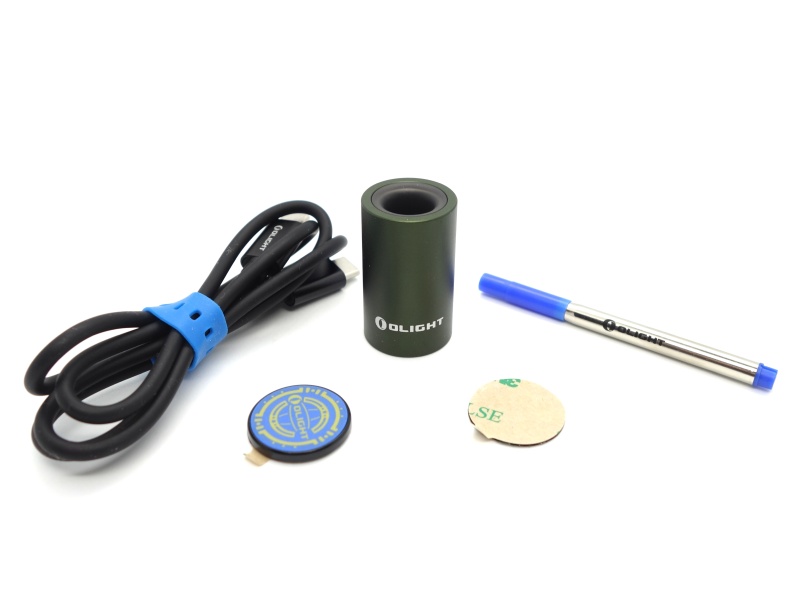
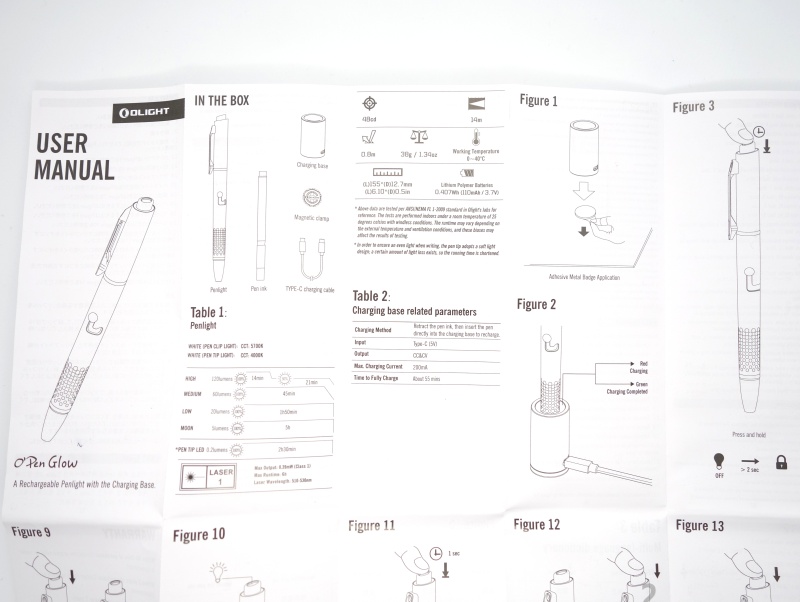
The following was included in the box:
- Olight O’Pen Glow
- Charging base
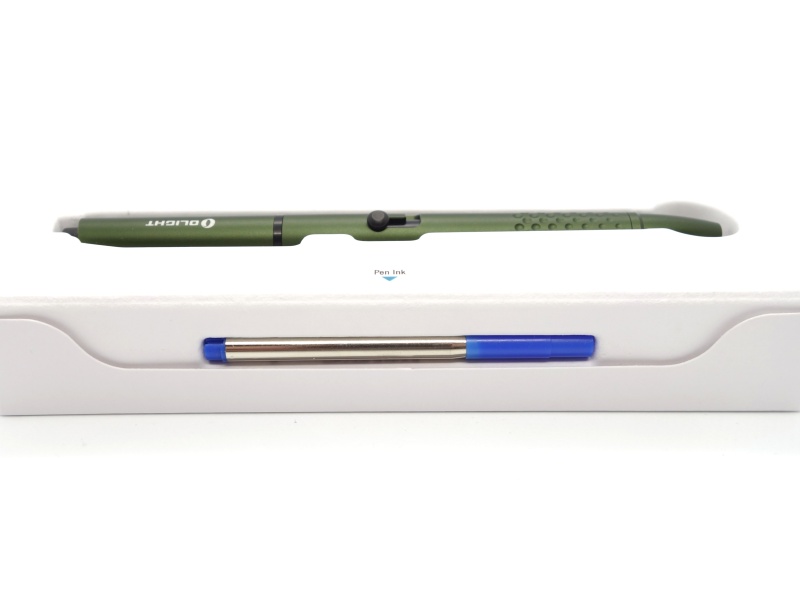
- Spare Blue Pen Ink
- USB-A to USB-C cable
- Magnetic clamp
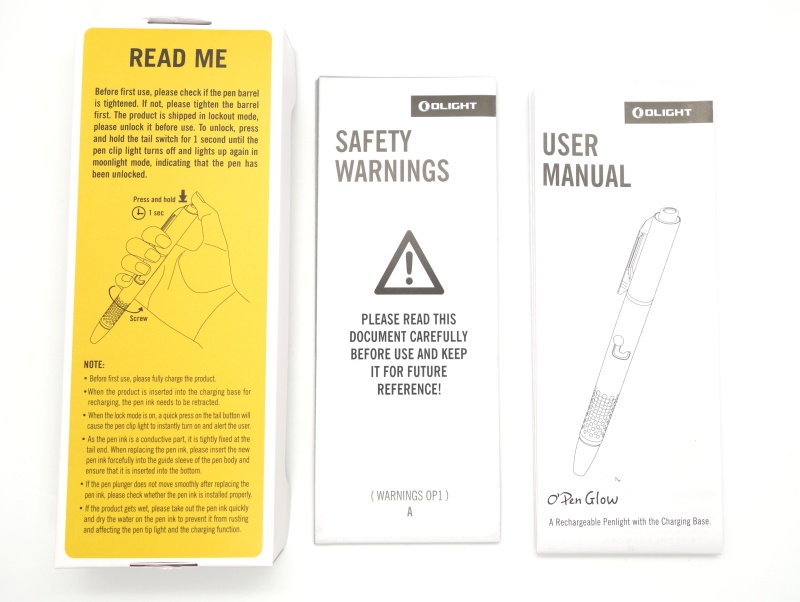
- User manual
The pen comes with black ink already installed.
Torch in use⌗
After checking out the Olight headquarters, Monica, Nick and I walked across to a nearby coffee shop. We were about to take a car to the factory.
I couldn’t help but open the Olight O’Pen Glow box to see what it is like!
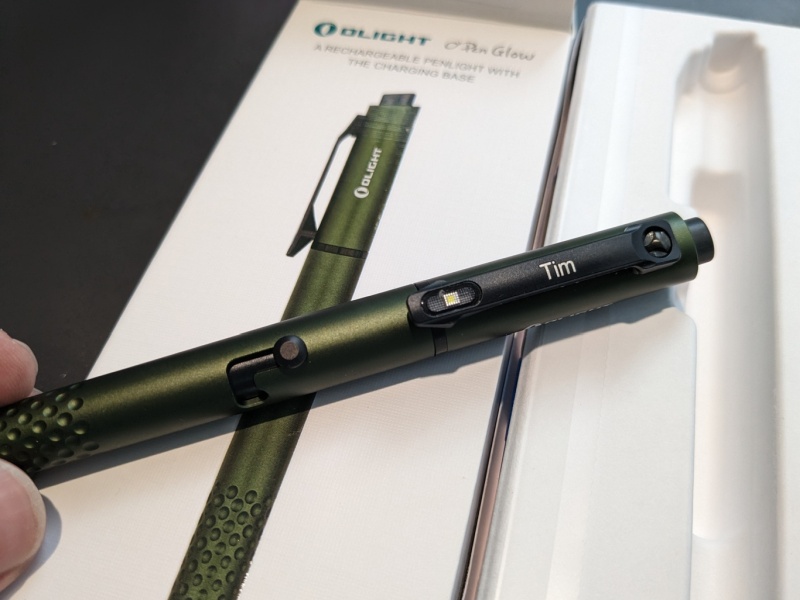
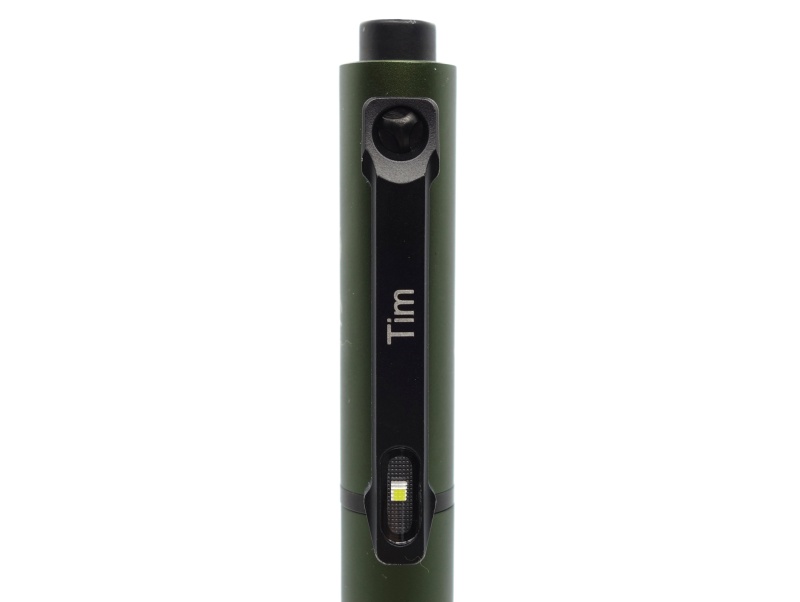
Olight had engraved my name on the pocket clip! Thanks Olight :-)
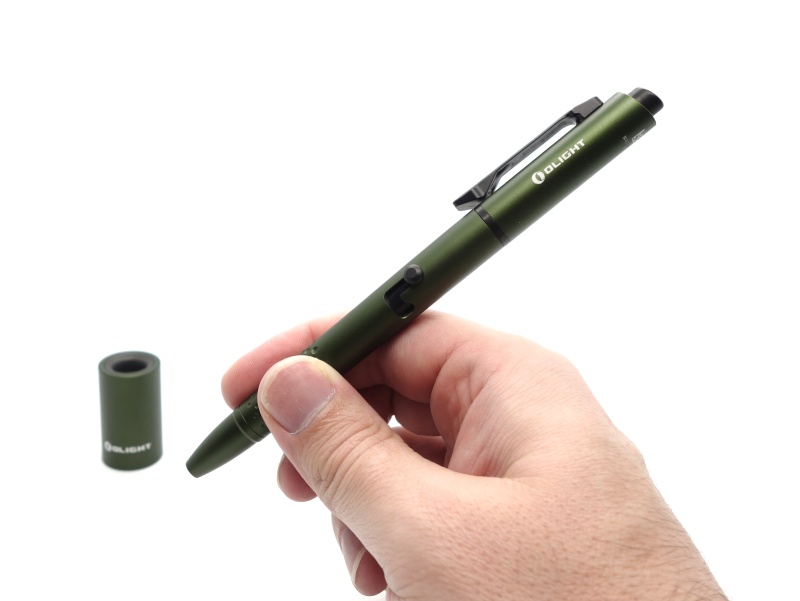
The O’Pen Glow feels comfortable in my medium sized hands.
I like the dot pattern near the tip. It provides additional grip.
The pen is a bit longer than a “regular” pen but it feels well balanced.
Pen Clip Light⌗
I decided to EDC the Olight O’Pen Glow while visiting relatives in China and it ended up saving the day.
My family and I could not see as we walked down a ramp to a car park after having dinner at a restaurant with relatives. Luckily, I had the O’Pen Glow in my pocket. I was able to turn the Pen Clip Light onto High and illuminate the ramp so that we could see where we were walking.
Green Laser Pointer⌗
I brought the Olight O’Pen Glow along to coffee shops with the intention of using the laser pointer to point at the menu if I ran into communication issues. But either staff or fellow customers ended up understanding what I said in Mandarin so I did not end up using the laser pointer.
Pen Tip Light⌗
The only time I genuinely used the Pen Tip Light was while filling in a customs declaration card on the flight home to Australia.
Pen⌗
I have used the Olight O’Pen Glow as a pen for signing a few important contracts.
I don’t usually EDC a pen. If I do have a pen in my pocket, it is because I need to sign something important.
It works well as a pen too.
Build quality⌗
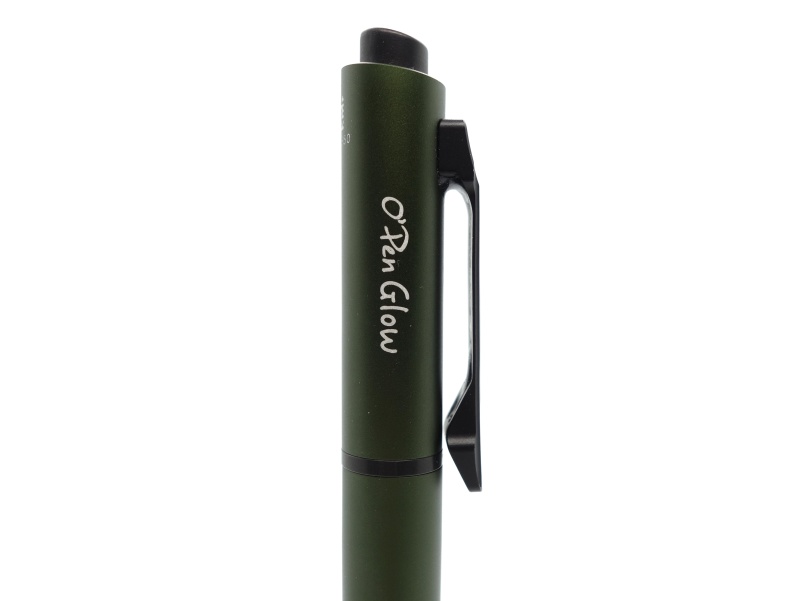
This Olight O’Pen Glow is made of aluminium and it has an OD Green anodised finish with black accents.
The pocket clip has a little bit of flex. It feels secure when I use it.
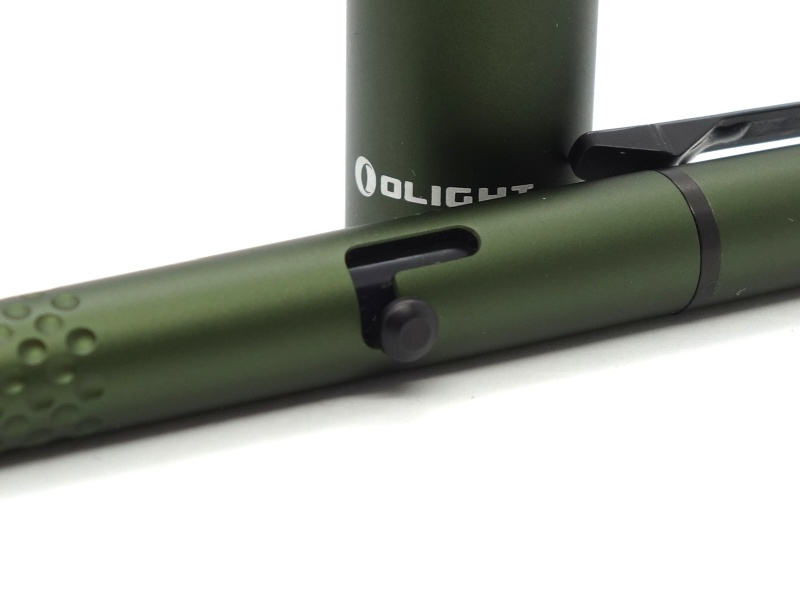
The bolt clicks into place smoothly with a strong spring.
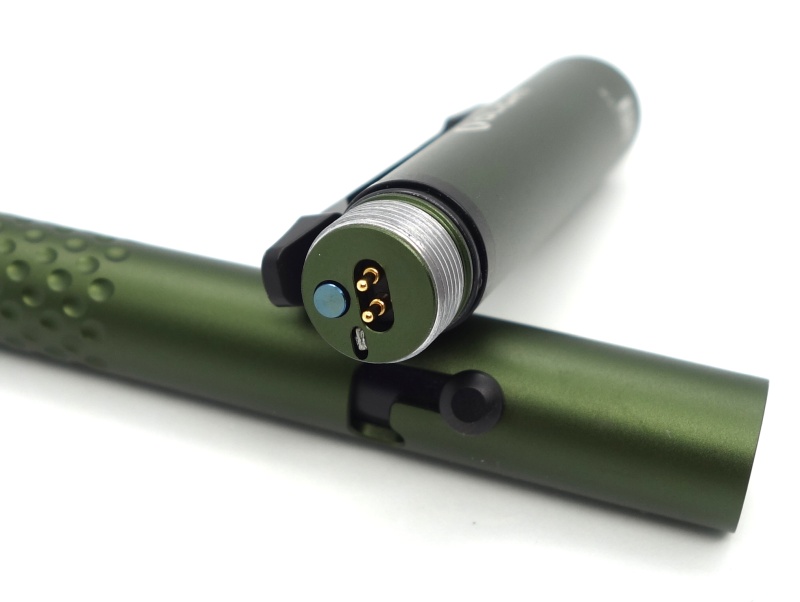
There is a button hidden inside the pen near two pins. The bolt can push the button to turn the laser pointer on and off.
I like how it is difficult to accidentally turn the laser pointer on. The bolt needs to be pushed toward the tail end for about a second to turn the laser pointer on at the tail.
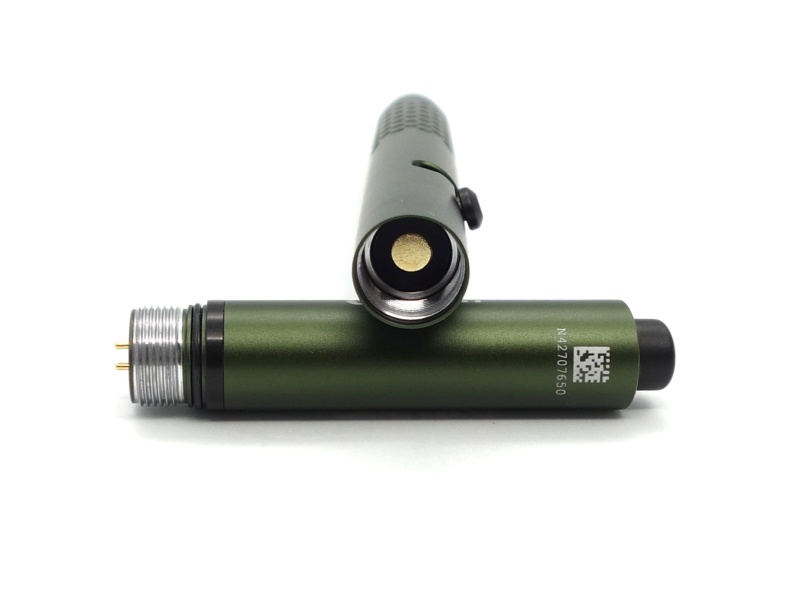
The pins and the threads are used to charge the battery and provide power to the Pen Tip Light.
The first half of the Olight O’Pen Glow looks very similar to an Olight O’Pen Mini.
The square cut threads turn smoothly. There are o-rings on the threads to help prevent water getting in.
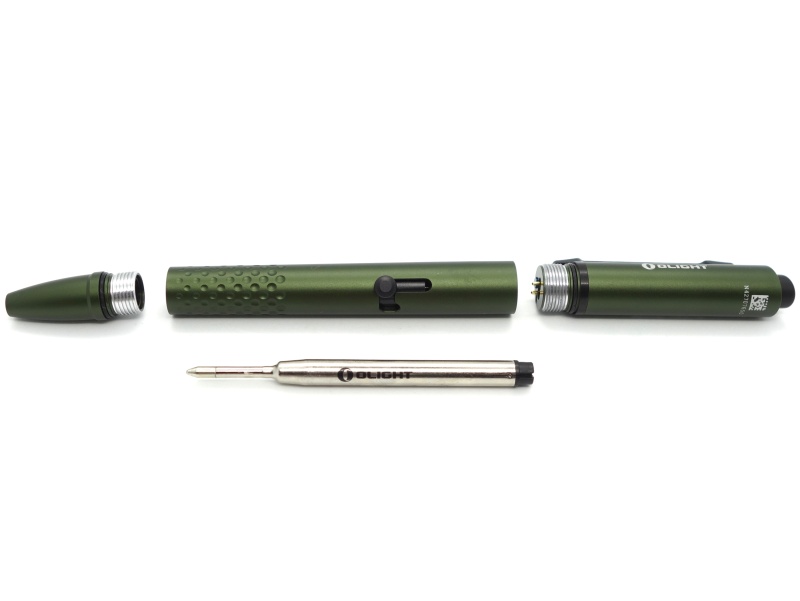
The following is on the refill:
Olight
Ball Point Refill
RF-OL182X BK Made in China
303
This information might be helpful if you are trying to find alternative refills.
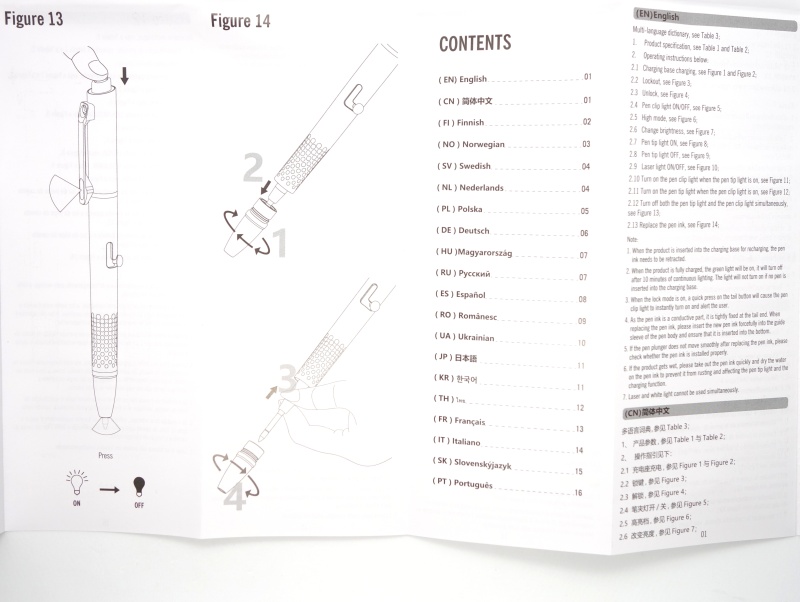
I found that a lot of force is required to pull the pen refill out and put a new one into the Olight O’Pen Glow.
These refills might fit:
- Schmidt Mini 8126
- Schmidt Megaline 4876M
LED, lens and beam⌗
The Olight O’Pen Glow has two LED lights and a laser pointer!
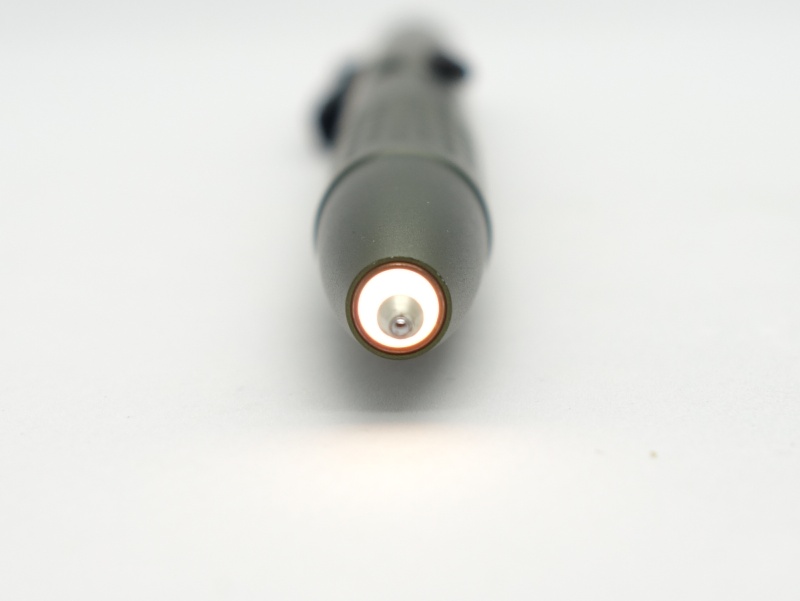
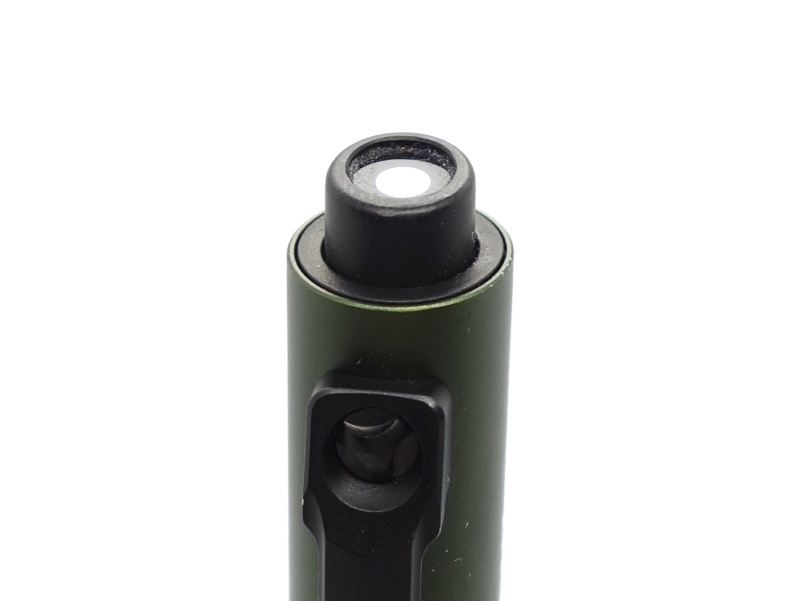
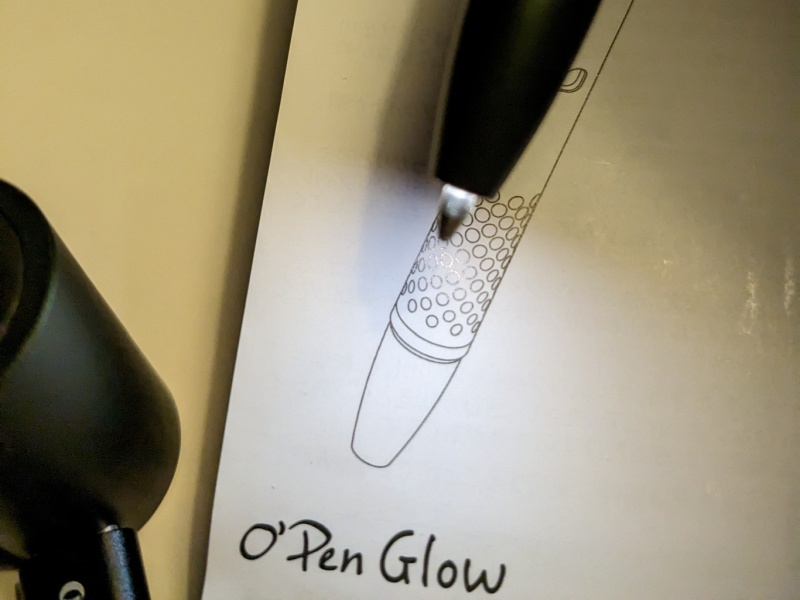
A warm white (4000K) Pen Tip Light:
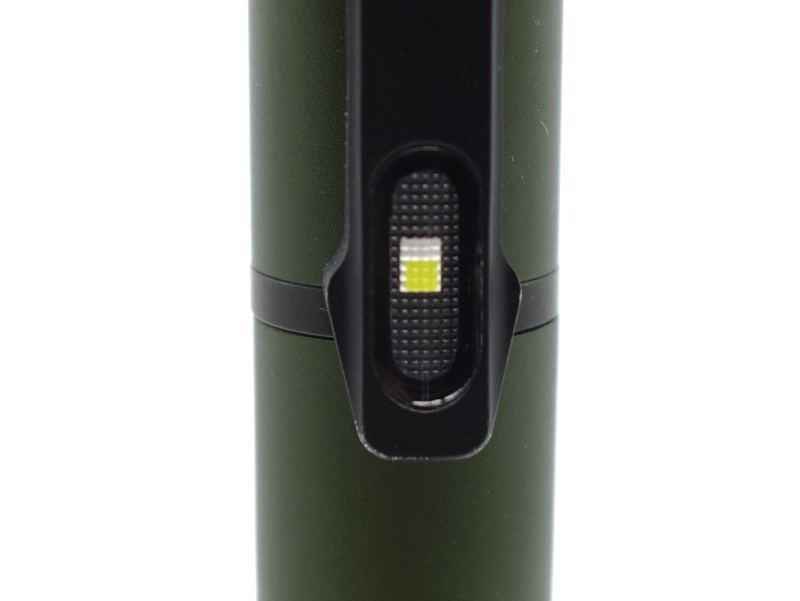
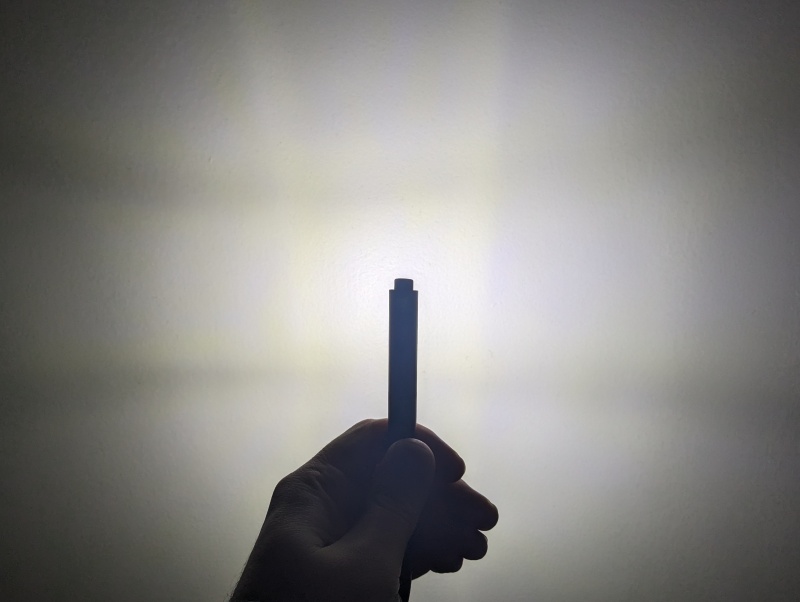
A cool white (5700K) Pen Clip Light:
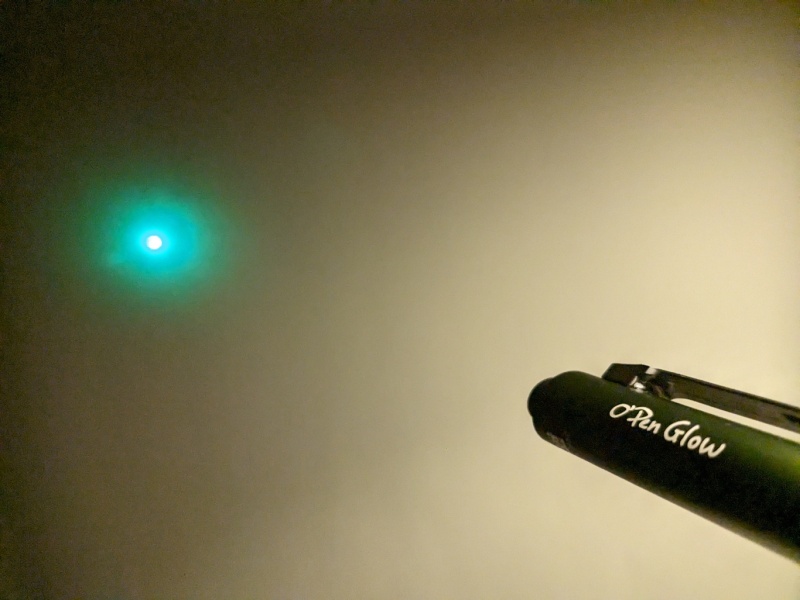
And a Green Laser Pointer:
CCT, CRI, and duv⌗
I have taken Correlated Colour Temperature (CCT) and Colour Rendering Index (CRI, RA of R1-R8) measurements with the Pen Tip Light positioned one centimetre away from an Opple Light Master Pro III (G3) and with the Pen Clip Light positioned five centimetres away.
The Pen Tip Light has a CCT of around 4100K and a high CRI of around 94. The Delta u, v is positive (green).
The Pen Tip Light produces a small warm beam around the tip of the pen. It is sufficient for writing in the dark.
The Pen Clip Light has a CCT of around 5900K and a low CRI of around 67. The Delta u, v is positive (green) on lower modes and slightly less green on higher modes.
The Pen Clip Light produces a floody cool white beam with a cross pattern. The cross pattern may be due to the optic. There is a bit of tint shift around the cross.
| Mode | CCT (K) | CRI (Ra) | x | y | Duv |
|---|---|---|---|---|---|
| Pen Tip Light | 4156 | 94.5 | 0.3772 | 0.3865 | 0.0055 |
| Moon | 5983 | 66.4 | 0.3219 | 0.3397 | 0.0042 |
| Low | 5959 | 67.2 | 0.3225 | 0.3382 | 0.0031 |
| Medium | 5927 | 66.9 | 0.3231 | 0.3397 | 0.0036 |
| High | 5998 | 67.5 | 0.3218 | 0.3366 | 0.0026 |
Calculate Duv from CIE 1931 xy coordinates
Dimensions and size comparison⌗
Dimensions⌗
I took the following measurements using a vernier caliper.
| Measurement | Unit (mm) |
|---|---|
| Length | 155.0 |
| Tube diameter | 12.7 |
| Refill length | 76.0 |
| Refill base diameter | 5.0 |
| Refill base length | 4.0 |
| Refill tube diameter | 6.0 |
| Refill tube length | 46-53 |
| Refill tip length | 18-19 |
| Refill tip diameter | 2.5 |
Weight⌗
I took the following measurements using a digital scale.
| Weight | Unit (g) |
|---|---|
| Olight O’Pen Glow | 38.54 |
Size comparison with its competition⌗
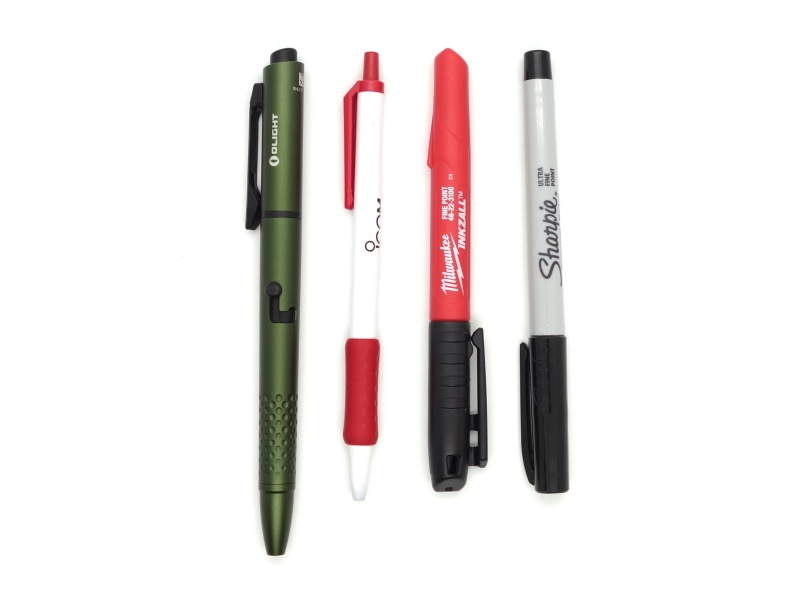
From left to right: Olight O’Pen Glow, Icom pen, Milwaukee INKZALL Black Fine Point Marker, Sharpie Ultra Fine Point
User interface⌗
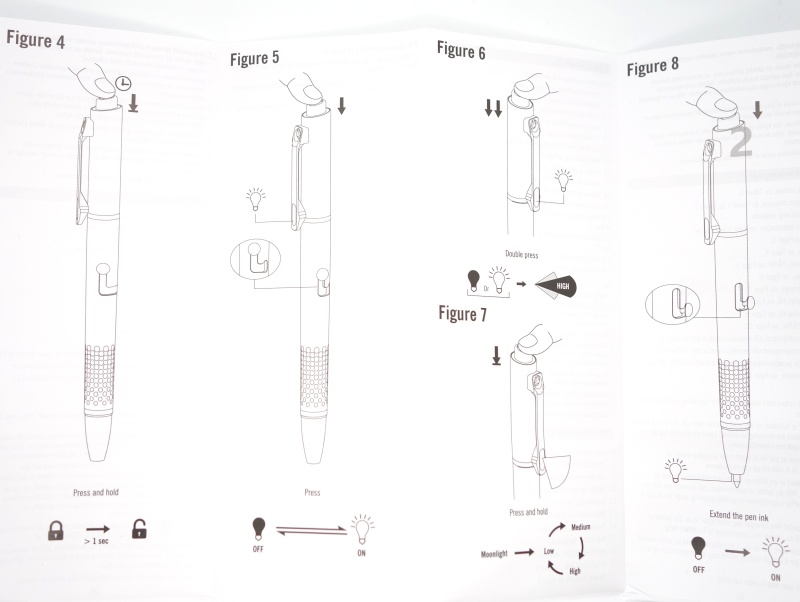
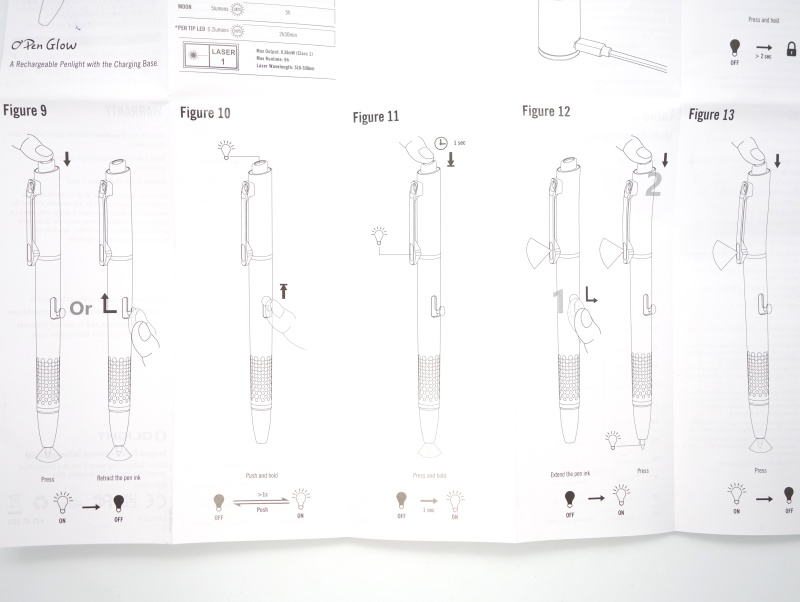
I highly recommend reading the user manual to understand how the user interface works. It may be easier than reading the following table.
The tail switch and the bolt can be used to control the Olight O’Pen Glow.
The Pen Clip Light is controlled by the tail switch. It has four modes: Moon, Low, Medium and High.
The Pen Tip Light is controlled by the bolt and the tail switch. It has one mode.
The Green Laser Pointer is controlled by the bolt. It has one mode.
The Pen Clip Light and the Pen Tip Light can be turned on individually and you can end up with both turned on.
The Pen Clip Light and Green Laser Pointer cannot be turned on at the same time.
| State | Action | Result |
|---|---|---|
| Off | Press tail switch | Pen Clip Light on (Moon) |
| Pen Clip Light on | Press and hold tail switch | Cycle Pen Clip Light (Low, Medium, High) |
| Pen Clip Light on | Press tail switch | Pen Clip Light off |
| Off | Press tail switch for > 2 seconds | Lock-out |
| Off | Double press tail switch | Pen Clip Light on (High) |
| Pen Clip Light on | Double press tail switch | Pen Clip Light on (High) |
| Lock-out | Press tail switch for > 1 second | Pen Clip Light on (Moon) |
| Lock-out | Press tail switch for < 1 second | Momentary Pen Clip Light on (Moon) |
| Off | Extend the pen ink and then press the tail switch | Pen Tip Light on |
| Pen Clip Light on | Extend the pen ink and then press the tail switch | Pen Tip Light on |
| Pen Clip Light off, Pen Tip Light on | Press and hold the tail switch for 1 second | Pen Clip Light on (Moon) |
| Pen Clip Light on, Pen Tip Light on | Press and hold the tail switch | Cycle Pen Clip Light (Low, Medium, High) |
| Pen Tip Light on | Press the tail switch | Off |
| Pen Tip Light on | Retract the pen ink | Pen Tip Light off |
| Off | Push the bolt toward the tail end for > 1 second | Laser Pointer on |
| Laser Pointer on | Press the tail switch | Nothing |
| Laser Pointer on | Press and hold the tail switch | Nothing |
| Laser Pointer on | Push the bolt toward the tail end for > 1 second | Laser Pointer off |
PWM⌗
I did not notice any visible PWM (flickering).
What I like about the UI⌗
- It is relatively simple to use.
- Shortcut to High from off.
What could be improved⌗
- An SOS or Strobe mode might be useful.
Batteries and charging⌗
Battery⌗
The Olight O’Pen Glow has a 110mAh 3.7V Li-ion battery built-in.
Charging⌗
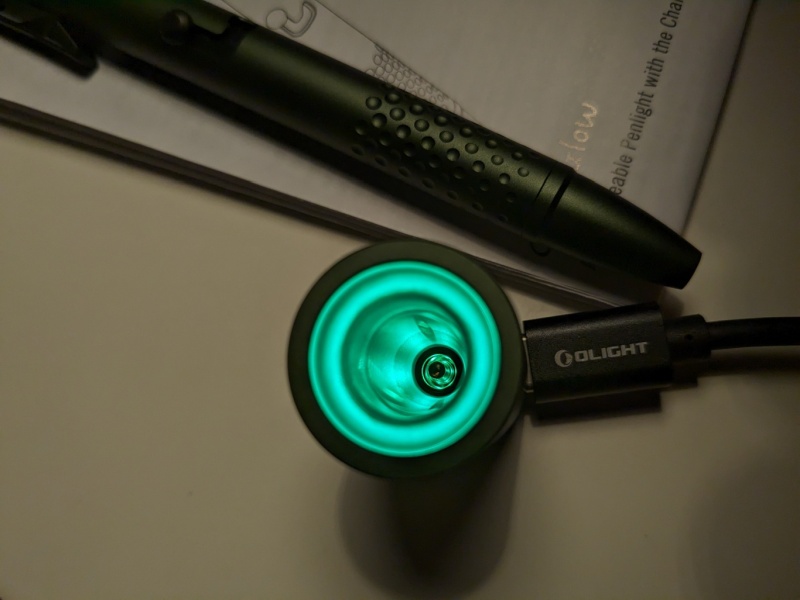
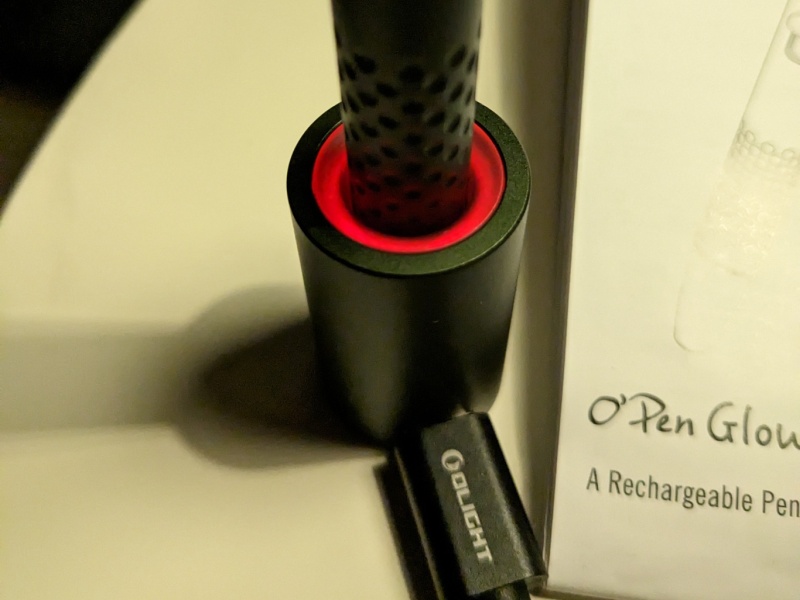
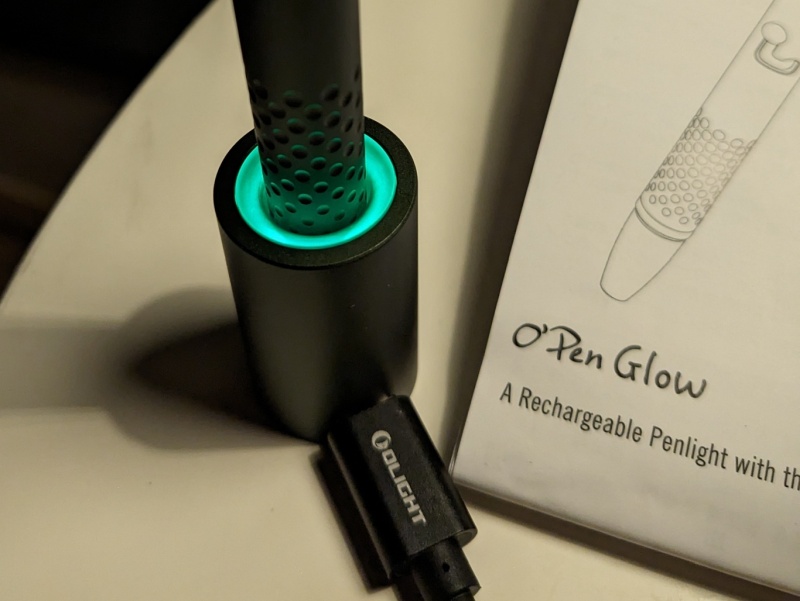
The Olight O’Pen Glow does not have a USB-C port built-in like the Olight O’Pen Pro. Instead, it comes with a charging base for the pen to sit in. The charging base has a USB-C port.
The tip of the pen must be retracted before placing the pen into the charging base. The pen refill and the circular tip at the head are used for charging.
The charging base turned red while the pen was charging and it turned green when charging completed.
Power supply: PinePower Desktop USB-C
USB Meter: AVHzY CT-3 (recommended by LiquidRetro)
Room temperature: 13 C
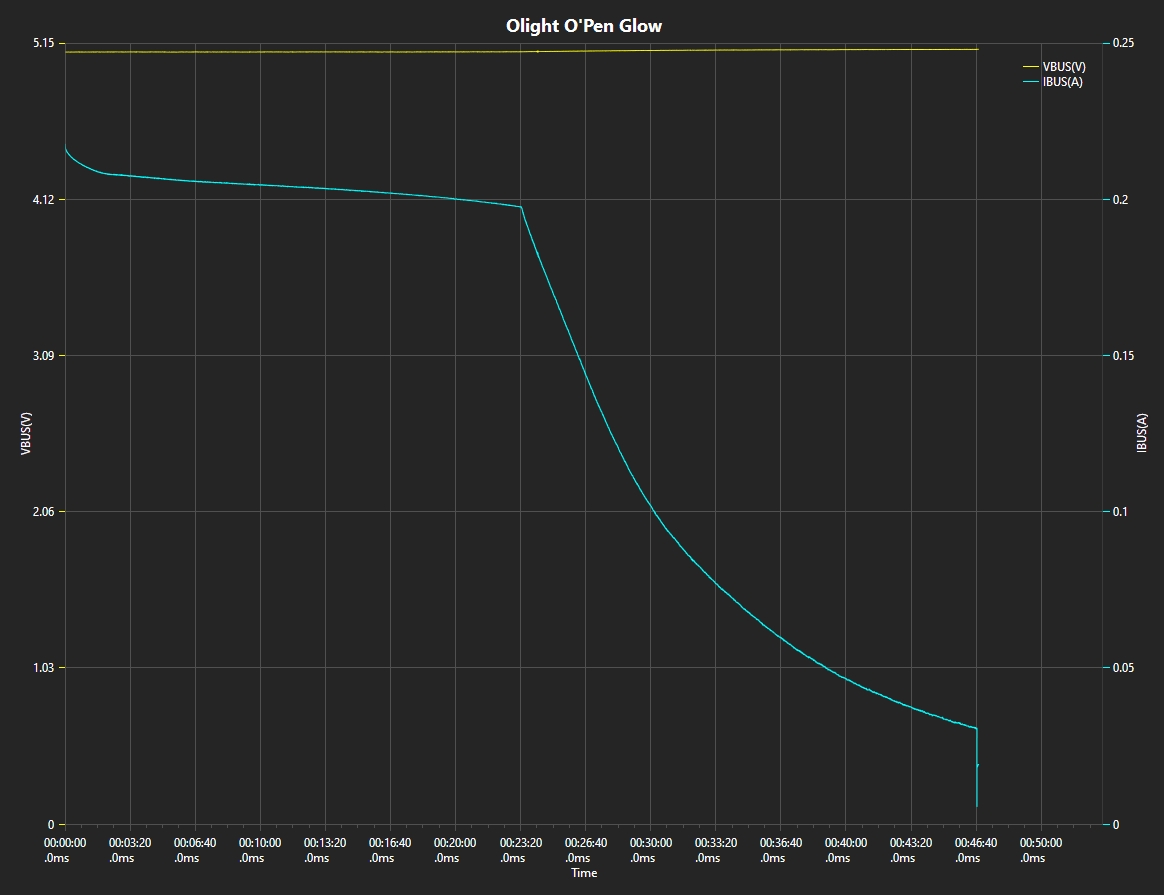
I performed a runtime test until the pen turned off and then I recorded the pen being charged.
The pen charged at a rate of 5V 0.2A for 46 minutes.
I measured a voltage of 1.246V between the threads and one of the pins when charging was complete.
Power supply compatibility⌗
I tried the following power supplies with the built-in USB-C charger:
| Power supply | USB Type | Protocol | Does it charge? |
|---|---|---|---|
| Apple 20W Power Adapter | USB-C | PD | Yes |
| Google Pixel Power Adapter | USB-C | PD | Yes |
| PinePower Desktop | USB-C | PD | Yes |
| PinePower Desktop | USB-A | QC | Yes |
| PinePower Desktop | USB-A | Yes |
USB-C to USB-C charging works.
Performance⌗
Specifications from the manual:
| Lumen | Runtime | Throw | Candela | |
|---|---|---|---|---|
| High | 120 + 60lm | 14 + 21min | 14m | 48cd |
| Medium | 60lm | 45min | 10m | 28cd |
| Low | 20lm | 1h50min | 6m | 10cd |
| Moon | 5lm | 5h | 2m | 2.5cd |
| Pen Tip LED | 0.2lm | 2h30min |
Lumen measurements⌗
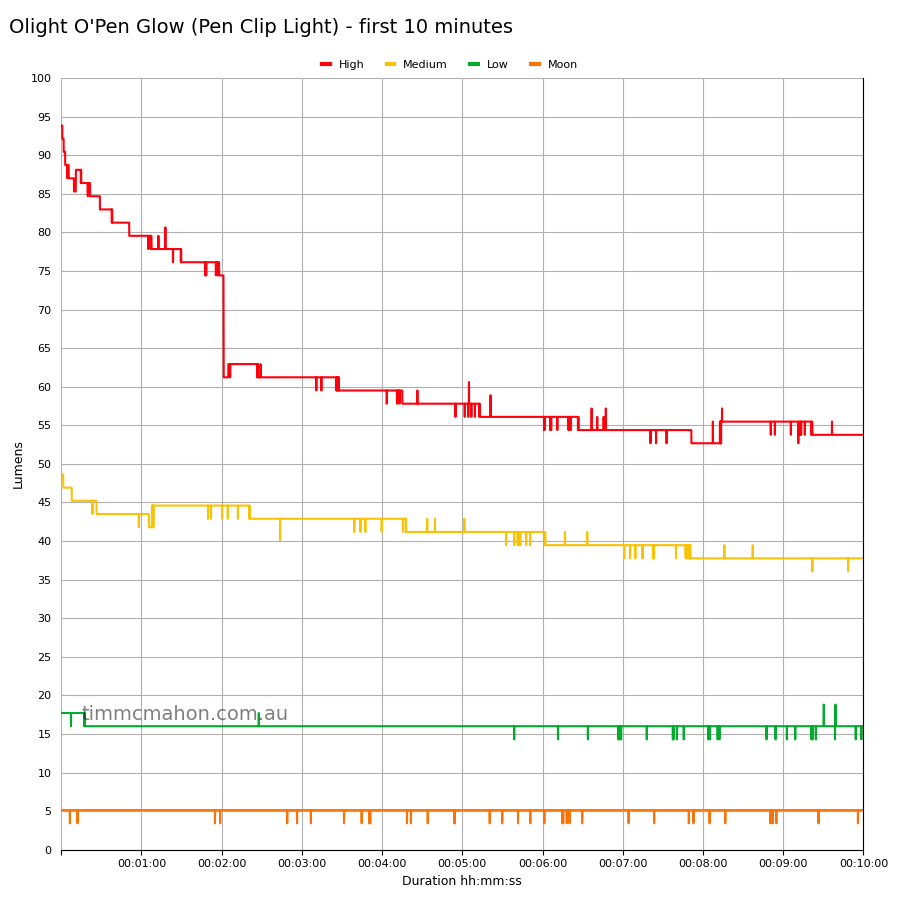
Note: Lumen measurements may be off by 10% with my DIY lumen tube.
| Mode | Specs | Lumens @turn on | Lumens @30 sec | Lumens @10 min |
|---|---|---|---|---|
| Moon | 5 | 5 | 5 | 5 |
| Low | 20 | 17 | 16 | 16 |
| Medium | 60 | 48 | 43 | 37 |
| High | 120 | 93 | 82 | 53 |
Runtime graphs⌗
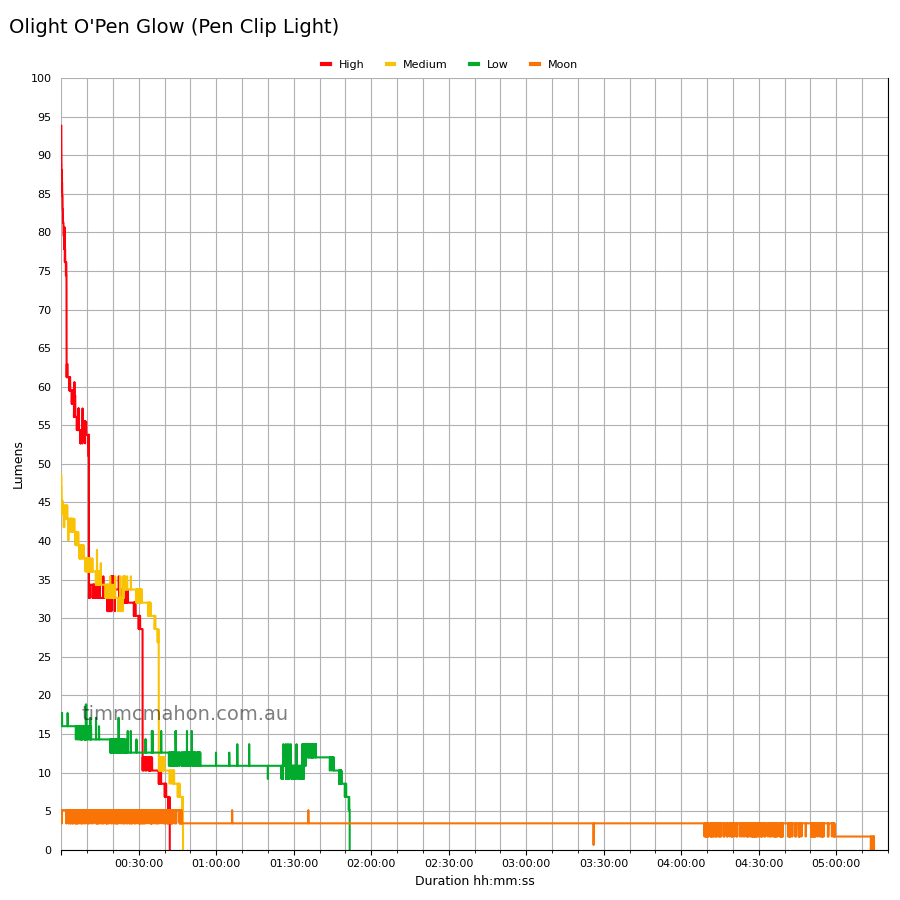
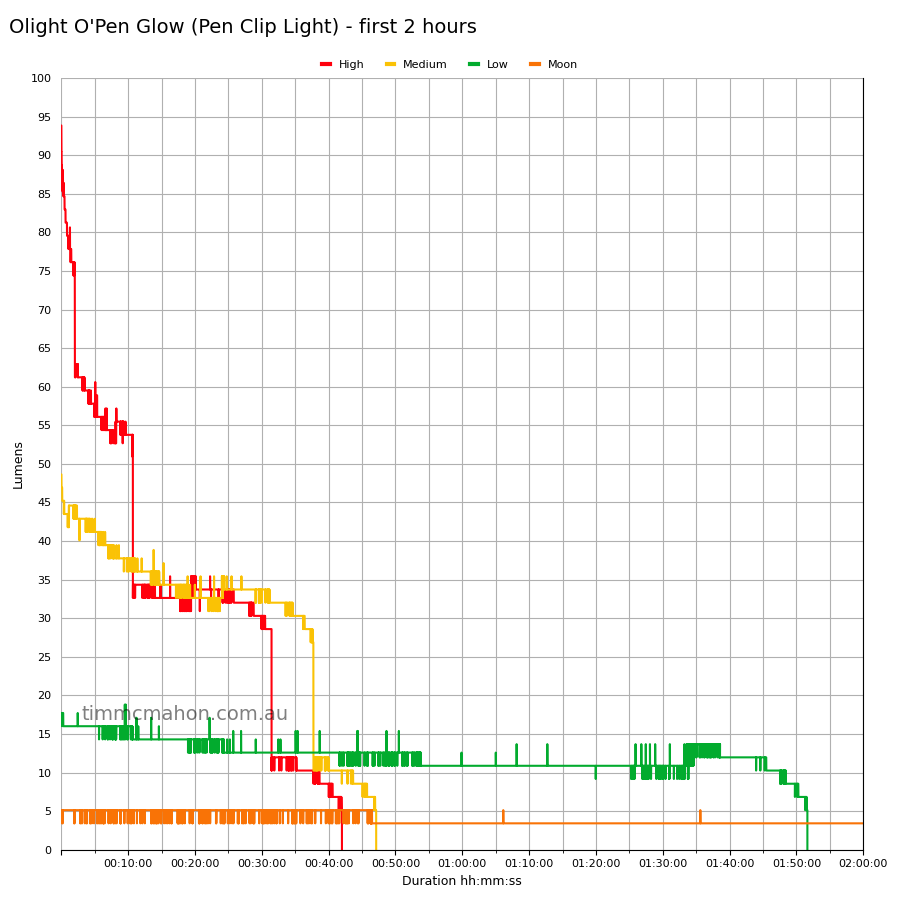
I used my own DIY lumen tube with a TSL2591 sensor and forked bmengineer’s project RuTiTe to record runtimes.
The room temperature was approximately 13 C.
Runtime⌗
Here is a summary of the runtime results:
| Mode | User manual | Runtime result |
|---|---|---|
| High | 14 + 21min | 41min 58s |
| Medium | 45min | 47min 6s |
| Low | 1h50min | 1h 51min 38s |
| Moon | 5h | 5h 14min 34s |
The runtime result is the time until my lumen tube no longer detects more than one lumen.
I have not tested the runtime for the Pen Tip Light. It is too dim for my DIY lumen tube to detect.
Olights numbers look pretty accurate.
Throw⌗
With the Pen Clip Light set to High, I can easily identify objects at five metres. I can see the light reach beyond ten metres but it is difficult to clearly identify objects at that distance.
I took lux measurements with a UNI-T UT383BT at 30 seconds. Moon was measued at half a metre. Low, Medium and High were measured at one metre.
| Mode | Specs (cd) | Specs (m) | Candela measured (cd) | Distance (m) |
|---|---|---|---|---|
| Moon | 2.5 | 2 | 2 | 2 |
| Low | 10 | 6 | 9 | 6 |
| Medium | 28 | 10 | 33 | 11 |
| High | 48 | 14 | 59 | 15 |
Beamshots⌗
Here are a few photos of the beams produced by the Pen Clip Light, Pen Tip Light and the Green Laser Pointer.
Pen Clip Light (High)⌗
Pen Tip Light⌗
Green Laser Pointer⌗
Conclusion⌗
It looks like Olight has put a lot of effort into perfecting the Olight O’Pen Glow.
I find it fascinating how the battery charges via the tip and how multiple emitters and a laser pointer can be controlled using a tail switch and a bolt.
It would be nice if the clip light had a high CRI emitter and if the optic could be changed so that the beam does not have a cross pattern with tint shift.
I like how a warm high CRI emitter has been used for the tip light.
It is nice how Olights numbers are so accurate. The runtime, beam distance, CCT and CRI that I measured are pretty close to Olights specifications. My DIY lumen tube might be slightly under-reporting the lumen measurements.
The charging base looks neat and tidy in an office. It would be even better if USB-C charging could be built into the pen too so that the pen can more easily charged while travelling.
Proprietary ink refills might be a concern for some people. Personally, it might take several years before I use up a single ink refill.
Would I recommend the Olight O’Pen Glow? Yes. It would make a wonderful gift. I bought one for a friend during Olights previous sale.
Pros:⌗
- Excellent build quality.
- Good runtimes.
- Good amount of flood and throw.
- High CRI and warm tip light.
- Feels comfortable to use.
- Relatively simple user interface.
- USB-C charging base.
- Laser pointer.
Cons:⌗
- Clip light produces a beam with a cross pattern.
- Low CRI clip light.
- No USB-C charging in the pen (use the charging base instead).
- Proprietary ink refills.
Price⌗
The Olight O’Pen Glow is AU$119.95 at the time of writing.

