Olight Warrior Nano Review

Olight Warrior Nano#
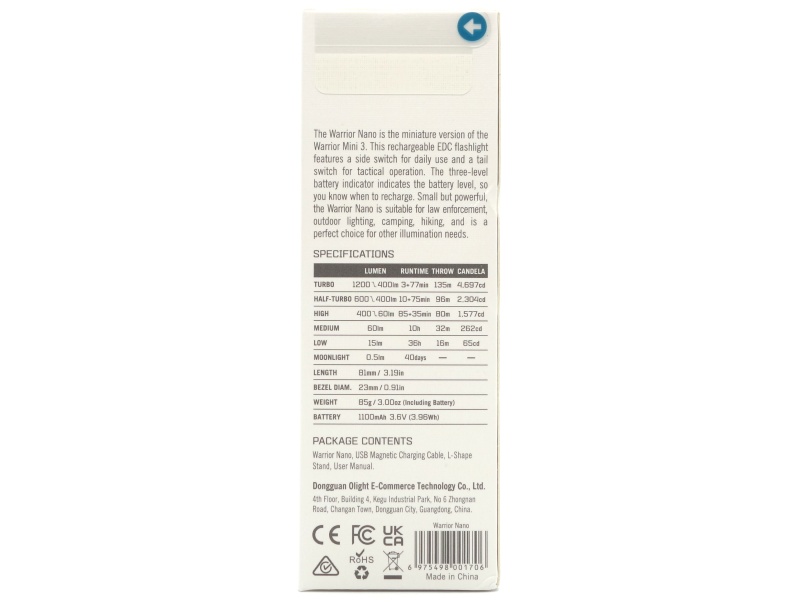
- Specifications
- Introduction
- Torch in use
- Build quality
- LED, bezel, lens and reflector
- Size and comparison
- User interface
- Batteries and charging
- Performance
- Beamshots
- Conclusion
- Price
- Product page
Specifications#
| Brand/model | Olight Warrior Nano |
|---|---|
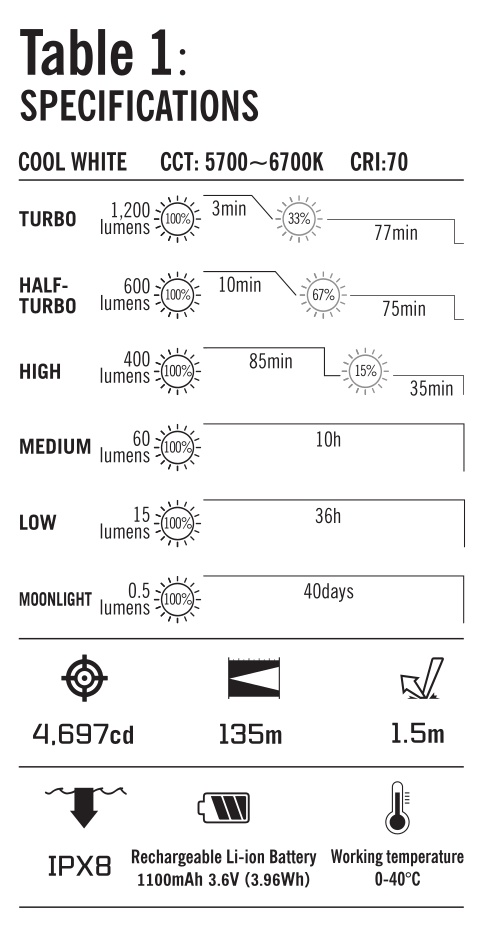
| LED | Cool White 5700-6700K 70 CRI |
| Maximum lumens | 1,200 lm |
| Maximum beam intensity | 4,697 cd |
| Maximum throw | 135 m |
| Battery | 1*18350 1100mAh |
| Onboard charging | Yes (magnetic charging) |
| Material | Aluminium |
| Modes | 6 |
| Blinkies | Strobe |
| Reflector | TIR |
| Waterproof | IPX8 |
| Review date | October 2023 |
Introduction#
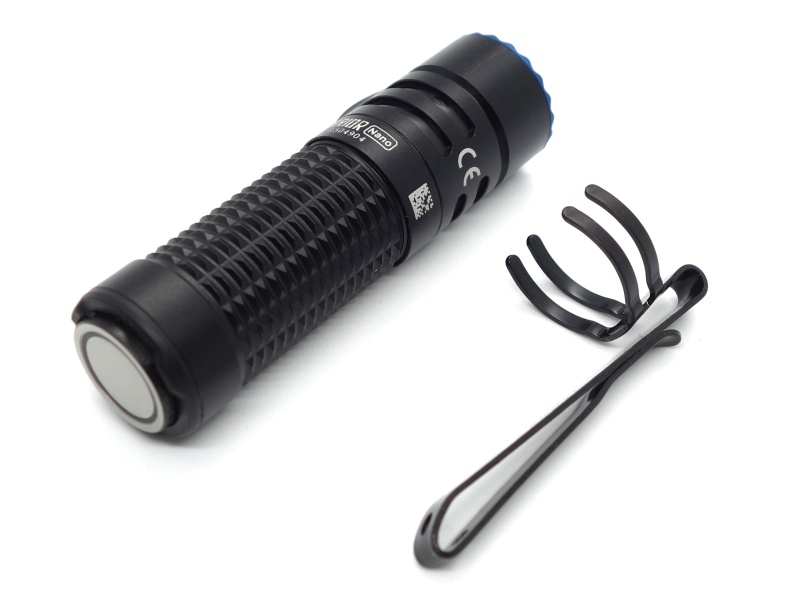
Olight Australia kindly sent the Warrior Nano for review. It is a shorter version of the Warrior Mini 3.
It comes with a proprietary 18350 cell and a magnetic charging cable.
Here is my video review of the Olight Warrior Nano:
I have not been paid for this review nor have I held back my opinions of this torch.
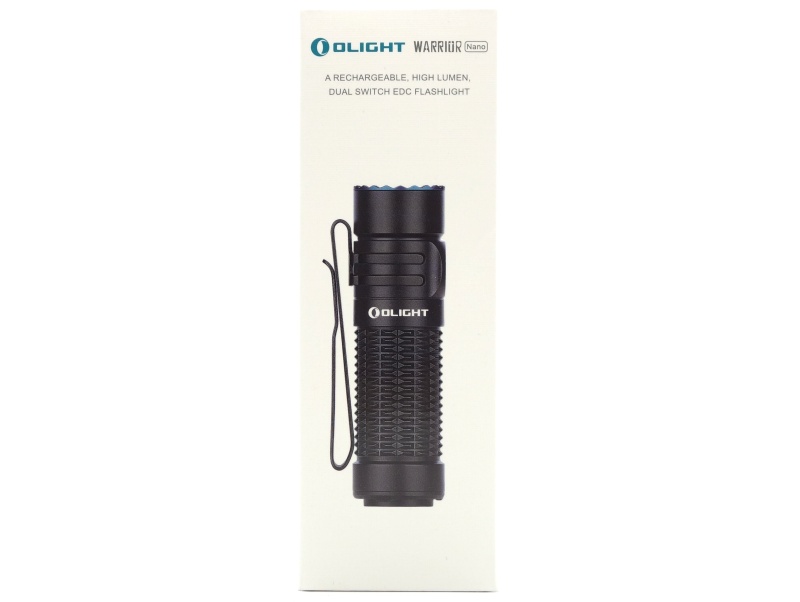
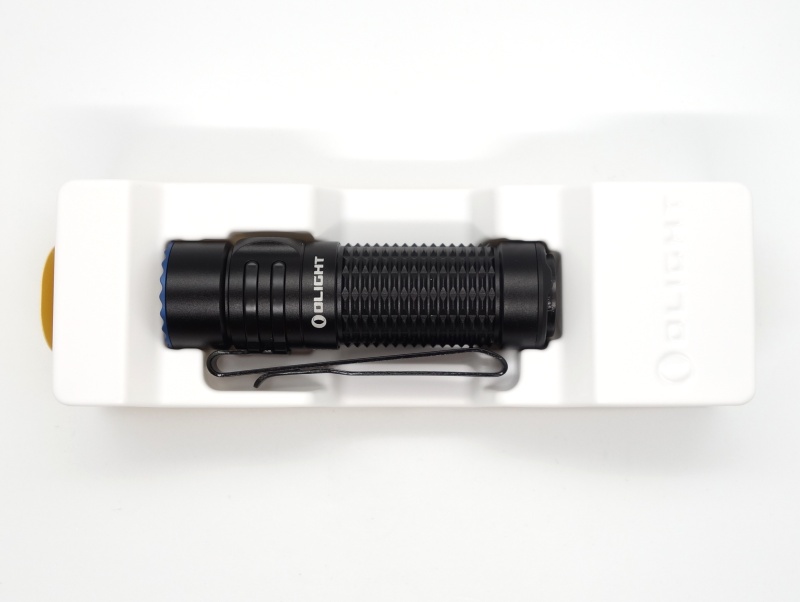
Packaging#
The Warrior Nano comes in white box with an image of the torch on the front and specifications on the back. The image feels raised and glossy.
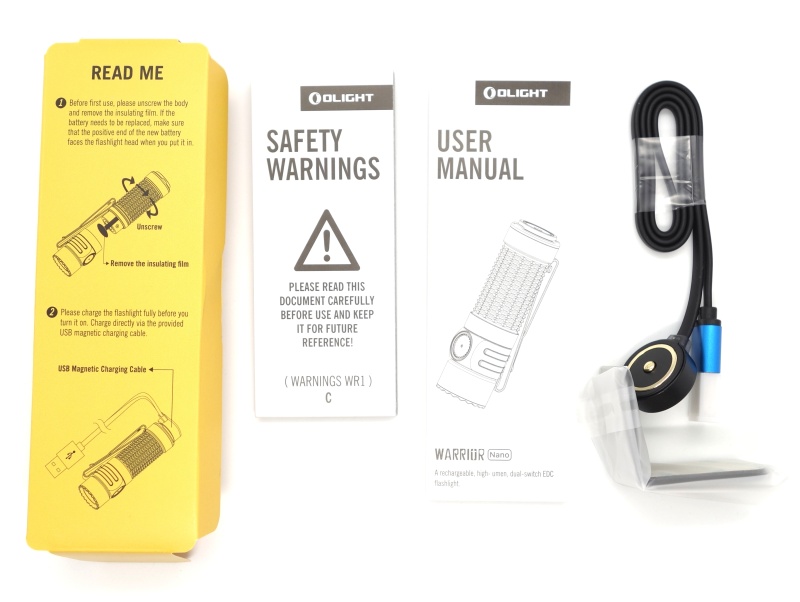
The following was included in the box:
- Olight Warrior Nano.
- Olight ORB-183C11 1100mAh battery.
- Olight MCC-1A Magnetic Charging Cable.
- L-Shape stand.
- User manual.

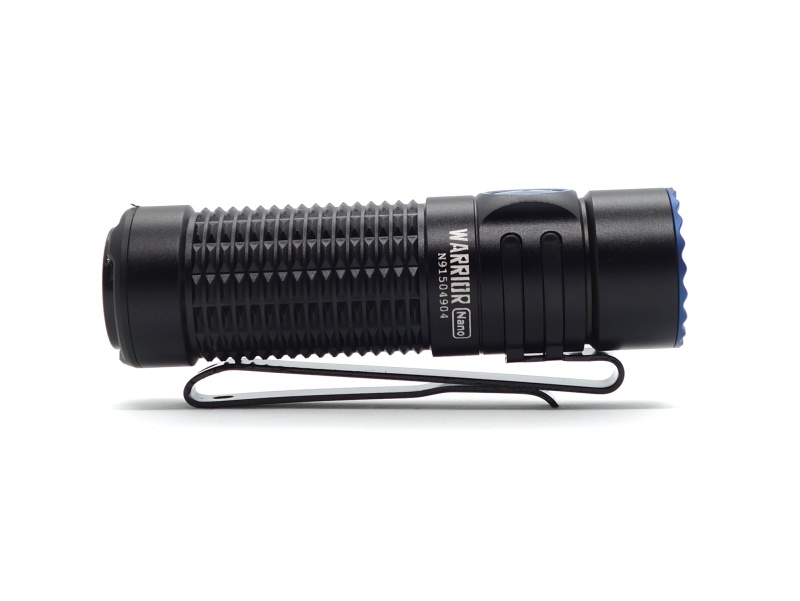
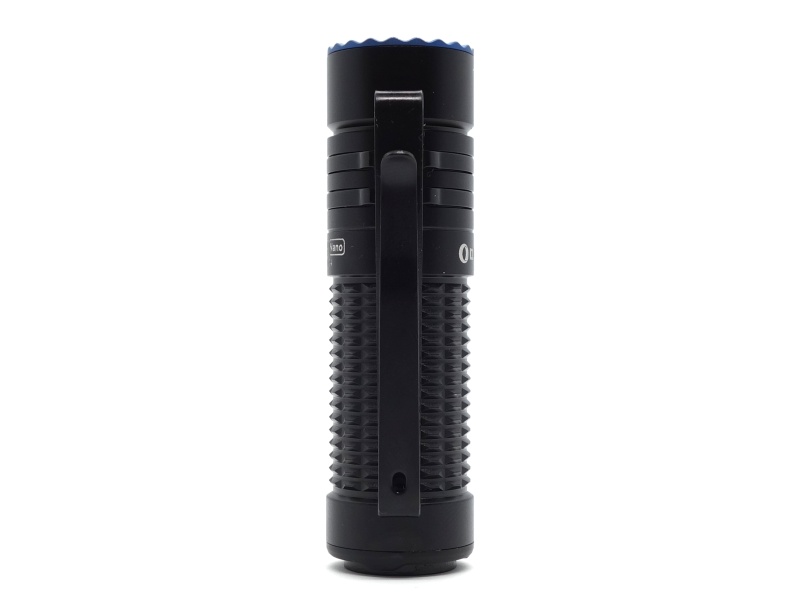
Torch in use#
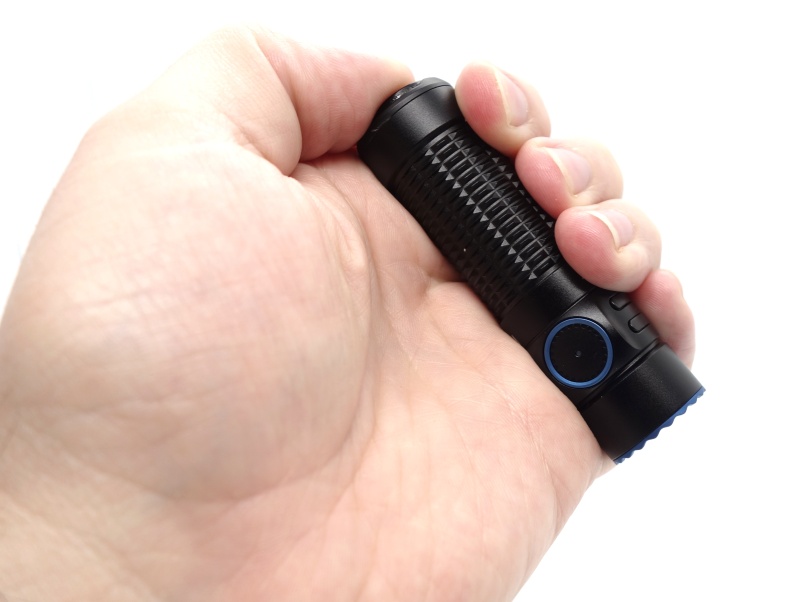
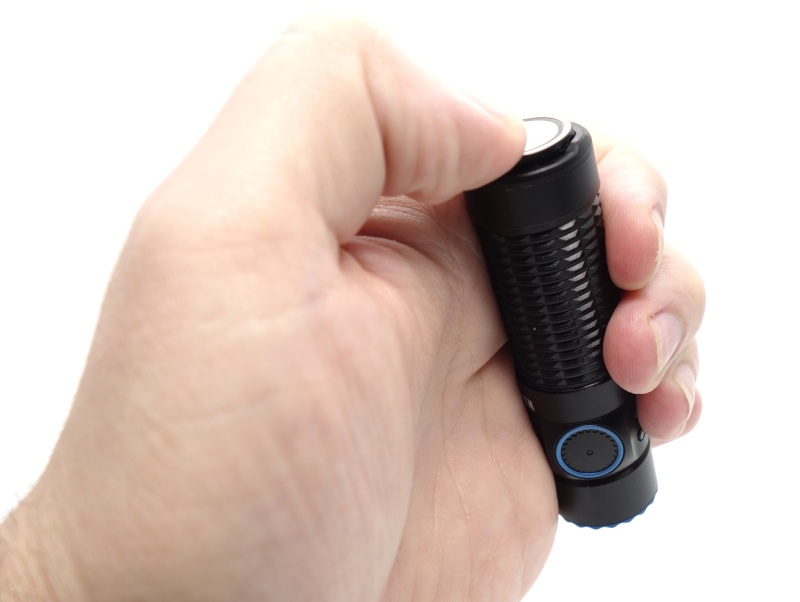
The Olight Warrior Nano feels small in my hand. It is not uncomfortably small. It is a cute size for a tactical torch.
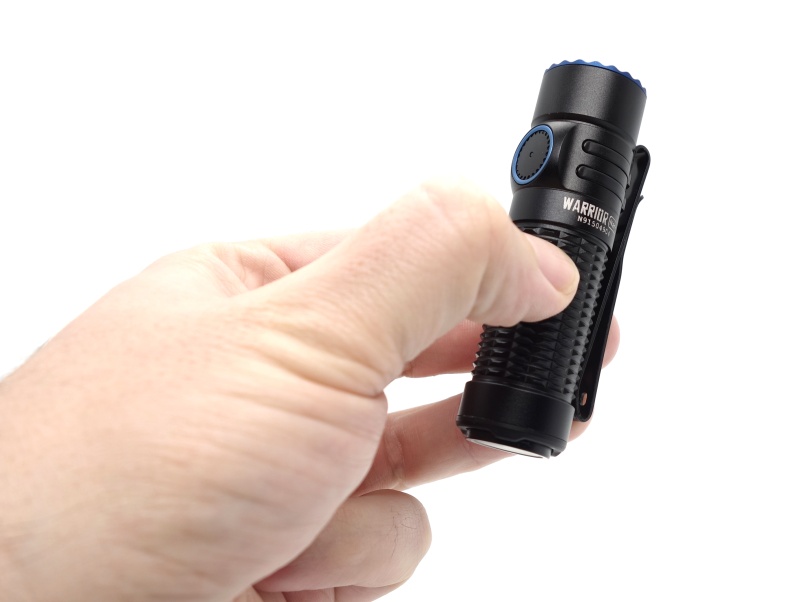
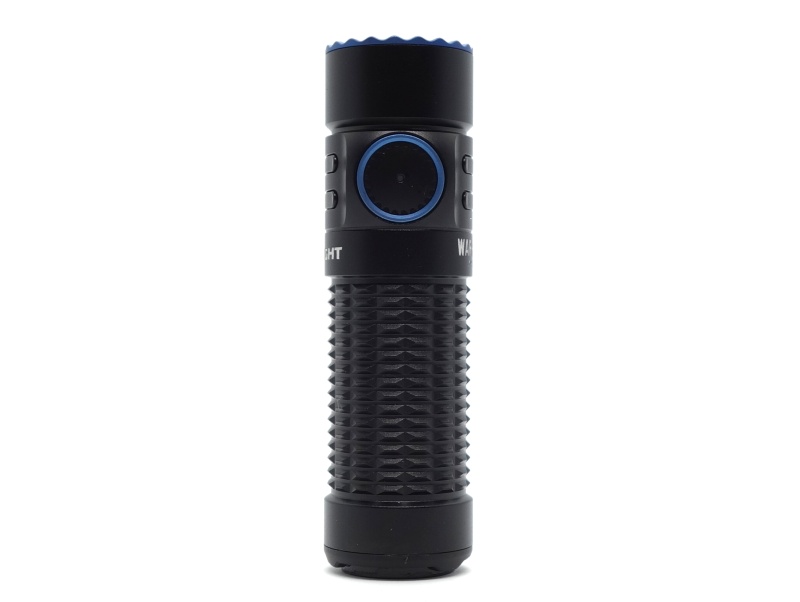
The torch may be controlled with the side switch or the magnetic tail switch.
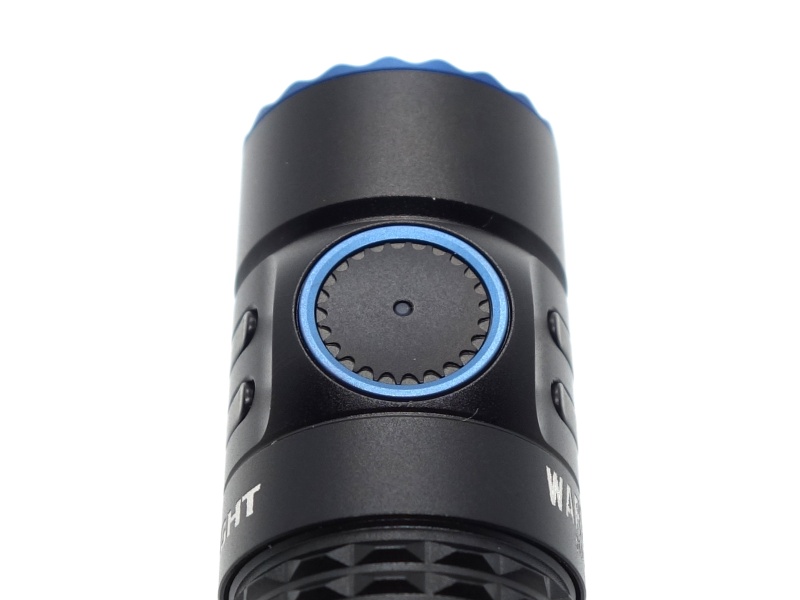
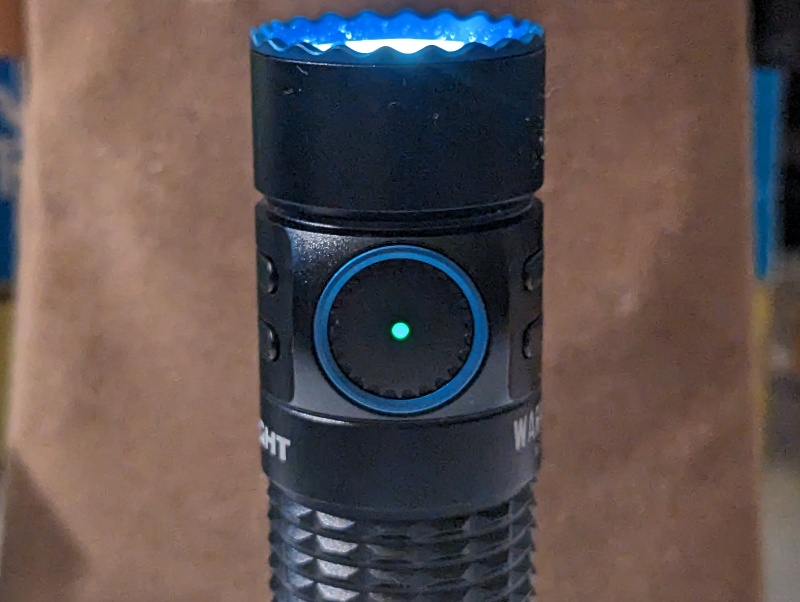
The recessed metal side switch doubles as a battery level indicator.
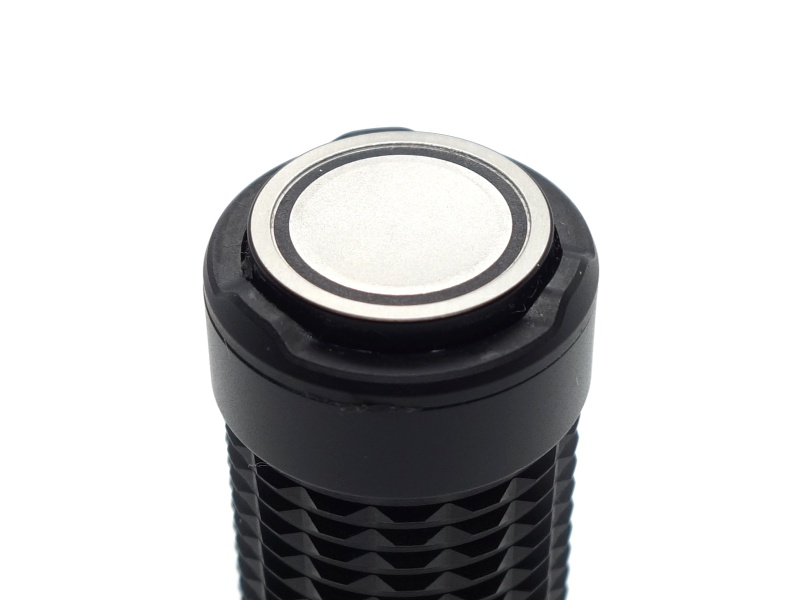
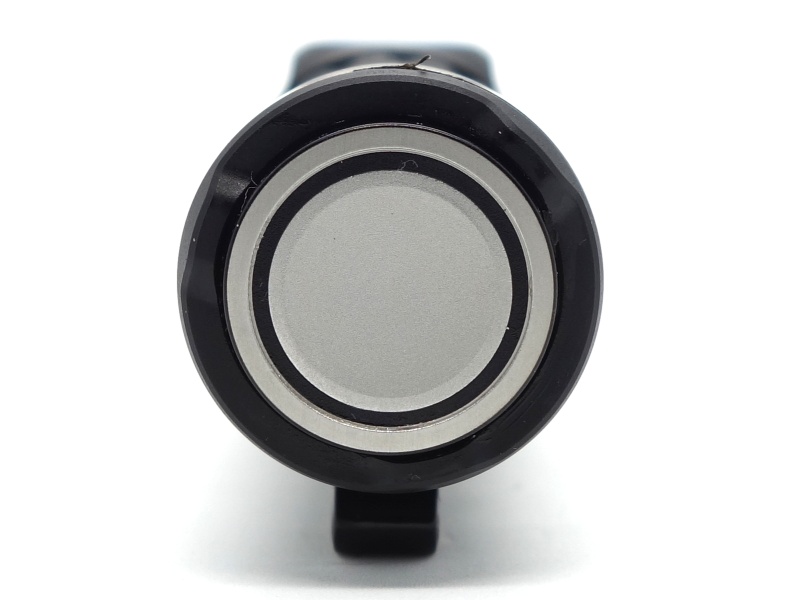
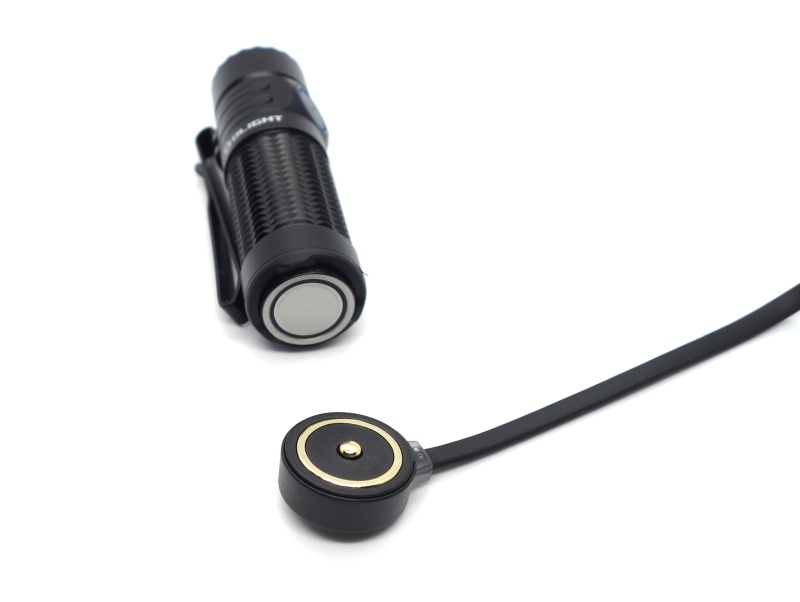
And the magnetic tail switch doubles as a point for the magnetic charging cable to connect to.
There are a lot of features packed into this small torch!
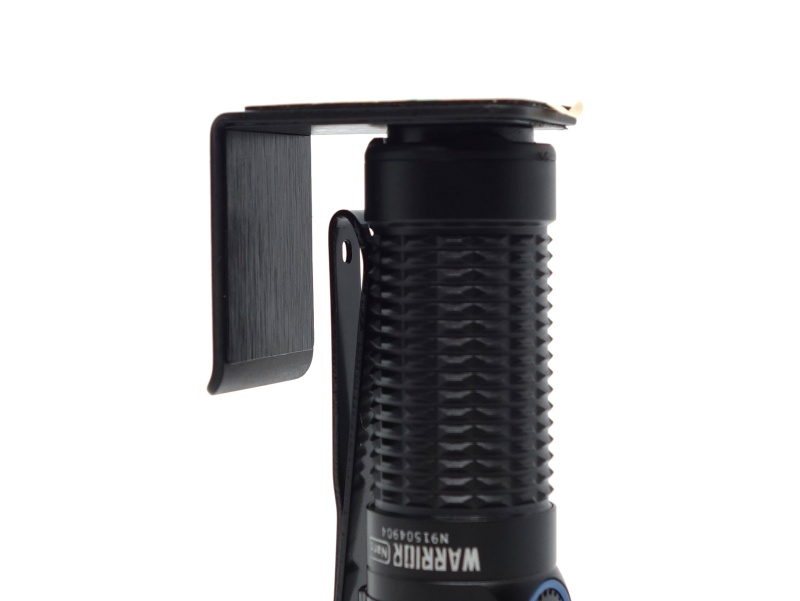
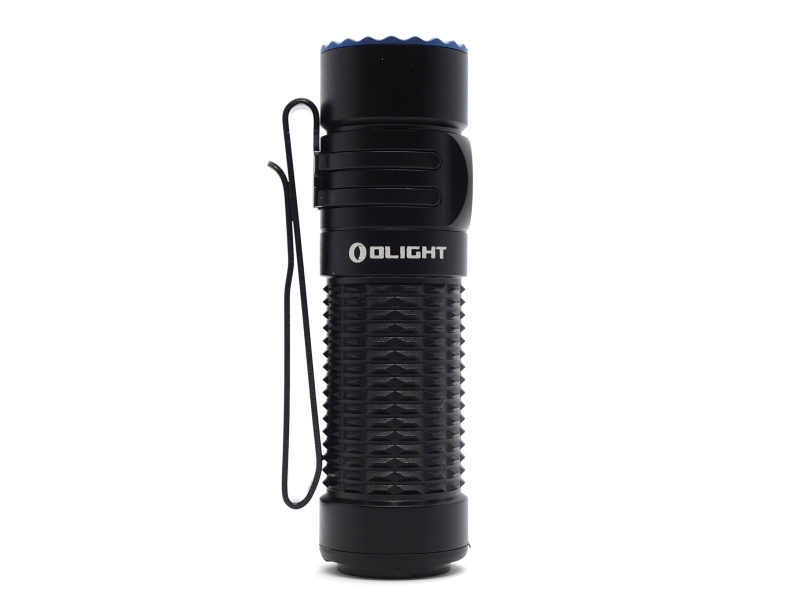
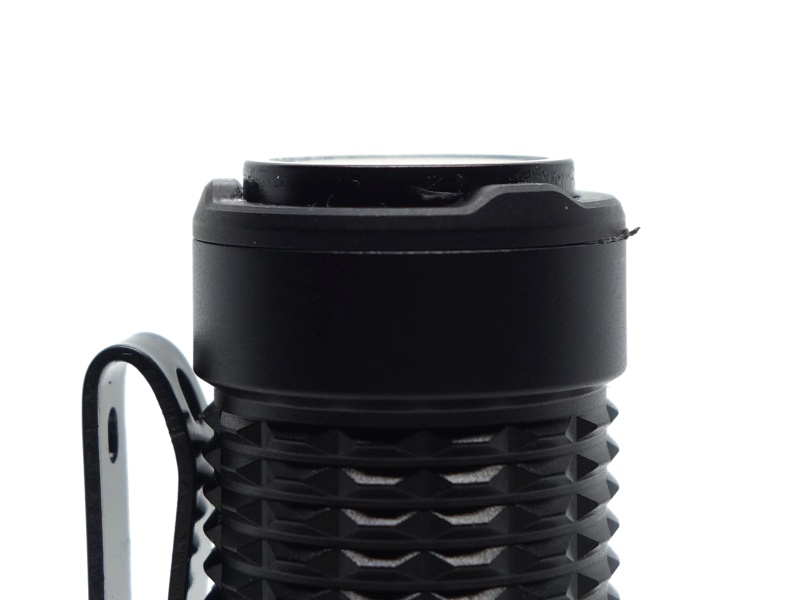
This torch is much more stable when tailstanding compared to the Warrior Mini 2. The design has been improved. There are still three notches on the tail but the button now sticks out further and provides a larger surface for tailstanding.
The tail switch can be slightly pressed while tailstanding but it bottoms out on the three notches. Those notches help prevent the torch from being turned on or off while tailstanding.
The surface of the magnetic tail switch is now easier to clean when metal shavings get stuck.
A metal l-shape stand with adhesive was included. The l-shape stand could be mounted to something to provide quick access to the torch.
The tail switch can be pressed and held to momentarily turn the torch on. Tapping the tail switch will cause the torch to turn on and remain on.
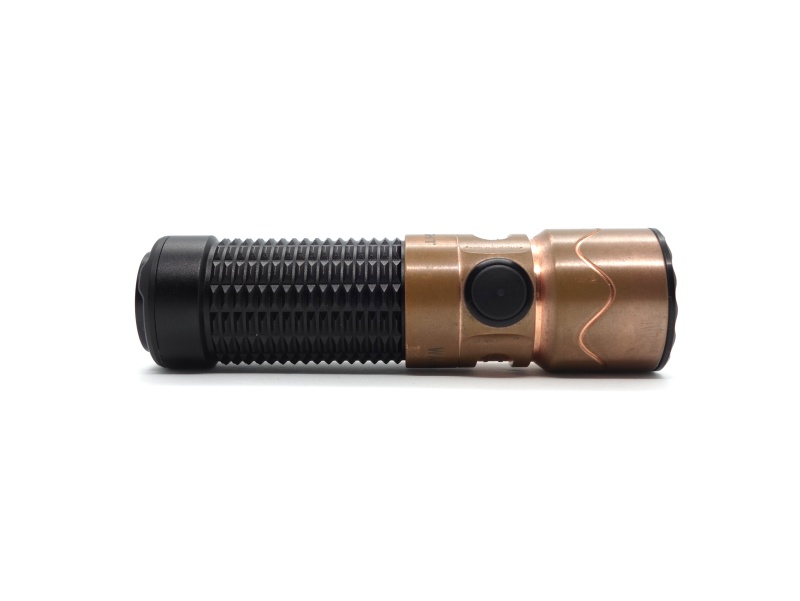
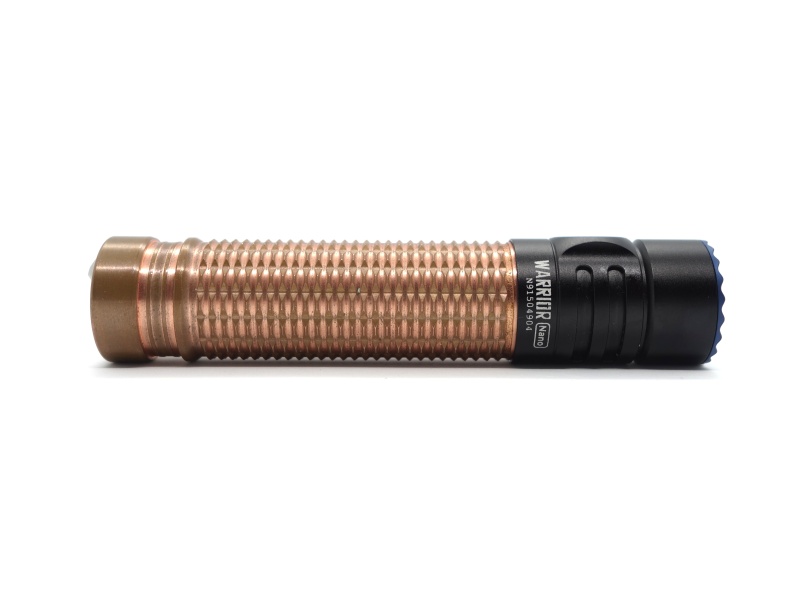
I like how the head of a Warrior Mini 2, or a Warrior Mini 3, works on the body of a Warrior Nano. The head of a Warrior Nano can also be put on the body of a Warrior Mini 2, or a Warrior Mini 3.
A lanyard was not included but a lanyard could be attached to the holes in the pocket clip.
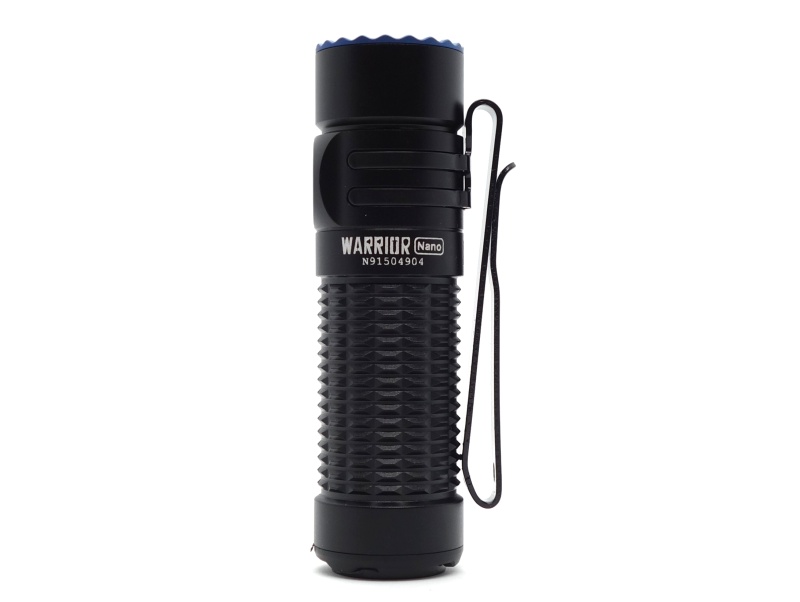
Build quality#
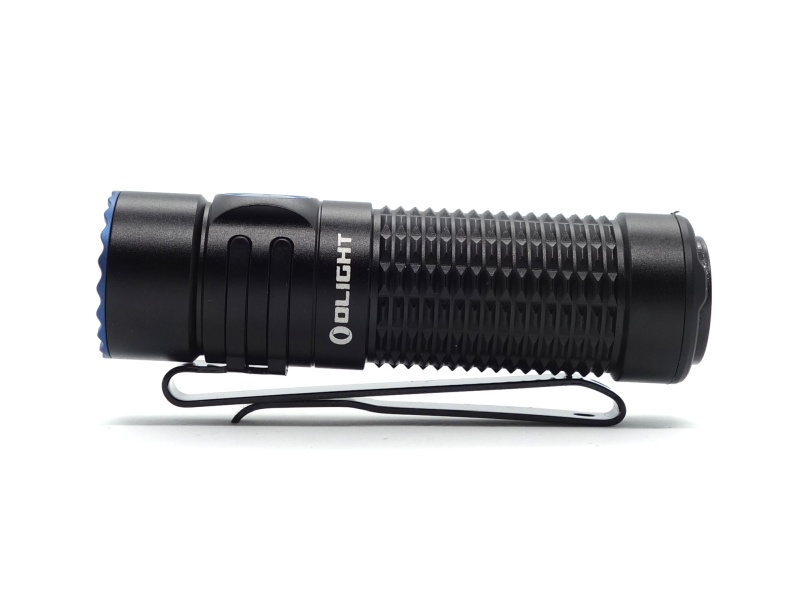
The Olight Warrior Nano is made of aluminium. It has a matte black anodised finish. There are no sharp edges.
The tube looks aggressive and feels grippy.
The tail switch is satisfying to press. I can clearly feel when I have half-pressed (press slightly) or fully-pressed (press hard) the tail switch.
I noticed some excess aluminium around the tail. I was able to scratch it off with my fingernail.
The pocket clip design has changed since the Warrior Mini 2! There are now two small parts that clasp onto the head of the torch. The head of the torch looks and feels nicer now without the pocket clip.
I found that the pocket clip does not get in the way when unscrewing the battery tube.
The threads are anodised and they came well lubricated.

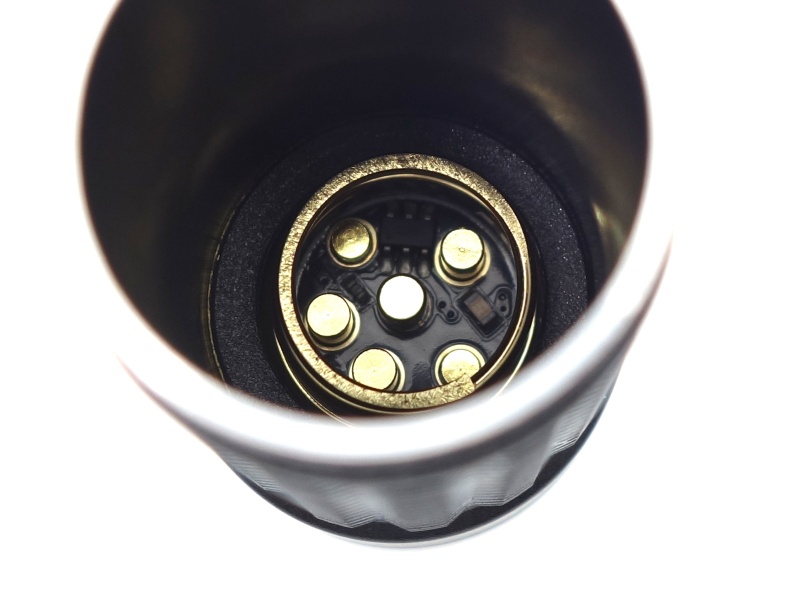
Unfortunately, unscrewing the head slightly will not disconnect the battery. The proprietary battery has both the positive and negative ends at the head making contact with the driver. The electronic lockout feature may need to be used instead.
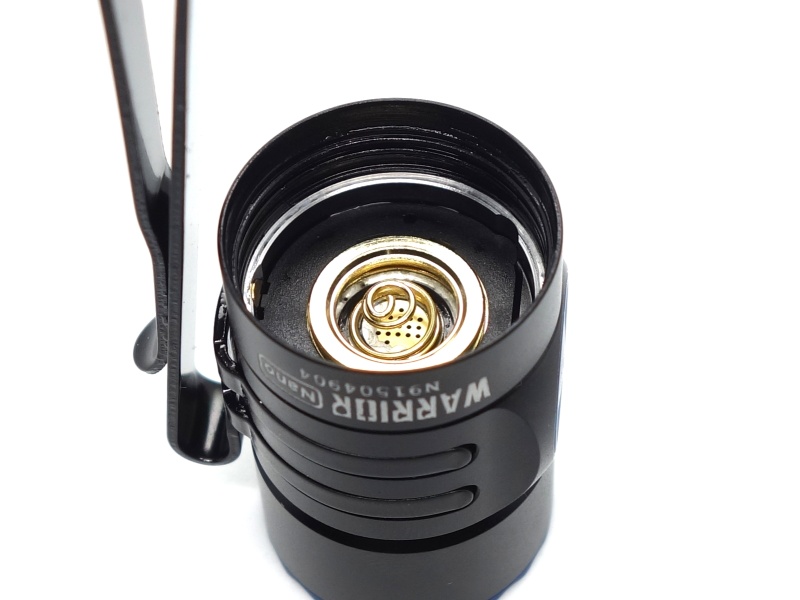
There are heaps of pogo pins in the tail!
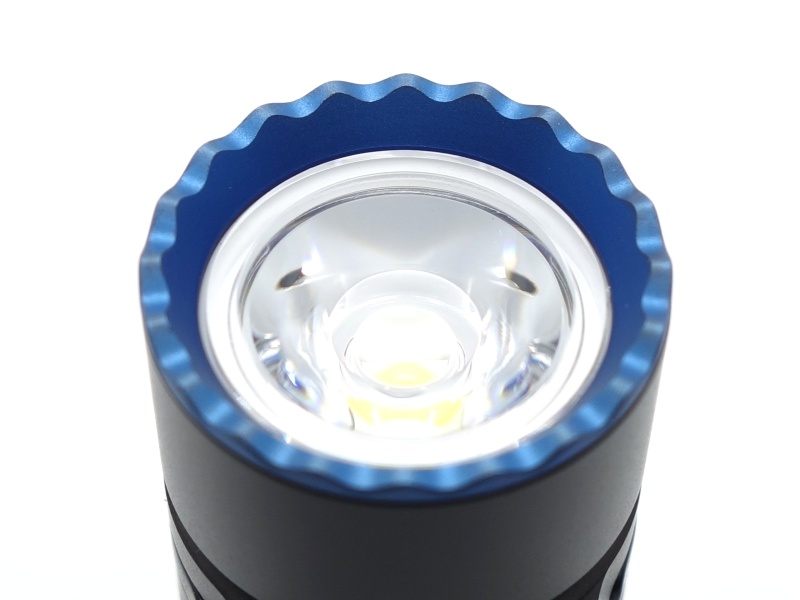
LED, bezel, lens and reflector#
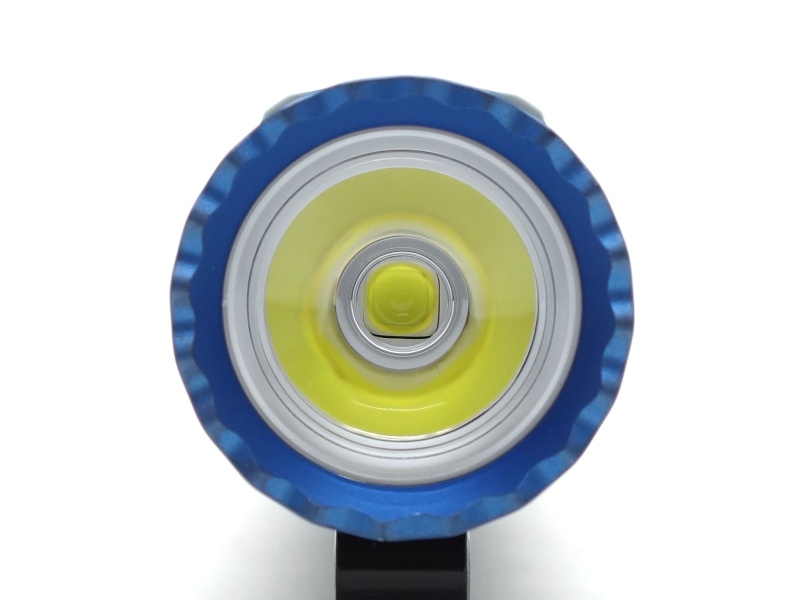
The Olight Warrior Nano has a cool white (5700-6700K) 70 CRI emitter behind a TIR optic. It looks like an Osram P9 emitter.
There is no glass lens to protect the TIR optic from being scratched.
The bezel can be unscrewed with some force and the 3737 sized emitter could be replaced. A Nichia 519A emitter might be a bit difficult to swap in due to it having a slightly smaller 3535 size. More attention to detail is required to get the 3535 emitter to connect to the 3737 pad on the MCPCB.
Cheule posted a video Warrior Nano swapped to Nichia 519A! demonstrating how to swap the emitter and showing the final results (lumen output, CCT, duv). Thanks Cheule!
Why would you re-use the MCPCB when swapping the emitter instead of getting a new MCPCB?
It’s sometimes easier to re-use the MCPCB.
Some flashlights, like the Warrior Nano, have a custom MCPCB with a particular: thickness, width and cut-outs. You can find suitable MCPCBs with the correct width but often the thickness isn’t correct and cut-outs are missing.
The thickness needs to be the same so that the TIR optic or reflector can go back in the head without rattling. If it’s too thick then the optic might crack when you screw the bezel down.
Holes may need to be drilled into the MCPCB so that the original screws (if any) can be put back in to help hold the MCPCB down, and so that wires fit. There are some cut-outs that help prevent a MCPCB from rotating in a head and keep the emitters aligned.
Each flashlight is different. It may be a lot easier to get a MCPCB with an LED pre-soldered and use that. If someone is starting out with swapping emitters, then I’d recommend trying that first and using a soldering iron to reconnect the wires.
CCT, CRI, and duv#
I have taken Correlated Colour Temperature (CCT) and Colour Rendering Index (CRI, RA of R1-R8) measurements with the torch positioned half a metre away from an Opple Light Master Pro III (G3) for each mode except Moonlight. Moonlight was measured at twenty-five centimetres.
The CCT is between 6445K and 7303K. The CRI is around 72.
The Delta u, v is slightly positive (green) on lower modes and close to pure white on High, Half-Turbo and Turbo.
The beam produced has a small white hot spot with a green corona and a purple spill.
| Mode | CCT (K) | CRI (Ra) | x | y | Duv |
|---|---|---|---|---|---|
| Moonlight | 6445 | 69.3 | 0.3136 | 0.3304 | 0.0035 |
| Low | 6787 | 72.2 | 0.3088 | 0.3217 | 0.0014 |
| Medium | 6857 | 72.4 | 0.3079 | 0.3204 | 0.0012 |
| High | 7012 | 72.7 | 0.3059 | 0.3175 | 0.0008 |
| Half-Turbo | 7070 | 73.0 | 0.3053 | 0.3159 | 0.0003 |
| Turbo | 7303 | 74.1 | 0.3027 | 0.3117 | -0.0006 |
Calculate Duv from CIE 1931 xy coordinates
Dimensions and size comparison#
Dimensions#
I took the following measurements using a digital caliper.
| Measurement | Unit (mm) |
|---|---|
| Length | 80.95 |
| Head diameter | 23.0 |
| Tube diameter | 22.27 |
| Tail diameter | 23.3 |
| Side switch diameter | 10.9 |
| Battery diameter | 18.29 |
| Battery length | 39.58 |
Weight#
I took the following measurements using a digital scale.
| Weight | Unit (g) |
|---|---|
| Torch | 51.78 |
| Battery | 26.63 |
| Pocket clip | 7.95 |
| Torch with battery and pocket clip | 86.36 |
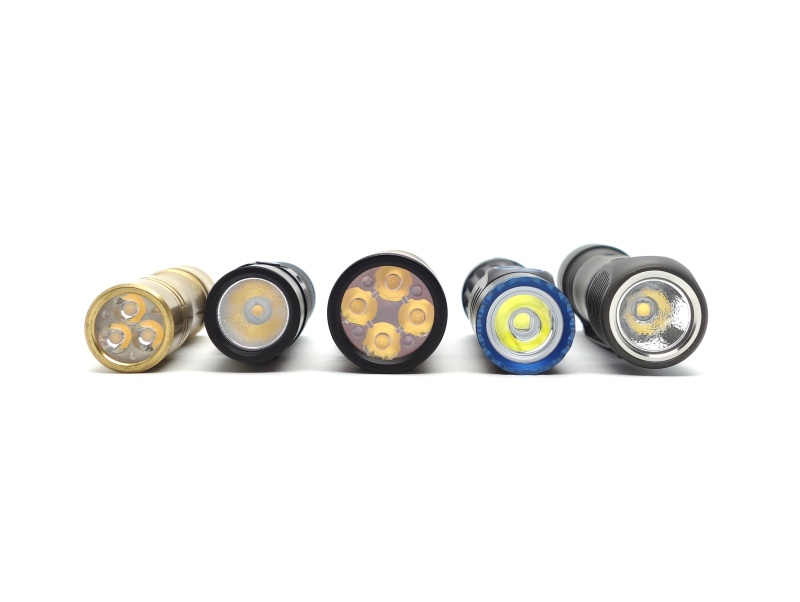
Size comparison with its competition#
From left to right: Wurkkos TS10 (14500), Sofirn SC21 (16340), Manker E14 III (18350), Olight Warrior Nano (18350), ZebraLight SC64c LE (18650)
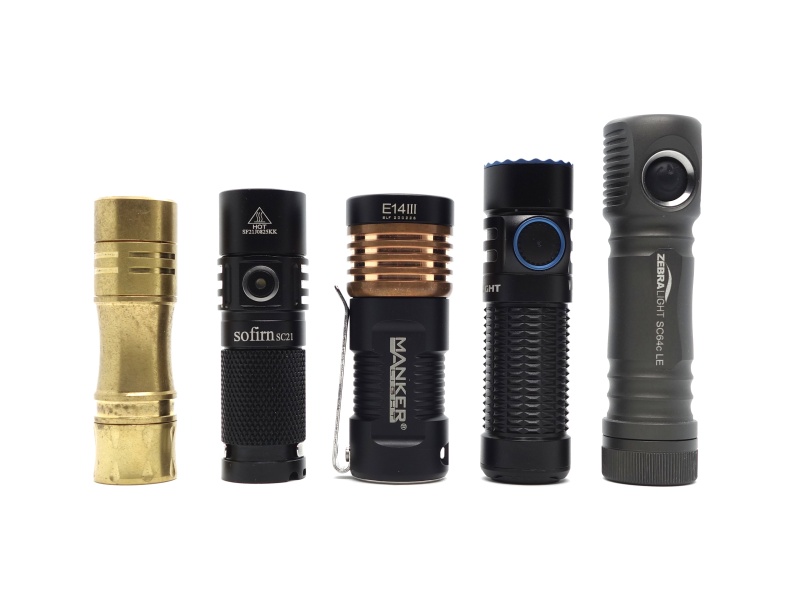
From left to right: Wurkkos TS10 (14500), Sofirn SC21 (16340), Manker E14 III (18350), Olight Warrior Nano (18350), ZebraLight SC64c LE (18650)
User interface#
The torch is controlled by a side switch and a tail switch.
There are three modes in the main group:
- Low
- Medium
- High
There are shortcuts to Moonlight, Half-Turbo, Turbo and Strobe.
There is one blinky mode: Strobe.
Configuration 1 - Factory mode:
| State | Action | Result |
|---|---|---|
| Any | Press and hold the side switch for 1 to 2 seconds | Moonlight |
| Off | Click the side switch | On (mode memory) |
| On | Press and hold the side switch | Cycle (Low, Medium, High) |
| On | Click the side switch | Off |
| Any | Double click the side switch | Turbo |
| Any | Triple click the side switch | Strobe |
| Turbo | Double click the side switch | Last memorised mode |
| Off | Press the tail switch slightly | Medium (Configuration 1 only) |
| Off | Press the tail switch slightly and hold | Momentary Medium |
| Off | Press the tail switch hard | Half-Turbo (Configuration 1 only) |
| Off | Press the tail switch hard and hold | Momentary Half-Turbo (Configuration 1) |
| Off | Press and hold the side switch for > 2 seconds | Lockout |
| Lockout | Click the side switch or press the tail switch | Battery level indicator turns red |
| Lockout | Press and hold the side switch for > 1 second | Unlock |
Configuration 2 - Strobe mode:
| State | Action | Result |
|---|---|---|
| Any | Press and hold the side switch for 1 to 2 seconds | Moonlight |
| Off | Click the side switch | On (mode memory) |
| On | Press and hold the side switch | Cycle (Low, Medium, High) |
| On | Click the side switch | Off |
| Any | Double click the side switch | Turbo |
| Any | Triple click the side switch | Strobe |
| Turbo | Double click the side switch | Last memorised mode |
| Off | Press the tail switch slightly | Momentary Medium |
| Off | Press the tail switch slightly and hold | Momentary Medium |
| Off | Press the tail switch hard | Momentary Strobe |
| Off | Press the tail switch hard and hold | Momentary Strobe (Configuration 2) |
| Off | Press and hold the side switch for > 2 seconds | Lockout |
| Lockout | Click the side switch or press the tail switch | Battery level indicator turns red |
| Lockout | Press and hold the side switch for > 1 second | Unlock |
The user manual does not go into a lot of detail to describe what happens when the tail switch is pressed while the torch is on.
Here are my observations when pressing the tail switch while the torch is on:
| State | Action | Result |
|---|---|---|
| Off, Moonlight, Low, Strobe | Press the tail switch slightly | Medium (Configuration 1 only) |
| Medium, High, Half-Turbo, Turbo | Press the tail switch slightly | Off |
| Off, Moonlight, Low, Strobe | Press the tail switch slightly and hold | Momentary Medium then off |
| Medium, High, Half-Turbo, Turbo | Press the tail switch slightly and hold | Momentary then off |
| Off, Moonlight, Low, Medium, Half-Turbo, Strobe | Press the tail switch hard | Half-Turbo (Configuration 1 only) |
| High, Half-Turbo | Press the tail switch hard | Off |
| Off, Moonlight, Low, Medium | Press the tail switch hard and hold | Momentary Half-Turbo (Configuration 1) then off |
| Any | Press the tail switch hard and hold | Momentary Strobe (Configuration 2) then off |
Please see the user manual for a simple diagram.
Mode memory#
Mode memory includes Moonlight, Low, Medium and High.
Switch between configurations#
There are two configurations for the tail switch.
Configuration 1 - Factory mode:
- Slightly press the tail switch for Medium.
- Slightly press and hold the tail switch for momentary Medium.
- Hard press the tail switch for Half-Turbo.
- Hard press and hold the tail switch for momentary Half-Turbo.
Configuration 2 - Strobe mode:
- Slightly press the tail switch and release. Medium will blink once.
- Slightly press and hold the tail switch for momentary Medium.
- Hard press the tail switch and release. Strobe will blink once.
- Hard press and hold the tail switch for momentary Strobe.
- The torch does not turn on and stay on when the tail switch is slightly or hard pressed and released.
The actions required to change between configurations are:
- Press and hold the tail switch hard.
- Click the side switch.
The light will either be in Half-Turbo or Strobe while pressing and holding the tail switch hard. When the side switch is also clicked, the torch will change configurations and either Half-Turbo or Strobe will be activated. Half-Turbo indicates that Configuration 1 has been selected while Strobe indicates that Configuration 2 has been selected.
Switch between pressing hard to access Half-Turbo and press hard to access Turbo#
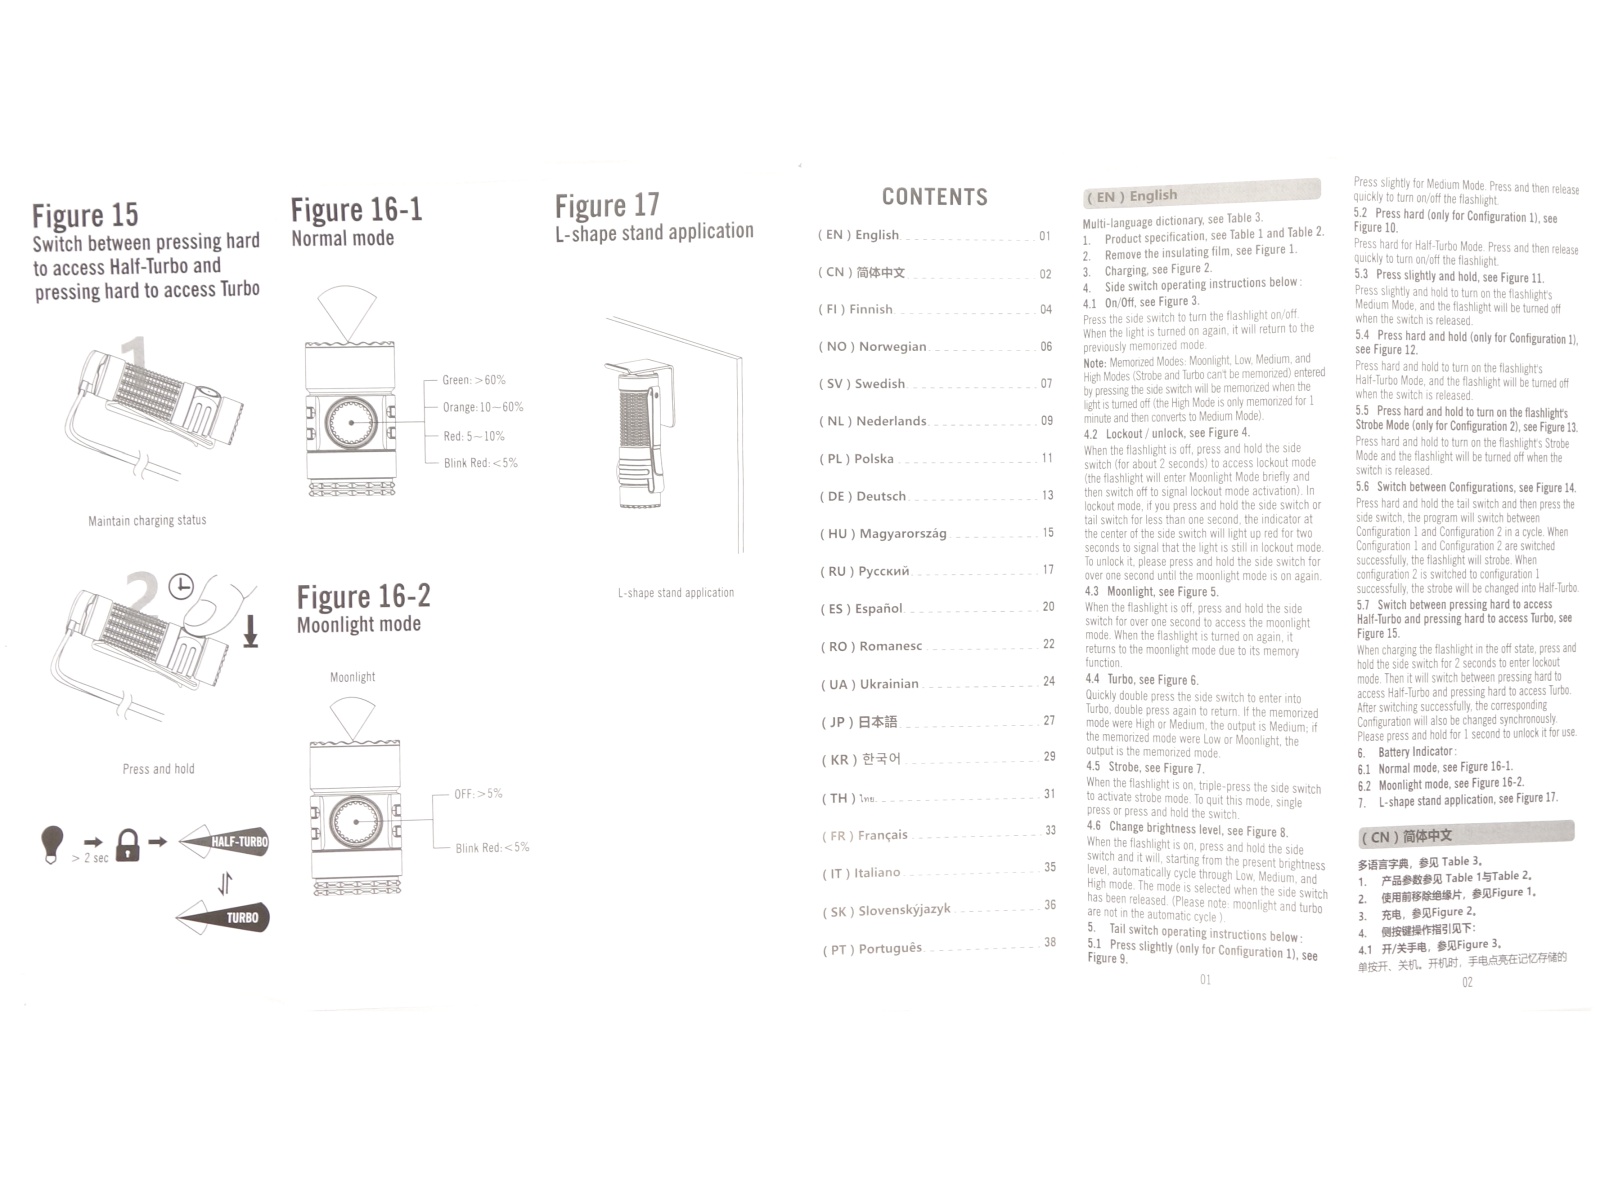
From the user manual:
“When charging the flashlight in the off state, press and hold the side switch for 2 seconds to enter lockout mode. Then it will switch between pressing hard to access Half-Turbo and pressing hard to access Turbo. After switching successfully, the corresponding Configuration will also be changed synchronously. Please press and hold for 1 second to unlock it for use.”
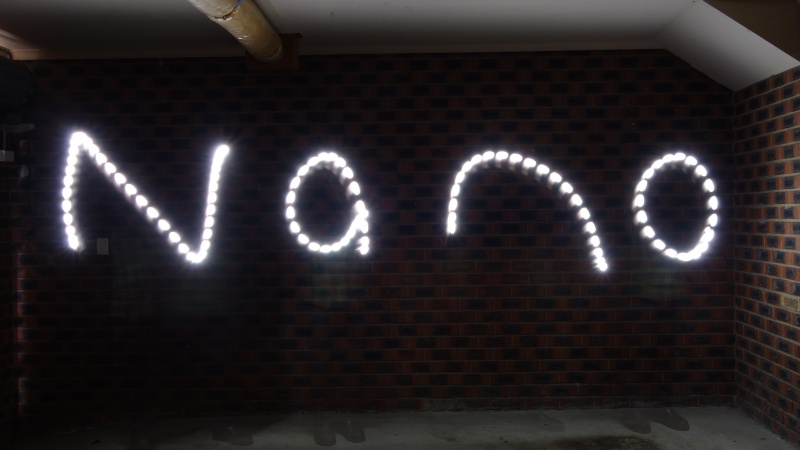
Strobe#
Strobe has a 13 Hz frequency at 1,200 lumens.
This torch might be suitable for light painting. Check out Stephen Knight’s “Best Flashlights for Light Painting Photography 2023”.
Here is my first attempt at light painting with the Warrior Nano in my garage:
Battery level indicator#
There is a battery level indicator in the side switch. It may display a colour when the torch is turned on.
Normal mode:
| Colour | Battery level |
|---|---|
| Green | > 60% |
| Orange | 10 - 60% |
| Red | 5 - 10% |
| Blink Red | < 5% |
Moonlight mode:
| Colour | Battery level |
|---|---|
| Off | > 5% |
| Blink Red | < 5% |
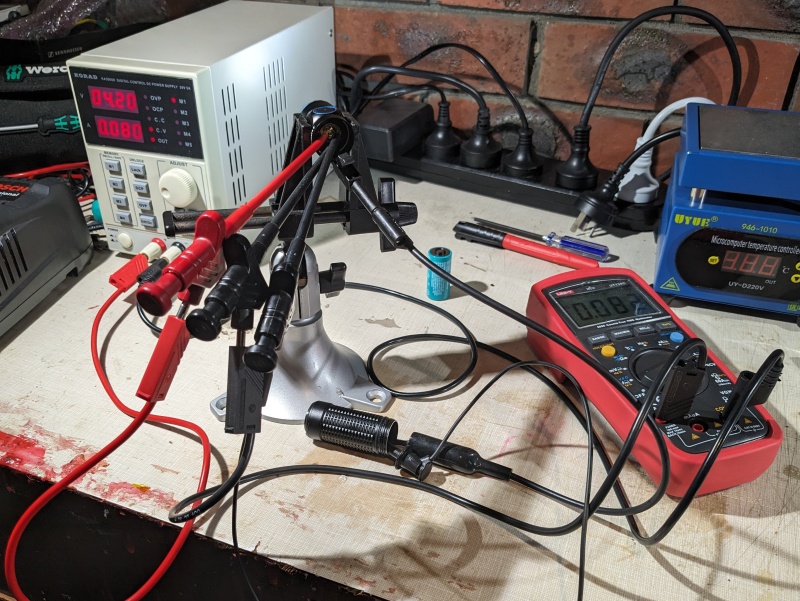
Low voltage protection#
There is low voltage protection. I tested low voltage protection by connecting the driver of the torch to a bench power supply and then by lowering the voltage from 4.2V.
| Mode | LVP? | Cut-off voltage | Current |
|---|---|---|---|
| Moonlight | Yes | 2.63V | 0.00 A |
| Low | Yes | 2.64V | 0.00 A |
| Medium | Yes | 2.64V | 0.00 A |
| High | Yes | 2.64V | 0.00 A |
| Half-Turbo | Yes | 2.64V | 0.00 A |
| Turbo | Yes | 2.64V | 0.00 A |
The emitter turned off at 2.63V to 2.64V and the current cut out.
PWM#
I did not notice any visible PWM (flickering).
What I like about the UI#
- The UI is simple to use if you stick to the user manual. It gets complicated when using the tail switch while the torch is already on.
- Shortcut to Moonlight from off.
- Shortcut to Half-Turbo from off.
- Shortcut to Turbo from off.
- Shortcut to Strobe from off.
What could be improved#
It is a bit confusing when I try to use the tail switch while the torch is already on. It would be nice if slightly pressing, slightly pressing and holding, hard pressing, or hard pressing and holding the tail switch when the torch is already on resulted in the torch going into the relevant mode or momentarily entering the relevant mode and then switching back to the previous mode when released.
For example:
The torch is on Medium. The tail switch is pressed hard and held to momentarily activate Half-Turbo. When the tail switch is released, I expect it to go back to Medium but the torch turns off.
There appears to be a bug. The torch will enter Half-Turbo from Moonlight, Low or Medium but it turns off when pressing the tail switch hard from High. I expected the torch to go to Half-Turbo from High when in Configuration 1.
To be fair, the user interface for the Warrior Mini 2 behaves in a similar manner.
Double clicking the side switch while on Turbo goes to Medium instead of High when the last memorised mode was High. It should go to High for consistency.
Pressing and holding the side switch for 1 second makes it easy to accidentally unlock the torch. It would be better if a commonly used “4 clicks to unlock” shortcut is used.
I am not a big fan of using the magnetic charging cable to configure the torch to switch between Half-Turbo and Turbo. I would prefer it if I can configure the torch without using the magnetic charging cable.
Batteries and charging#
Battery#
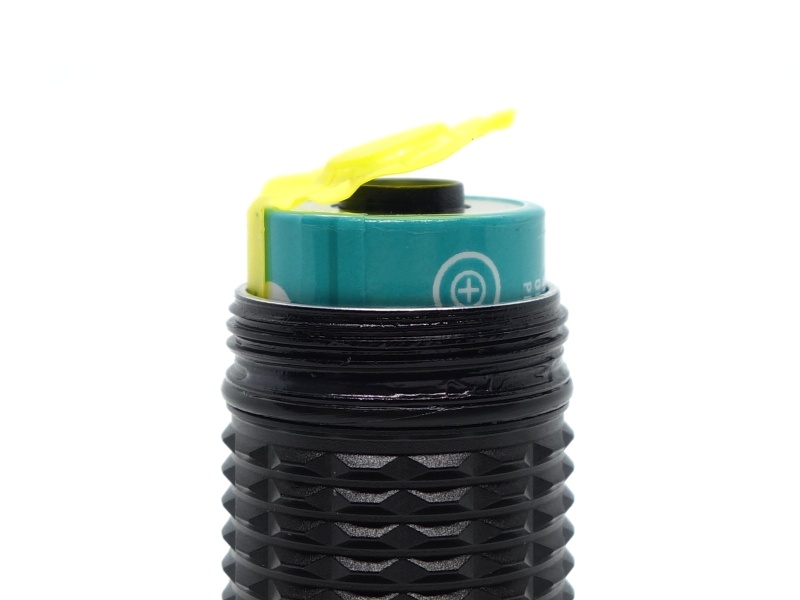
The Olight Warrior Nano came with a proprietary Olight 18350 cell installed. A yellow piece of insulating film was included in the battery tube to help prevent the torch from turning on while in the packaging. It arrived with a voltage of 3.62V.
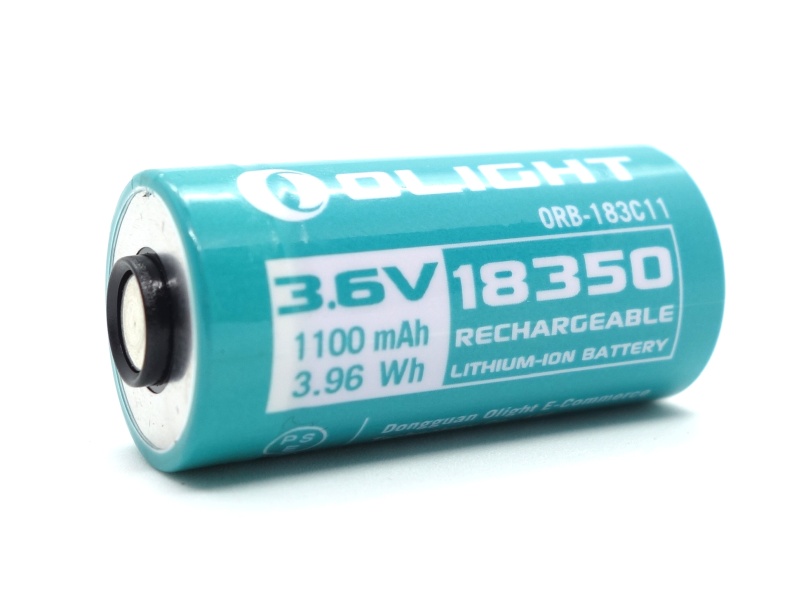
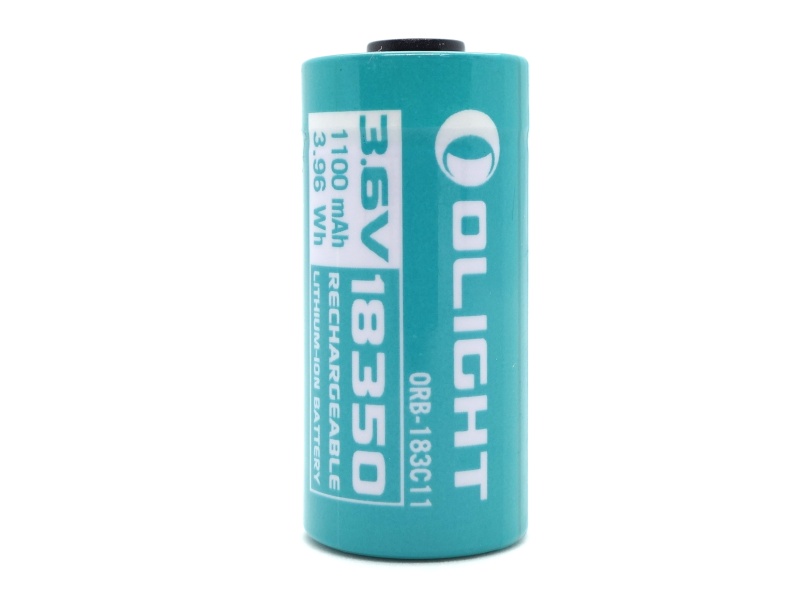
I measured a capacity of 1111mAh by discharging the cell at a rate of 0.5A using a Vapcell S4+.
Here is video of a larger Olight 21700 battery being assembled from when I visited the Olight factory.
I tried the following cells:
| Cell | Top | Compatible? |
|---|---|---|
| Olight ORB-183C11 1100mAh 3.6V | Button | Yes |
| KeepPower IMR18350 Li-ion 1200mAh 3.7V | Button | No |
| Skilhunt BL-111 18350 Li-ion 1100mAh 3.6V | Button | No |
| Manker 18350 Li-ion 1100mAh 3.7V USB-C | Button | No |
| Vapcell F14 18350 Li-ion 1400mAh 3.7V | Flat | No |
Charging#
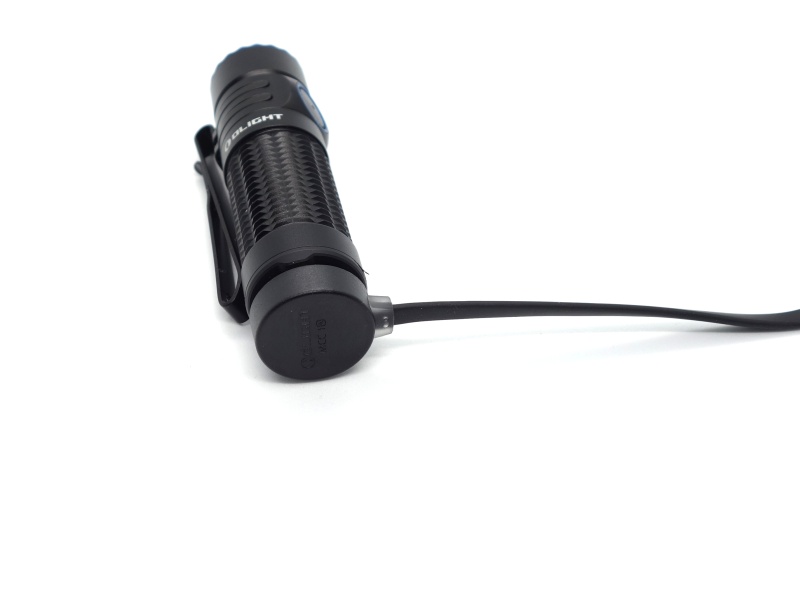
The 18350 cell can be charged inside the torch by connecting a magnetic charging cable to the tail.
The magnetic charging cable has an input of 5V 1A and an output of 4.2V 1A.
Power supply: PinePower Desktop USB-A
USB Meter: AVHzY CT-3 (recommended by LiquidRetro)
Room temperature: 16 C
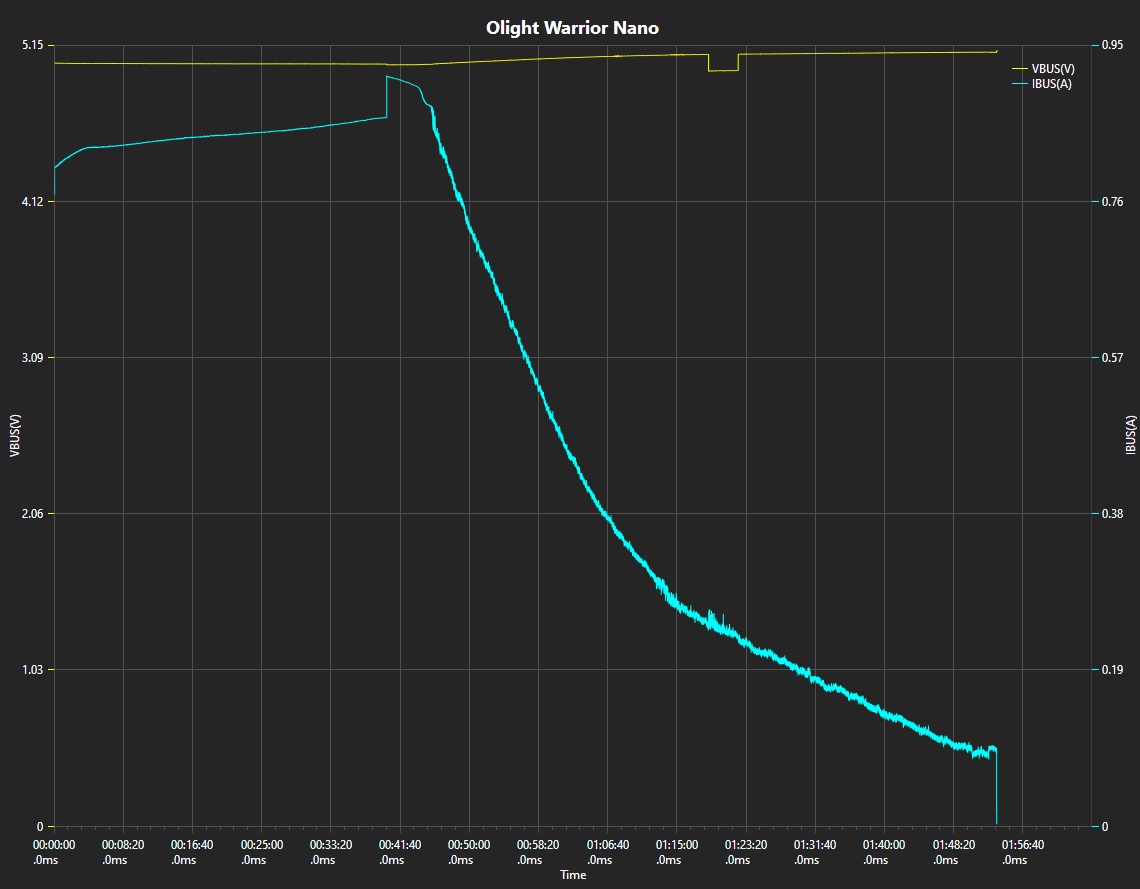
I charged the cell inside the torch with the magnetic charging cable from 2.98V to 4.16. Charging completed after 1 hours 53 minutes. The charging rate was approximately 5V 0.8A. The magnetic charging cable light changed from red to green when charging finished.
Power supply compatibility#
I tried the following power supplies with the USB-A magnetic charging cable:
| Power supply | USB Type | Protocol | Does it charge? |
|---|---|---|---|
| PinePower Desktop | USB-A | QC | Yes |
| PinePower Desktop | USB-A | Yes |
Performance#
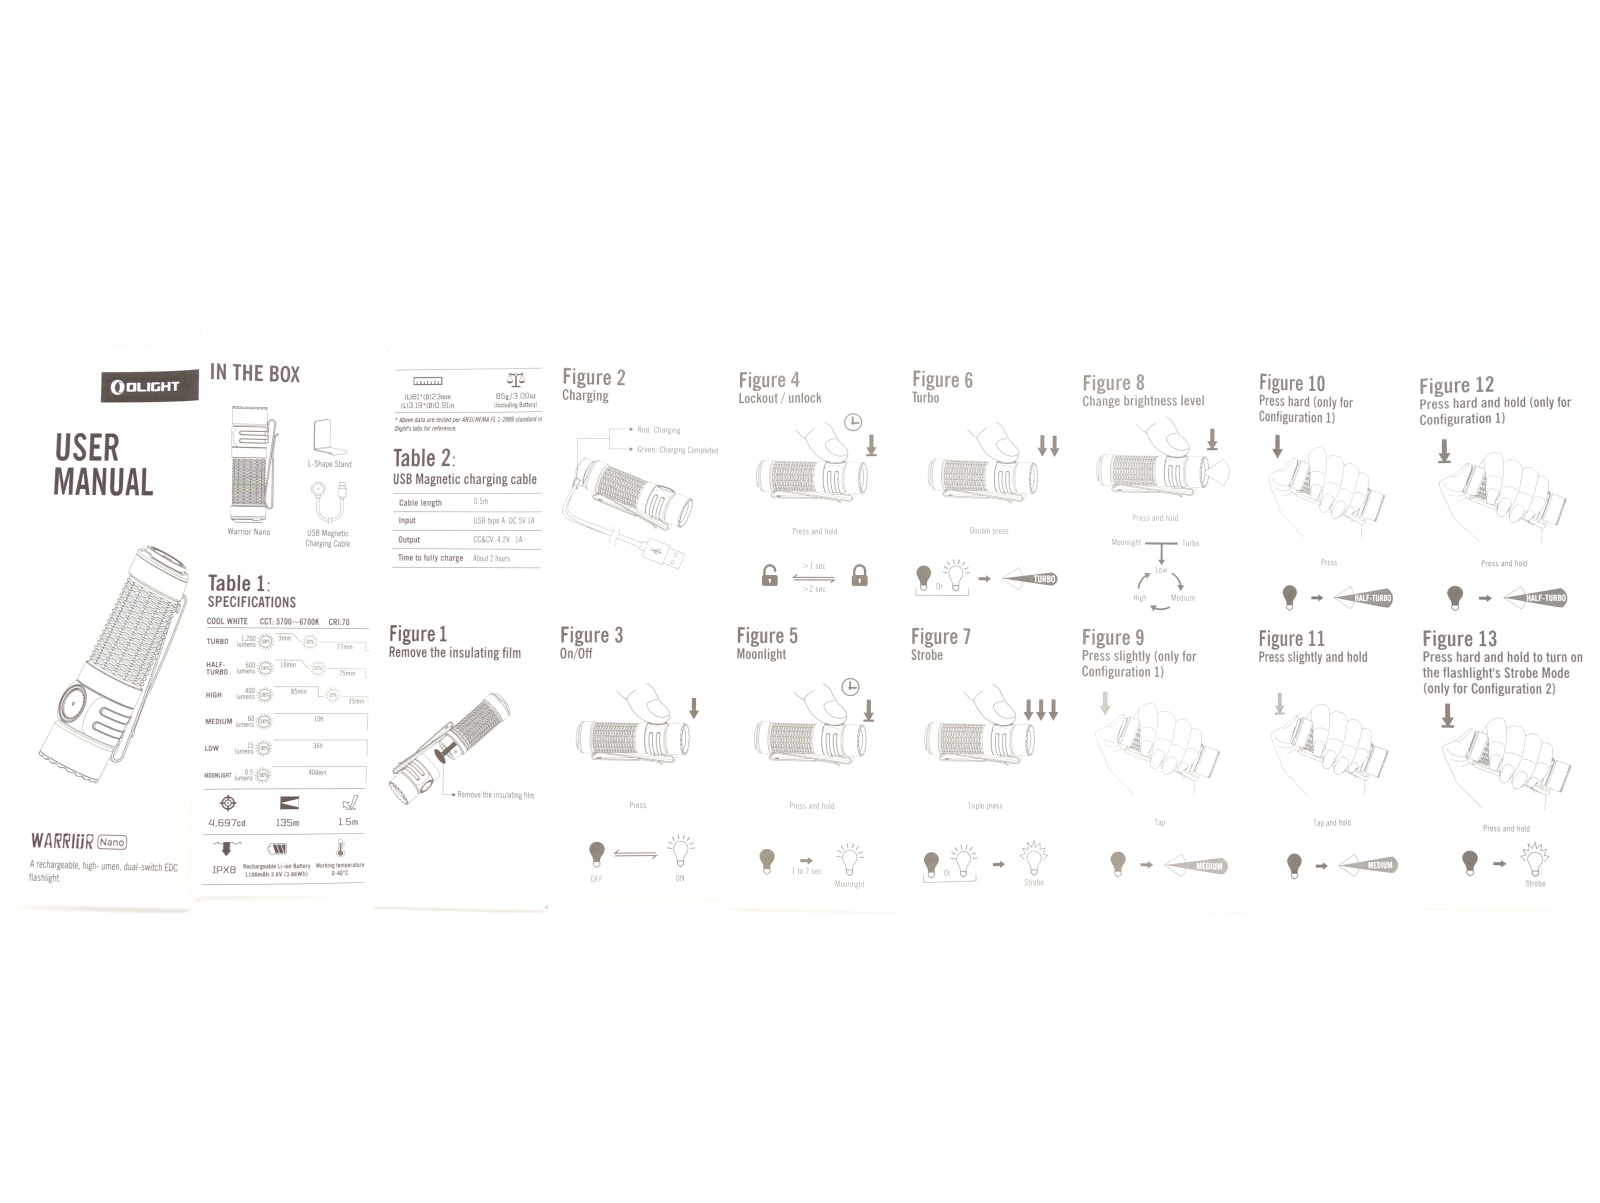
Specifications from the manual:
| Lumen | Runtime | Throw | Candela | |
|---|---|---|---|---|
| Turbo | 1,200 + 400lm | 3 + 77min | 135m | 4,697cd |
| Half-Turbo | 600 + 400lm | 10 + 75min | 96m | 2,304cd |
| High | 400 + 60lm | 85 + 35min | 80m | 1,577cd |
| Medium | 60lm | 10h | 32m | 262cd |
| Low | 15lm | 36h | 16m | 65cd |
| Moonlight | 0.5lm | 40days |
The user manual has a bit of a runtime graph with the estimated output over time.
Lumen measurements#
I used a bench power supply to measure the current at turn on.
| Mode | Amps at start | Specs | Lumens @turn on | Lumens @30 sec | Lumens @10 min |
|---|---|---|---|---|---|
| Moonlight | 1.6 mA | 0.5 | |||
| Low | 0.02 A | 15 | 14 | 14 | 14 |
| Medium | 0.08 A | 60 | 55 | 53 | 53 |
| High | 0.62 A | 400 + 60 | 366 | 357 | 351 |
| Half-Turbo | 1.03 A | 600 + 420 | 552 | 539 | 525 |
| Turbo | 3.04 A | 1,200 + 400 | 1,182 | 1,055 | 348 |
Moonlight was too low for my DIY lumen tube to detect.
Standby drain#
73.0 µA
Runtime graphs#
I used my own DIY lumen tube with a TSL2591 sensor and forked bmengineer’s project RuTiTe to record runtimes.
Note: Lumen measurements may be off by 10% with my DIY lumen tube.
The room temperature was approximately 16 C.
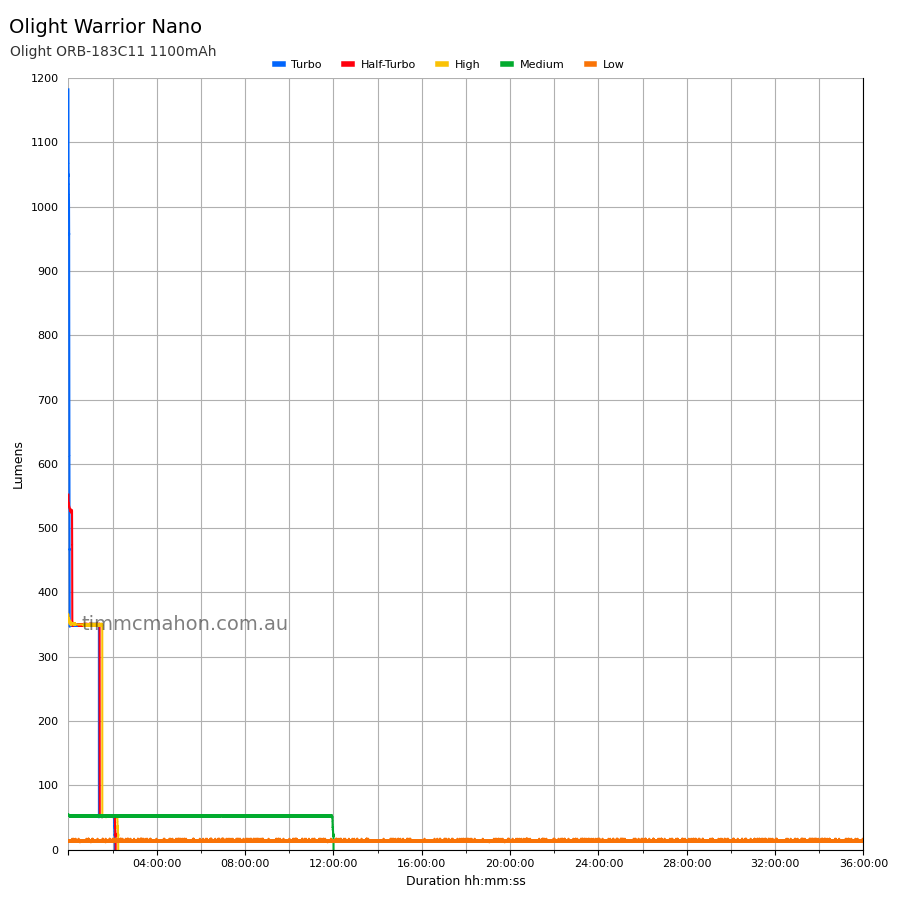
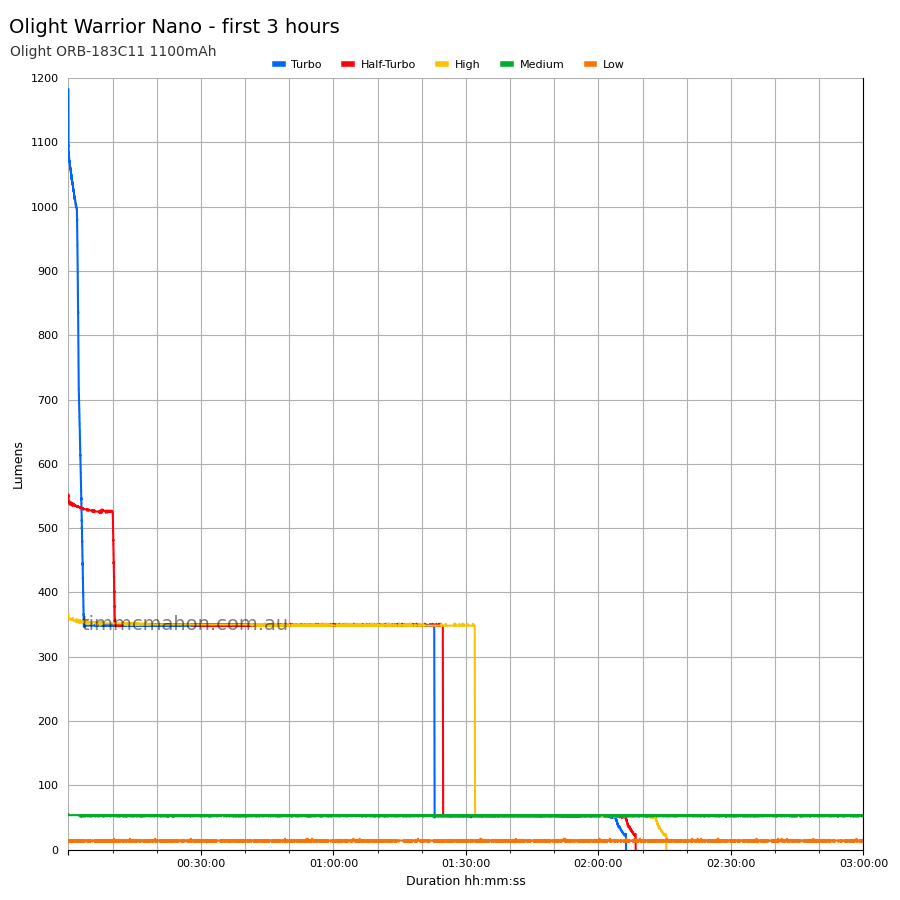

Runtime#
Here is a summary of the runtime results:
| Mode | User manual | Runtime | Turn off | Final voltage |
|---|---|---|---|---|
| Turbo | 3 + 77min | 1h 22min 52s | 2h 6min 14s | 2.98 |
| Half-Turbo | 10 + 75min | 1h 24min 50s | 2h 8min 27s | 3.07 |
| High | 85 + 35min | 2h 14min 8s | 2h 15min 0s | 2.87 |
| Medium | 10h | 12h 0min 15s | 12h 0min 15s | 2.96 |
| Low | 36h | 36h+ | 36h+ | |
| Moonlight | 40days |
“Runtime” is the time until the output reduces to 10% of the output at 30 seconds (as per the ANSI/PLATO FL1 2019 Standard).
“Turn off” is the time until my DIY lumen tube no longer detects more than 1 lumen.
“+” indicates that the light remained on after recording had stopped.
Moonlight was too low for my DIY lumen tube to detect.
The runtime results are pretty close to Olight’s claims. Medium lasted a few hours longer than expected.
The output looks well regulated.
Throw#
I took lux measurements with a UNI-T UT383BT at 30 seconds. Low, Medium, High, Half-Turbo and Turbo were measured at one metre. Moonlight was too low to detect at one metre.
| Mode | Specs (cd) | Specs (m) | Candela measured (cd) | Distance (m) |
|---|---|---|---|---|
| Low | 65 | 16 | 62 | 15 |
| Medium | 262 | 32 | 249 | 31 |
| High | 1,577 | 80 | 1,763 | 83 |
| Half-Turbo | 2,304 | 96 | 2,591 | 101 |
| Turbo | 4,697 | 135 | 5,011 | 141 |
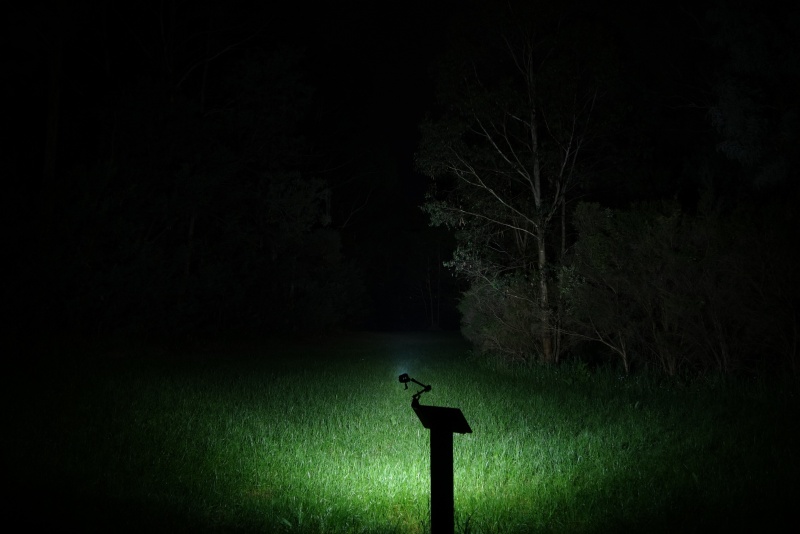
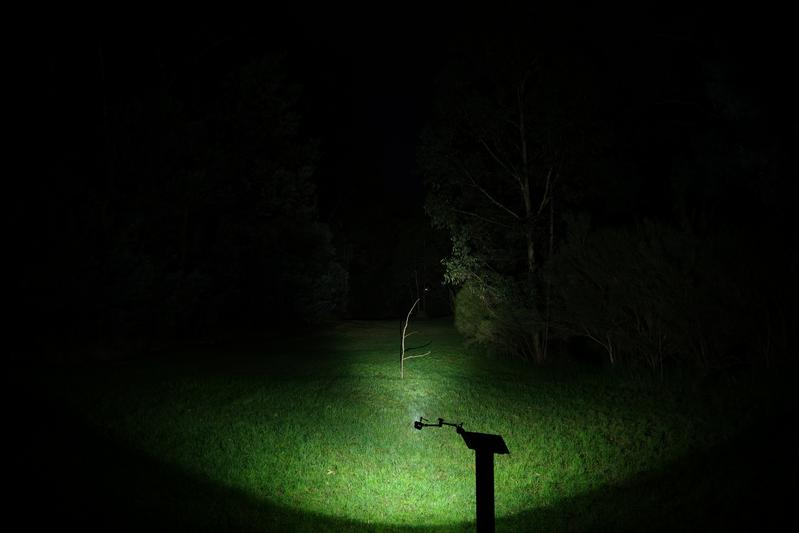
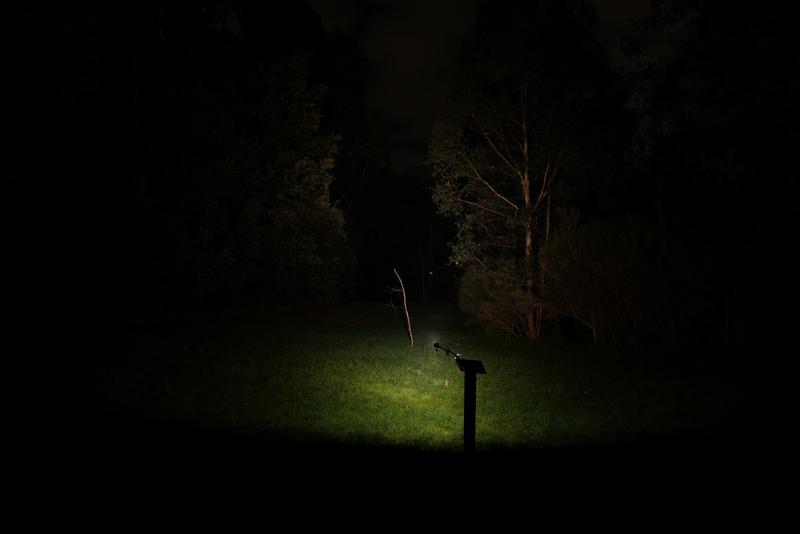
Beamshots#
I went to a local park and aimed the Olight Warrior Nano at a tree 70 metres away while using Turbo.
Beamshots were taken using a Sony RX100M2 using 3.2", f3.2, ISO 100, 5000K WB.
Olight Warrior Nano (Turbo)#
Olight Warrior Mini 2#
Wurkkos TS10 (14500) (Turbo)#
Conclusion#
The Olight Warrior Nano is the fun sized tactical torch that I had hoped for since buying a Warrior Mini 2!
The design has improved:
- The side switch is metal and recessed.
- The tail switch is flatter and sticks out more.
- The pocket clip has two small parts that clasp onto the head.
- The proximity sensor has been removed.
I would have liked to see a glass lens used to help protect the TIR optic from scratches.
The output is well regulated and the runtimes are pretty close to Olight’s claims.
The lumen output was slightly lower than expected but that could be due to the accuracy of my DIY lumen tube.
The beam distance measured was pretty close to Olight’s claims. It would be even better if a neutral white high CRI Luminus SFT40 emitter is used instead of what appears to be a cool white 70 CRI Osram P9 emitter.
If you want something with a longer runtime, more lumens and more throw, then I’d recommend the larger Warrior Mini 3.
I really like the Warrior Nano. I’m a big fan of small torches. I hope that there’s a 14500 sized Warrior torch one day.
Pros:#
- Good build quality.
- Metal side switch.
- Tactical tail switch.
- Floody beam.
- Good sustained output.
- Magnetic charging.
Cons:#
- Low CRI.
- Colour temperature is cooler than expected (6400K to 7300K instead of 5700K to 6700K).
- UI could be improved.
- No glass lens to protect the TIR optic.
- Proprietary battery.
Price#
The Warrior Nano is AU$86.96 while on sale at the time of writing.
Olight Australia is having sale with up to 40% off from 8:00 pm 25/10/2023 to 11:59 pm 27/10/2023 AEDT:
Warrior Nano at olightstore.com.au
Product page#
Here is a 10% promo code that may be used when there isn’t a sale: TMM10
olightstore.com.au affiliate link
I may earn a commission if you use an affiliate link or a promo code. This will help fund future torch reviews and tutorials.