ReyLight Dawn Max Ti Stonewashed Torch Review

ReyLight Dawn Max Ti Stonewashed#
- Specifications
- Introduction
- Torch in use
- Build quality
- LED, bezel, lens and reflector
- Size and comparison
- User interface
- Batteries and charging
- Performance
- Beamshots
- Thermal Images
- Conclusion
- Price
- Product page
Specifications#
| Brand/model | ReyLight Dawn Max Ti Stonewashed |
|---|---|
| LED | FFL505A 3500K |
| Maximum lumens | 840? lm |
| Maximum beam intensity | 69,125? cd |
| Maximum throw | 525? m |
| Battery | 18650 |
| Onboard charging | No |
| Material | Titanium |
| Modes | 4 |
| Blinkies | Strobe, SOS |
| Reflector | TIR |
| Waterproof | ? |
| Review date | September 2026 |
Introduction#
The ReyLight Dawn Max is a thrower available with an FFL505A 3500K or an SFT40 5000K LED, an 18350 or an 18650 tube, and various titanium finishes. This particular torch has a Ti Stonewashed finish.
ReyLight kindly sent this torch for review. I have not been paid for this review nor have I held back my opinions of this torch.
Packaging#
The ReyLight Dawn Max comes in an orange protective case with foam padding inside.


These cases are pretty cool for storing precious torches and knives!
The following is included in the case:
- ReyLight Dawn Max Ti Stonewashed.
- INR18650MJ1 3400mAh cell.
- Two spare o-rings.


User manual#
There is a programming guide available on reylight.net
Torch in use#
The ReyLight Dawn Max Ti Stonewashed feels comfortable to hold.


It is the perfect size for my hand.

The torch is controlled by a reverse-clicky tail switch with three tritium slots in it.

The torch can tailstand because the tail switch does not stick out.


The torch can headstand and it has a one-way pocket clip that may be unscrewed.

There are two holes in the pocket clip that could be used to attach a lanyard.
Build quality#
This ReyLight Dawn Max is made of titanium and it has a stonewashed finish. There are no sharp edges.


The hexagon pattern looks cool and it provides additional grip.


The threads came well lubricated and they turn smoothly.


The small springs at each end allow an unprotected flat top 18650 cell to fit.
It would be nice if the driver had a bit of plastic to protect the components.


Overall, the build quality is pretty good.
LED, bezel, lens and reflector#
This ReyLight Dawn Max has a FFL505A 3500K emitter. It is also available with an SFT40 5000K emitter.
The TIR optic is held down by a strike bezel (it is not sharp).


The little mark at the edge of the TIR optic is often seen on these TIR optics.
It would be nice to see a glass lens in front of the TIR optic to protect it from dirt and scratches.
CCT, CRI, and duv#
I have taken Correlated Colour Temperature (CCT) and Colour Rendering Index (CRI, RA of R1-R8) measurements with the torch positioned two metres away from an Opple Light Master Pro III (G3).
The CCT is around 3600K, the CRI is around 98 and the Delta u, v is slightly positive (rosy).
The beam produced is gorgeous. It has a very narrow hot spot surrounded by a corona that blends smoothly into the spill.
| Mode | CCT (K) | CRI (Ra) | x | y | Duv |
|---|---|---|---|---|---|
| 2% | 3471 | 98.6 | 0.4041 | 0.3825 | -0.0034 |
| 20% | 3649 | 98.6 | 0.3959 | 0.3811 | -0.0021 |
| 100% | 3624 | 97.7 | 0.3942 | 0.3729 | -0.0055 |
Calculate Duv from CIE 1931 xy coordinates
Dimensions and size comparison#
Dimensions#
I took the following measurements using a digital caliper.
| Measurement | Unit (mm) |
|---|---|
| Length | 126.05 |
| Head diameter | 38.63 |
| Tube diameter | 25.0 |
| Tail diameter | 25.0 |
Weight#
I took the following measurements using a digital scale.
| Weight | Unit (g) |
|---|---|
| Torch | 173.92 |
| Battery | 46.90 |
| Torch with battery | 220.82 |
Size comparison with its competition#
From left to right: ReyLight Dawn Max Ti Stonewashed, Manker MC13, Manker MC13 II SE


From left to right: ReyLight Dawn Max Ti Stonewashed, Manker MC13, Acebeam Defender P16 Gray, Manker MC13 II SE


User interface#
The torch has a reverse-clicky tail switch.
| State | Action | Result |
|---|---|---|
| Off | Click | On |
| On | Click | Off |
| On | Half click (tap) | Cycle (Moonlight, 2%, 20%, 100%) |
| On | Double half click (tap) | 100% |
Here are some of the things that can be configured:
- select one of four mode groups;
- toggle mode memory on or off;
- toggle moonlight mode on or off;
- change the cycle order (Low to High, or High to Low).
Here is a Programming Guide from Rey’s website:
To Enter Configuration Mode:

- From ON, half-click/tap the tail switch 8+ times until it starts to flash.

(When the configuration mode is entered, the light will start to blink once, then a quick flash, blink twice, then a quick flash, blink three times, then a quick flash, blink four times, then a quick flash, blink five times, then a quick flash. This sequence continues twice if a selection is not chosen)

* The number of blinks indicates the configuration option number to be changed.
* Half-click/tap the tail switch during any quick flashes following the blinks to select the configuration option.

- Here are the configuration options:

1. Mode group selection

(After entering this menu, you can see it blink 4 times. The number of blinks indicates the number of mode groups)

The 1st blink -------- Group1:  (Moonlight)-2%-20%-100%
The 2nd blink -------- Group2:  (Moonlight)-10%-40%-100%
The 3rd blink -------- Group3:  (Moonlight)-2%-10%-50%
The 4th blink -------- Group4:  (Moonlight)-50%-100%-strobe-SOS

* Half-click/tap the tail switch during any blinks to select the mode group.
* After selecting the mode group, you can half-click/tap to select the brightness mode.

2. Memory mode on-off toggle (default off)

To turn memory mode on, half-click/tap the tail switch during the quick flash after the second blink.

* To turn off the memory mode, reenter the configuration mode and repeat the instruction above.

3. Moonlight mode off-on toggle (default on)

To turn the moonlight off, half-click/tap the tail switch during the quick flash after the third blink.

* Repeat to turn the moonlight on.

4. Mode order toggle (default LMH)

To change the mode order from Low Medium High to High Medium Low, half-click/tap the tail switch during the quick flash after the fourth blink.

* Repeat to reverse the order.

For example, the default mode order of group 1 is (Moonlight)-2%-20%-100%, if you change the mode group to HML, the mode ORDER of group 1 will be (Moonlight)-100%-20%-2%

5. Factory reset

Half-click/tap the tail switch during the quick flash after the fifth blink to reset all options to their original states.
Strobe#
Strobe has an alternating frequency.
Strobe, SOS


I measured Strobe and SOS with a Zoyi ZT-706S oscilloscope using High Speed mode.
Low voltage protection#
There is low voltage protection. The light turns off around 2.67V.
I tested low voltage protection by connecting the driver of the torch to a bench power supply and then by lowering the voltage from 4.2V to 0V.
Pulse Width Modulation#
I did not notice any visible PWM (flickering).
I measured the PWM of the light with a Zoyi ZT-706S oscilloscope.
Moonlight, 2%, 20%, 100%


What I like about the UI#
- Simple to use.
What could be improved#
- A printed user manual with a programming guide might be helpful.
Batteries and charging#
Battery#
Rey included an unprotected flat top INR18650MJ1 3400mAh cell.


The cell was isolated with a piece of card to prevent accidentally turning the torch on.

I tried the following cells:
| Cell | Top | Compatible? |
|---|---|---|
| INR18650MJ1 3400mAh | Flat | Yes |
| NEXTORCH 18650 3.6V Li-ion 2600mAh | Button | No |
Unprotected flat top cells fit. Other cells are too long.
Charging#
There is no built-in charging.
Performance#
There was no user manual with specifications included.
I used the included INR18650MJ1 3400mAh cell for the following tests.
Lumen measurements#
I used a bench power supply to measure the current at turn on.
| Mode | Amps at start | Specs | Lumens @turn on | Lumens @30 sec | Lumens @10 min |
|---|---|---|---|---|---|
| 2% | 0.10 A | 33 | 33 | 31 | |
| 10% | 0.22 A | 101 | 99 | 97 | |
| 20% | 0.50 A | 212 | 210 | 198 | |
| 50% | 1.87 A | 569 | 557 | 154 | |
| 100% | 3.19 A | 927 | 840 | 152 |
Note: Lumen measurements may be off by 10% with my DIY lumen tube.
Runtime graphs#
I used my own DIY lumen tube with a TSL2591 sensor and forked bmengineer’s project RuTiTe to record runtimes.
The room temperature was approximately 15 C.


Runtime#
Here is a summary of the runtime results:
| Mode | User manual | Runtime | Turn off | Final voltage |
|---|---|---|---|---|
| 100% | 6h 2min 50s | 9h 6min 52s | 2.90 | |
| 50% | 7h 19min 59s | 9h 6min 3s | 2.90 | |
| 20% | 6h 59min 36s | 6h 59min 37s | 2.88 | |
| 10% | 16h 20min 18s | 16h 20min 19s | 2.86 | |
| 2% | 48h+ | 48h+ | 3.04 |
“Runtime” is the time until the output reduces to 10% of the output at 30 seconds (as per the ANSI/PLATO FL1 2019 Standard).
“Turn off” is the time until my DIY lumen tube no longer detects more than 1 lumen.
“+” indicates that the light remained on after recording had stopped.
The runtimes are pretty good. It would be nice if the lumen output was constant.
Throw#
I took lux measurements with a UNI-T UT383BT at 30 seconds. 100% mode was measured at five metres.
| Mode | Specs (cd) | Specs (m) | Candela measured (cd) | Distance (m) |
|---|---|---|---|---|
| 100% | 69,125 | 525 |
Beamshots#
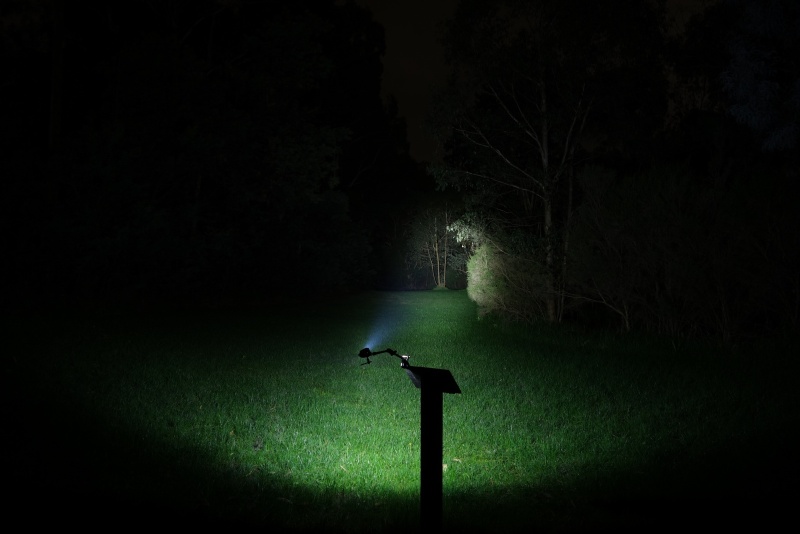
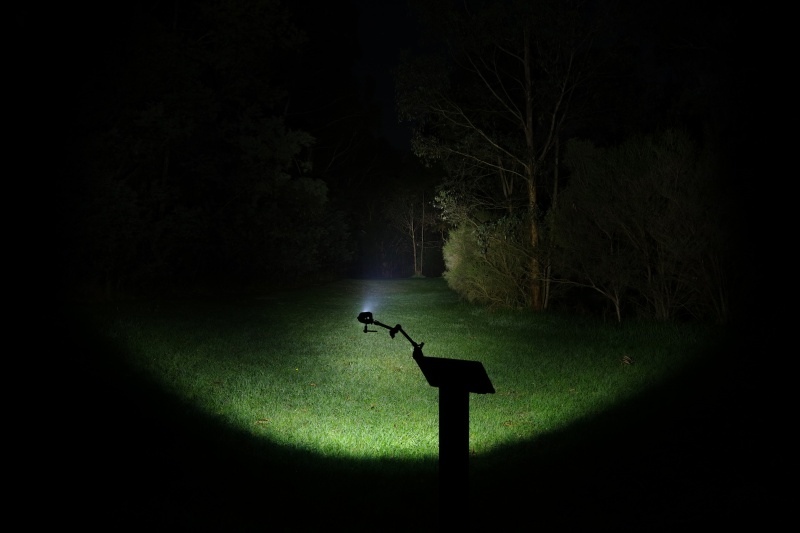
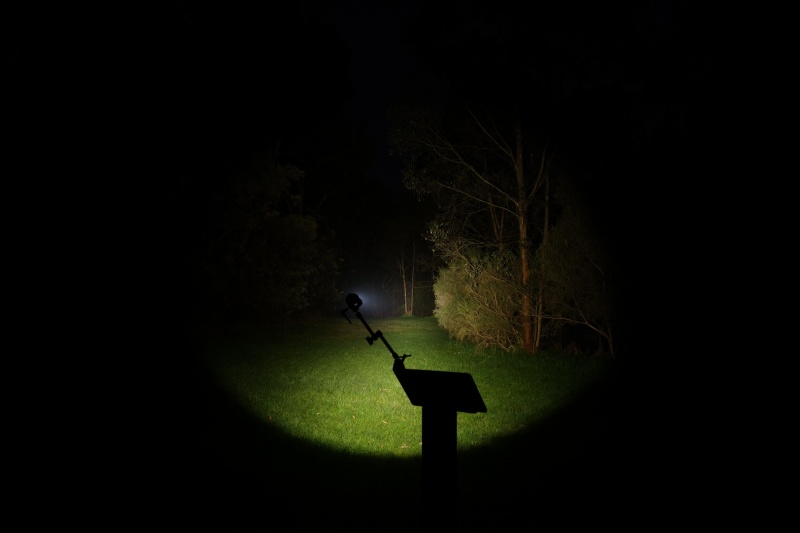
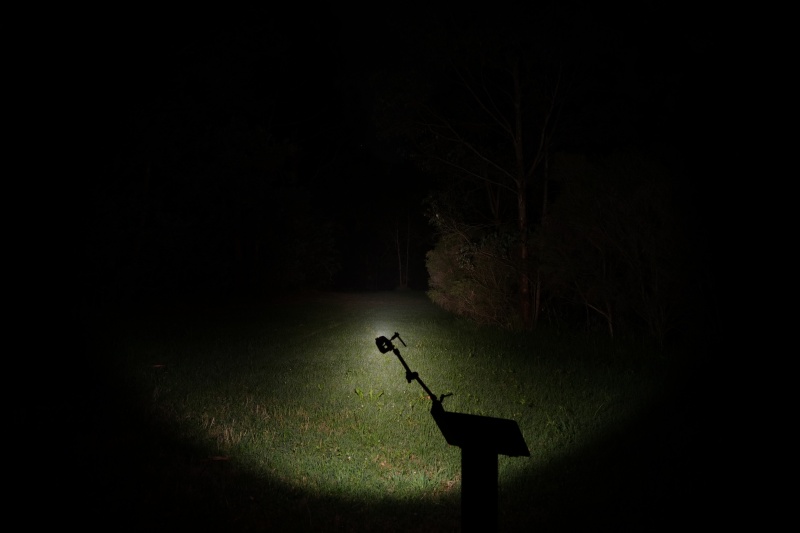
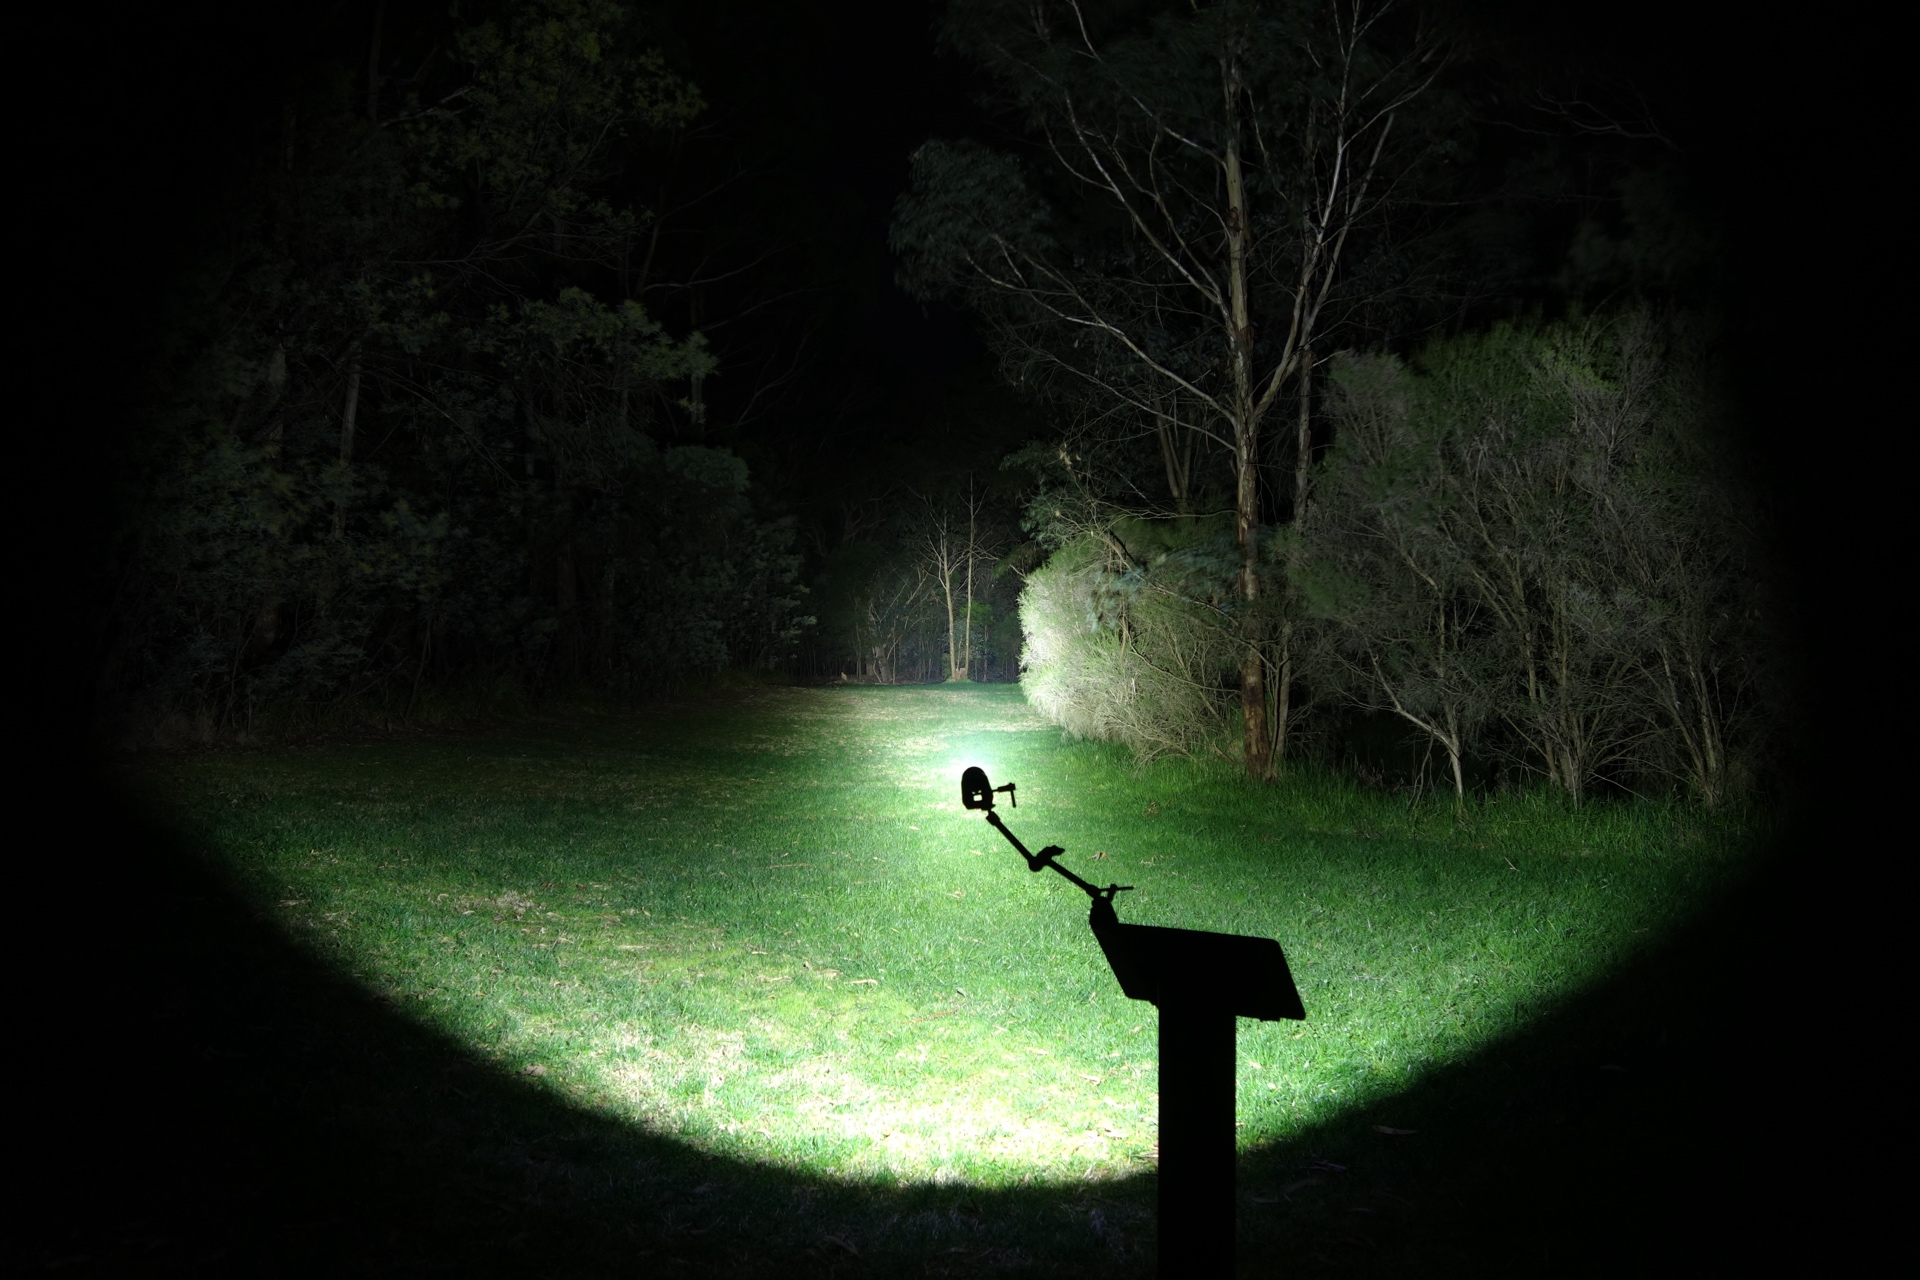
I went to a local park and aimed the torch at a tree 70 metres away while using 100%.
Beamshots were taken using a Sony RX100M2 using 3.2", f3.2, ISO 100, 5000K WB.
ReyLight Dawn Max Ti Stonewashed (100%)#

Acebeam Defender P16 Gray (Turbo)#
Acebeam T35 Coyote (Turbo)#
Armytek Predator Pro Warm (Turbo)#
NLIGHTD E1 Copper Nichia 219B 14500 (Turbo)#
Manker MC13 II SE (Turbo) 18650#
Thermal Images#
I used a Thermal Master P3 to take thermal images of the torch while using 100% mode. Get 10% off the Thermal Master P3 with code Mcmahon10
Room temperature: 13 C
| Time (mm:ss) | Max Temperature |
|---|---|
| 00:00 | 21.2 C |
| 01:00 | 30.9 C |
| 02:00 | 42.7 C |
| 03:00 | 45.1 C |
| 04:00 | 41.4 C |
| 05:00 | 38.7 C |
| 06:00 | 37.0 C |
| 07:00 | 35.5 C |
| 08:00 | 34.7 C |
| 09:00 | 34.0 C |
| 10:00 | 33.8 C |
The torch reached 45.1 C within the first 3 minutes. The output then began to drop and the torch started to cool down.
The head gets a bit warm to hold. I prefer to hold the torch by the tube without gripping the head with my thumb and finger.


The titanium hexagon pattern looks really cool on a thermal camera!
Conclusion#
This ReyLight Dawn Max Ti Stonewashed looks gorgeous and it produces a beautiful beam with a FFL505A 3500K emitter.
The runtimes are good. It would be even better if the lumen output was constant rather than gradually decreasing.
EDC enthusiasts that collect titanium gear will want to check this out!
The beam produced sparks joy.
Pros:#
- Good build quality.
- Good runtimes.
- High CRI.
- Beautiful beam.
- Simple user interface.
Cons:#
- No glass lens in front of the TIR optic to protect it.
- Long 18650 cells do not fit.
Price#
The ReyLight Dawn Max Ti Stonewashed is US$129 at reylight.net when you get the 18650 version.
The 18350 version is US$119.
If you already have a ReyLight Rook then you could just but the Dawn Max head for US$79 and screw it onto the body of a ReyLight Rook.
Product page#
Dawn Max Ti Stonewashed at reylight.net
I may earn a commission if you use an affiliate link or a promo code. This will help fund future torch reviews and tutorials.