Skilhunt H150 Nichia 519A 3000K Headlamp Review

Skilhunt H150 Headlamp#
- Specifications
- Introduction
- Torch in use
- Build quality
- LED, bezel, lens, reflector and beam
- Size and comparison
- User interface
- Batteries and charging
- Performance
- Beamshots
- Conclusion
- Price
- Product page
Specifications#
| Brand/model | Skilhunt H150 |
|---|---|
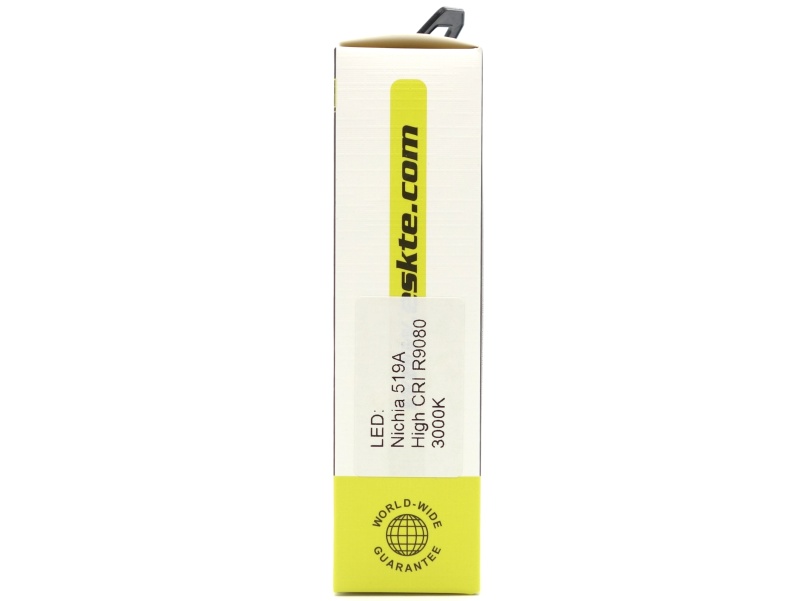
| LED | Nichia 519A 3000K |
| Maximum lumens | 480 lm |
| Maximum beam intensity | 2,250 cd |
| Maximum throw | 95 m |
| Battery | 1*14500, 1*AA Ni-MH |
| Onboard charging | Yes (magnetic) |
| Material | Aluminium |
| Modes | 7 |
| Blinkies | Strobe, SOS, Beacon |
| Reflector | TIR |
| Waterproof | IPX-8 |
| Review date | September 2023 |
Introduction#
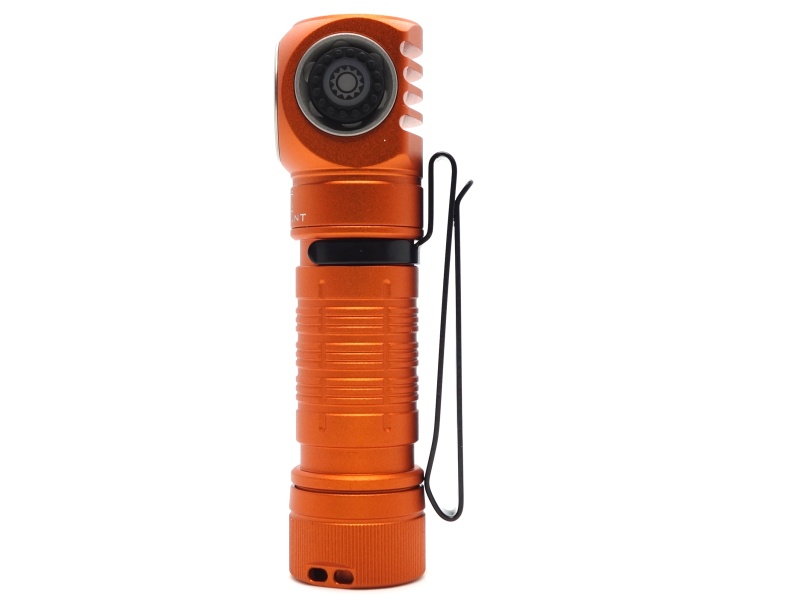
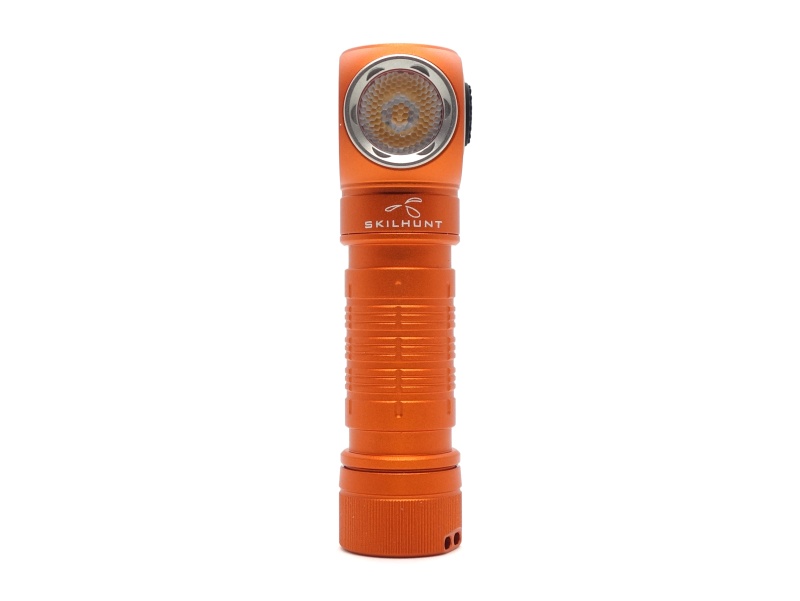
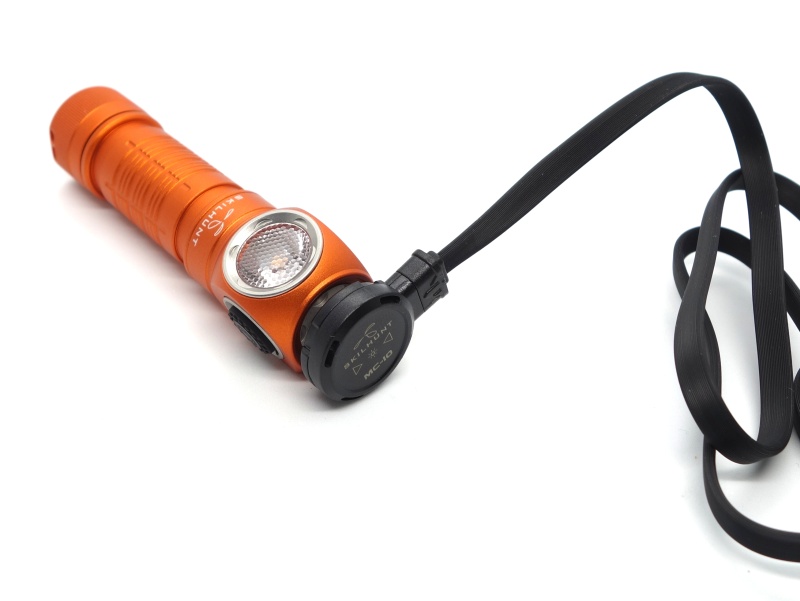
This orange Skilhunt H150 is a AA sized headlamp with magnetic charging and it comes with a Nichia 519A 3000K emitter. It can be powered by either a AA Ni-MH cell or a 14500 Li-ion cell. It is available with a few different LEDs (CREE XP-L2, Nichia 519A) and different colours (orange, green, gray, black).
Skilhunt are known for their headlamps and torches with electronic side switches. Their H04 series of headlamps are available with cool white, neutral white and high CRI emitters and they come with either a honeycomb TIR optic, reflector or reflector with a diffuser flap. More recently, Skilhunt has been making their torches available with Nichia 519A emitters with different colour temperatures.
I bought a Skilhunt H04 RC Mini headlamp a few years ago while searching for a small headlamp. This 18350 sized headlamp came with a Samsung LH351D 4000K emitter that produced a beam with a hint of green so I swapped a Nichia 219B emitter into it.
The HB3 headband that comes with the Skilhunt H04 RC Mini is arguably one of the most comfortable and convenient headbands. A headlamp can be inserted into the mount while a pocket clip is attached. It clamps onto the headlamp and doesn’t require a lot of effort like some silicone mounts. I will compare this headband with the new one that comes with the H150.
Skilhunt is rebranding to ESKTE. SKT is an abbreviation of SKilhunT. It is pronounced “ess-kay-tee” but I digress.
Skilhunt kindly provided this torch for review. I have not been paid for this review nor have I held back my opinions of this torch.
First batch recalled#
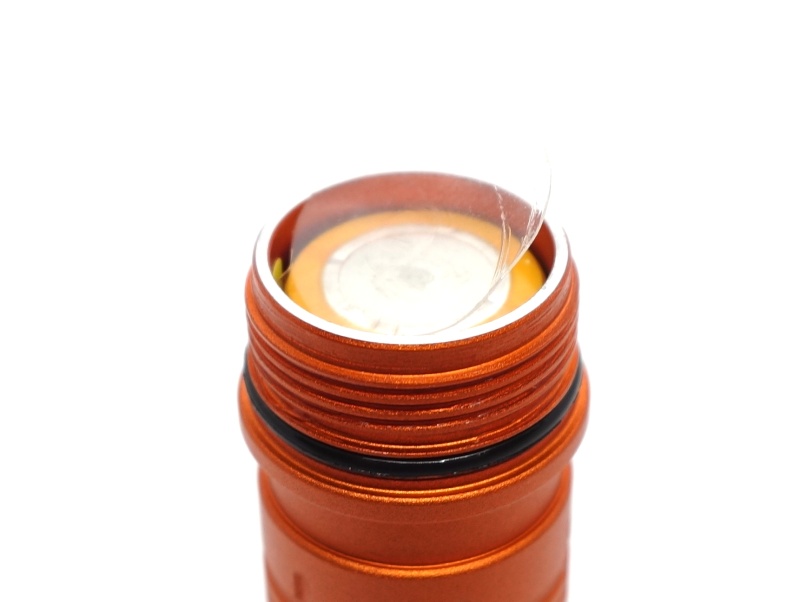
There was a recall for the first batch of Skilhunt H150 headlamps after Zak noticed and reported a flaw with the reverse-polarity protection while using a flat top 14500 cell. The little notch on the driver for reverse-polarity protection was connected to ground by mistake and could cause a flat top battery to get hot and explode. Kudos to Skilhunt for promptly issuing a recall, updating the design, and resolving the issue within a few weeks.
The newer batches have V2 on the driver. This can be seen by looking down the battery tube.
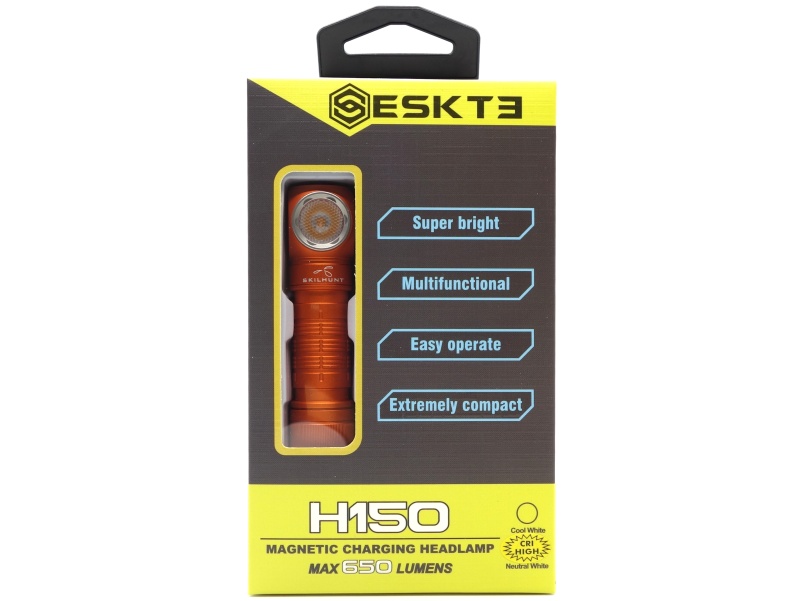
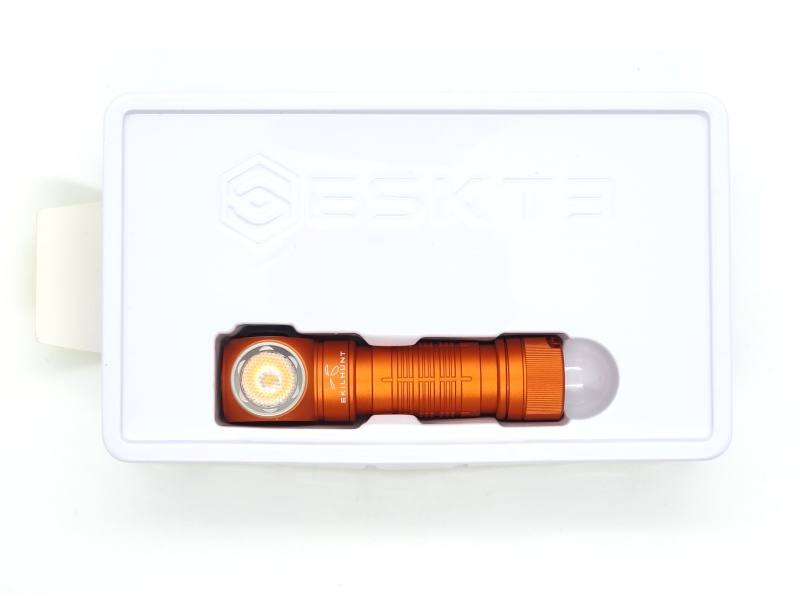
Packaging#
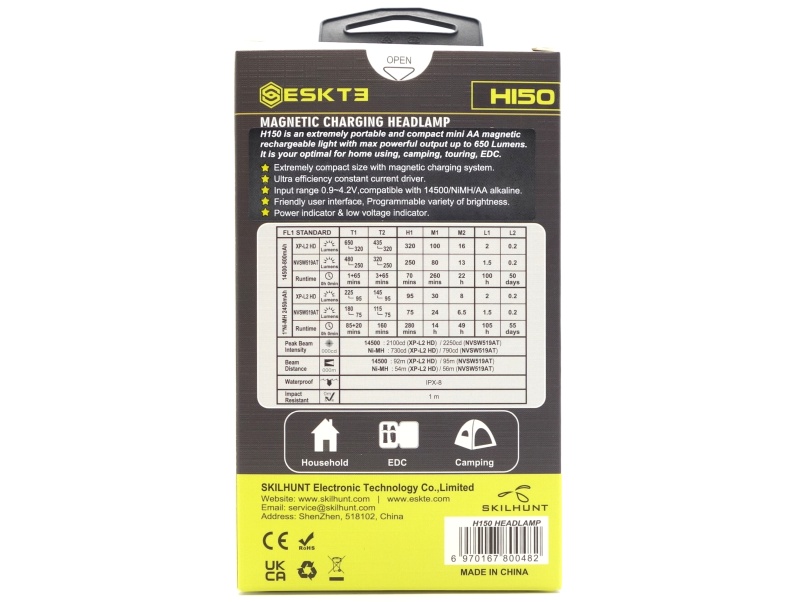
The H150 comes in a gray and yellow box with ESKTE branding. There is a window to see the headlamp. Specifications are on the back of the box.
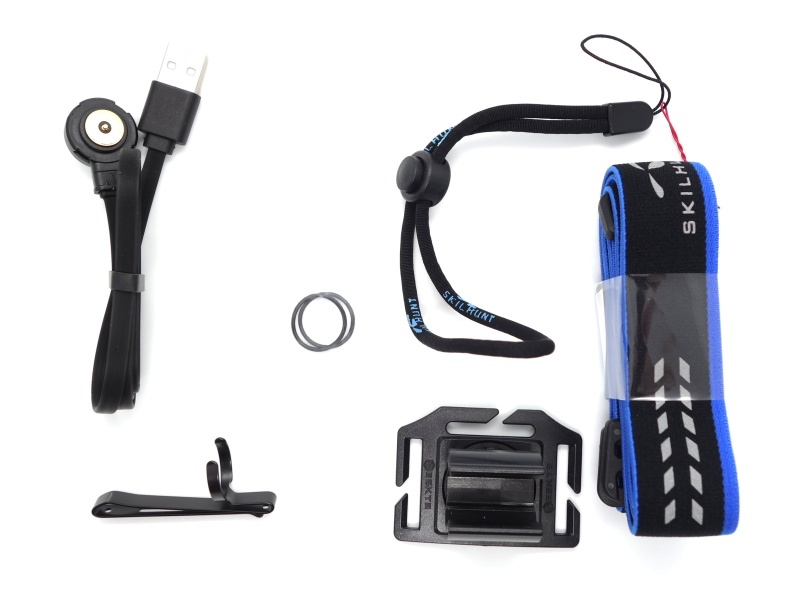
The following was included in the box:
- Skilhunt H150.
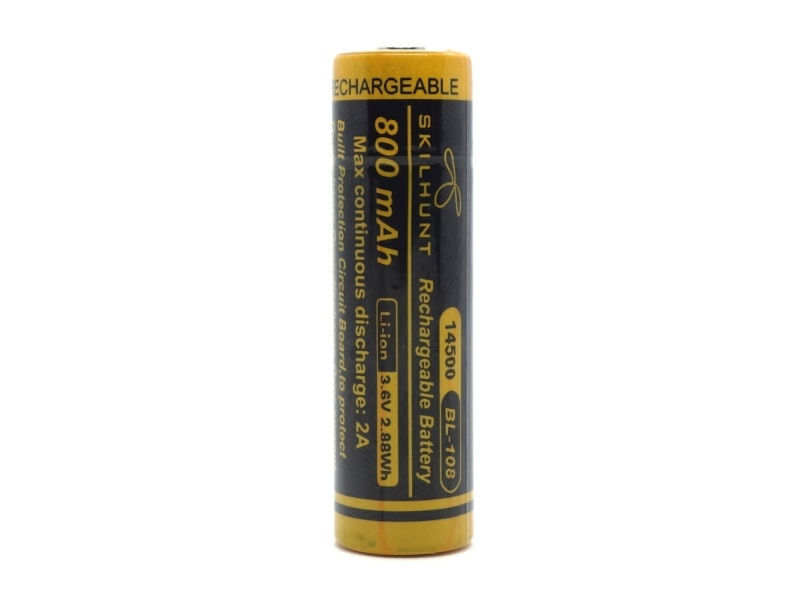
- Skilhunt 14500 BL-108 800mAh 3.7V Li-ion cell.
- Magnetic charging cable.
- Pocket clip.
- Lanyard.
- Two spare o-rings.
- Headband.
- User manual.
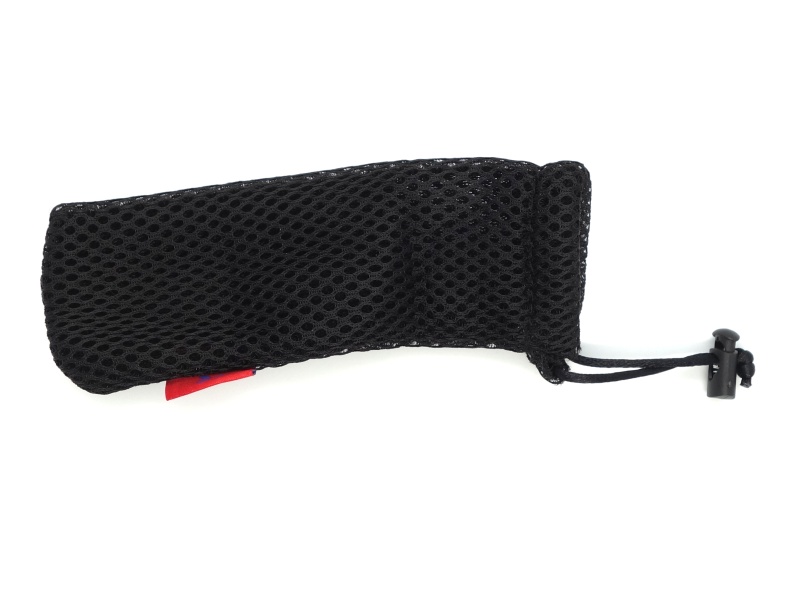
A mesh pouch was also included outside the box with this review sample.
Torch in use#
The Skilhunt H150 feels tiny in my hand. It’s a bit like a fidget toy, except double clicking the button with the light facing me will temporarily blind my eyes with Turbo.

The reversible deep-carry pocket clip can be attached to either end of the tube. This is great if you like to carry right-angle torches with the head up or down.
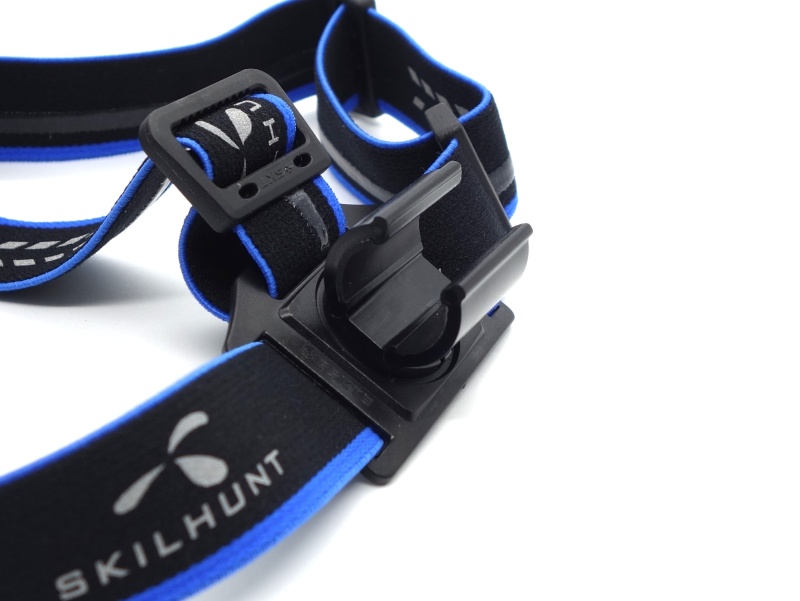
The new headband is quite comfortable to wear and easy to use. It has a gel or rubber liner on the elastic material. It might be difficult to assemble the headband for the first time. Here is a video by Skilhunt for assembling a similar headband.
The top strap can be removed. I prefer to wear the headband without the top strap because the headlamp isn’t very heavy and the top strap seems unnecessary.
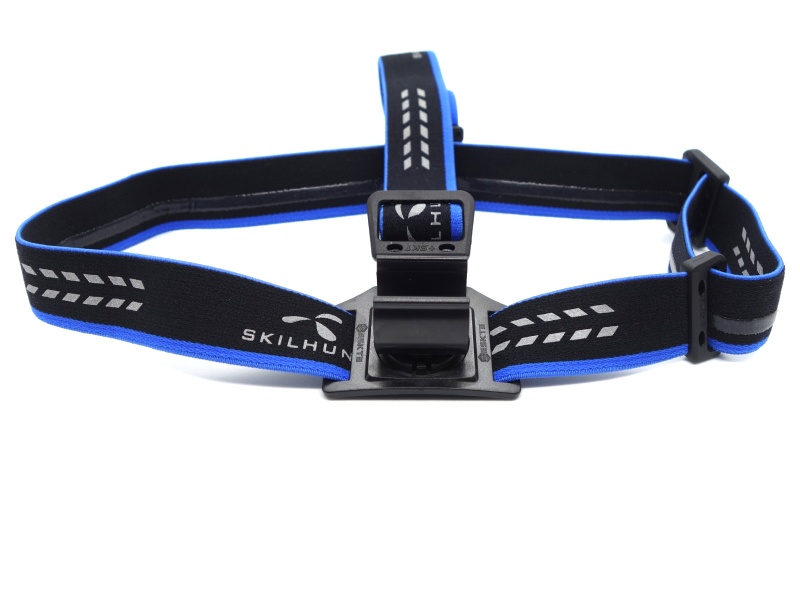
The gray Skilhunt branding and the dashes on the headband are reflective.
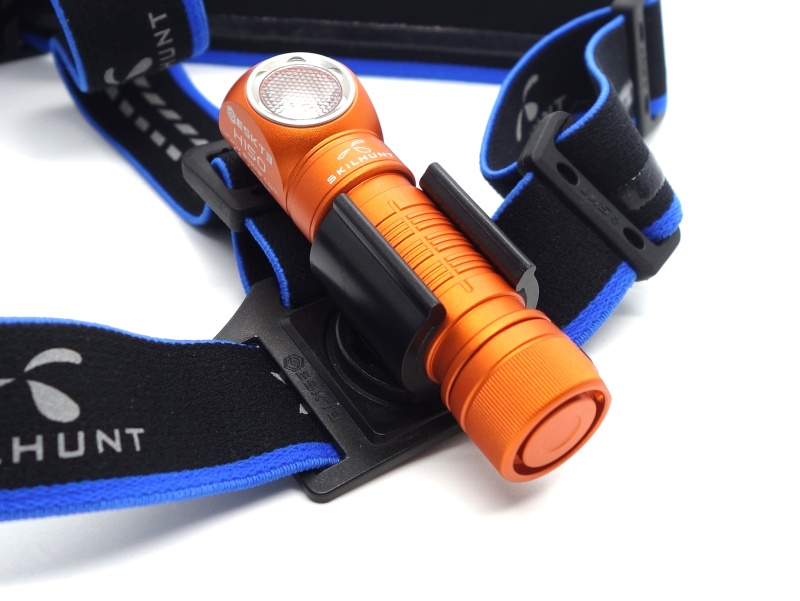
It has a new feature! The H150 can be rotated in the mount.
The older HB3 headband that comes with the H04 series of headlamps allows a pocket clip to be attached to the headlamp while it is in the mount.
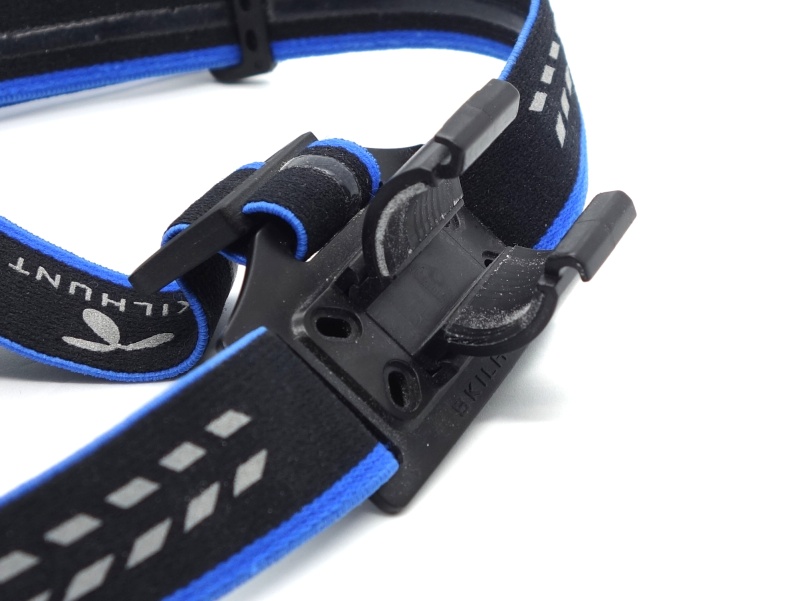
Unfortunately, Skilhunt didn’t include a cut-out in the mount for a pocket clip to fit when designing the headband mount for the H150.
I was able to put the H150 in the mount with a pocket clip but I had to put the clip on the upper or lower part of the mount. It is harder to rotate the headlamp up and down when the pocket clip is clipped to the mount.
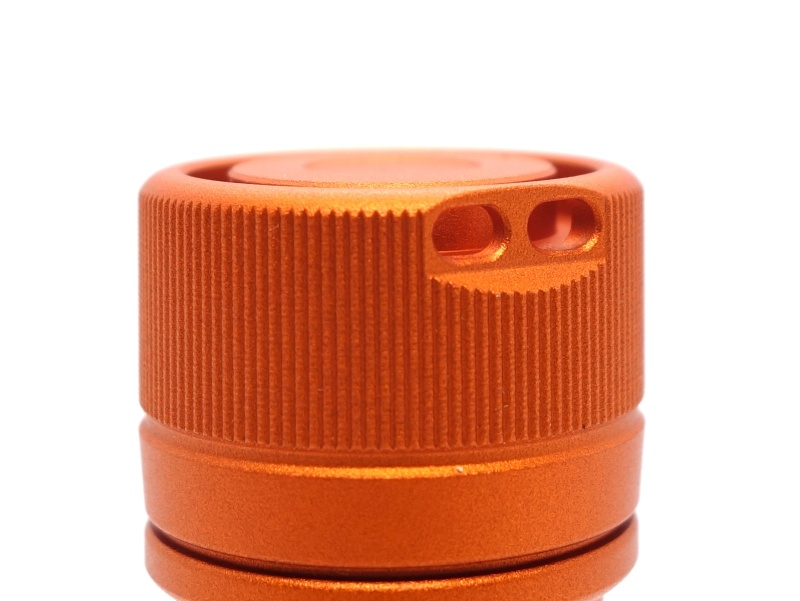
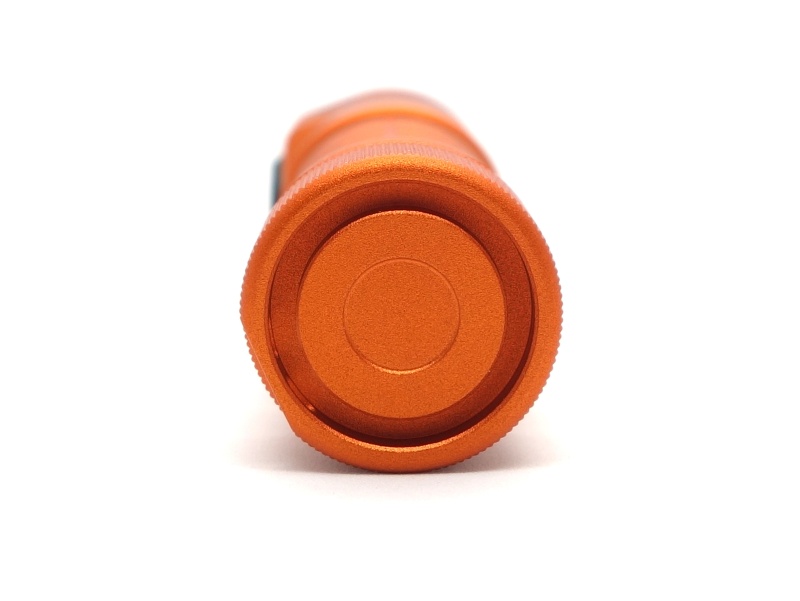
There are two large holes in the side of the tailcap to allow a lanyard to be used without getting in the way of tailstanding.
Build quality#
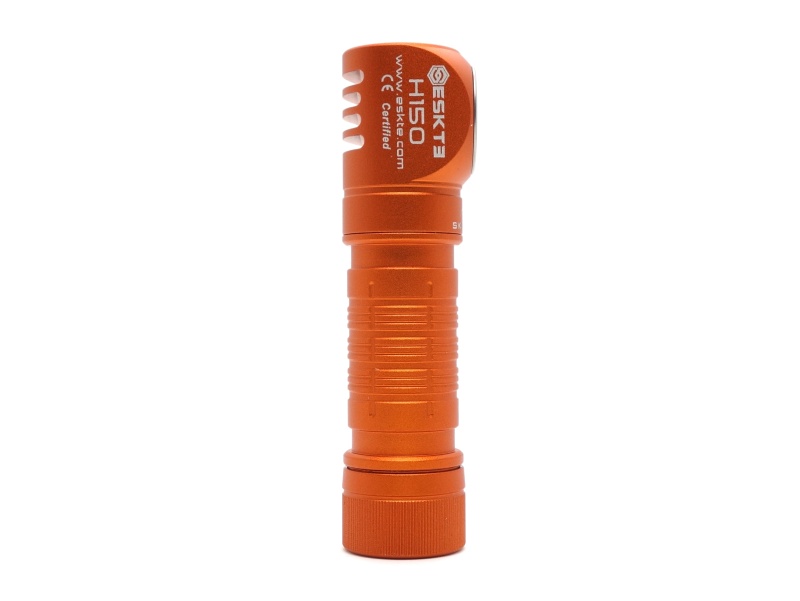
This Skilhunt H150 headlamp has an aluminum body with orange anodising. There are no sharp edges.
There is plenty of grip on the tube and the tailcap.
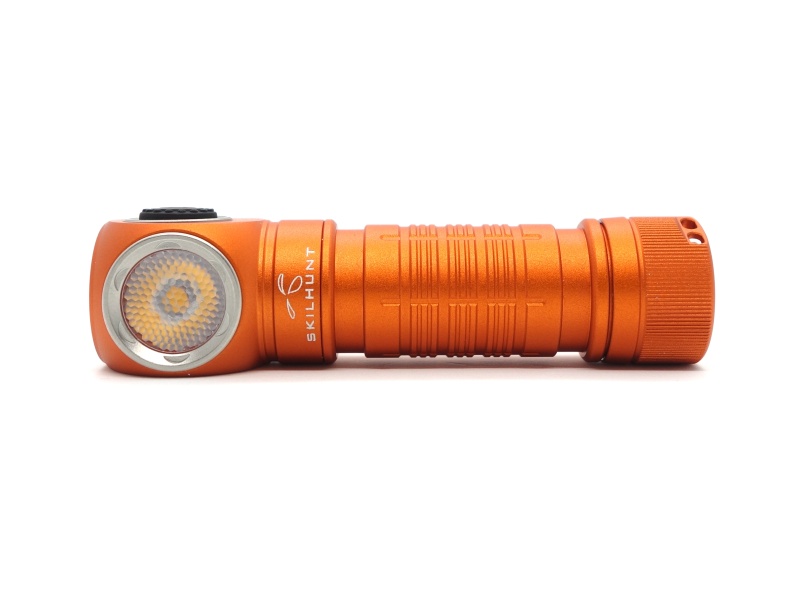
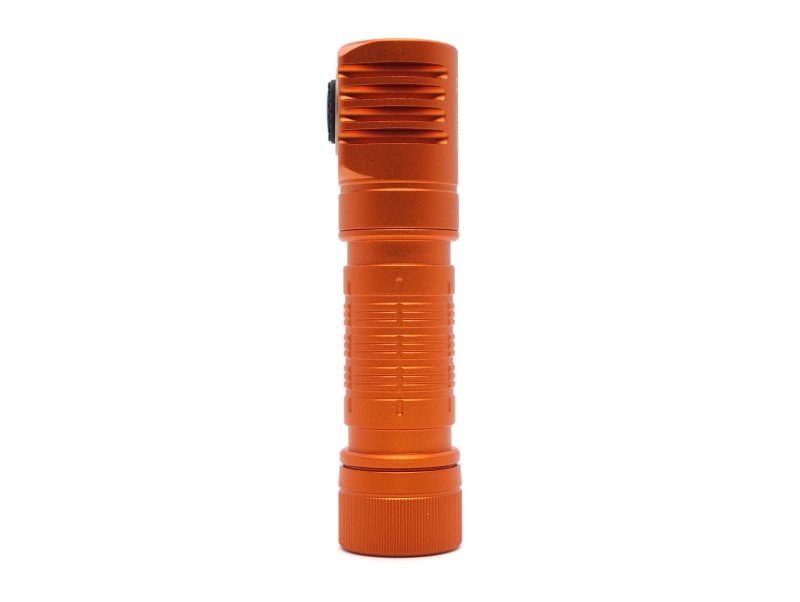

The button cover feels a bit mushy but it gives a satisfying click. It might be easier to accidentally press the raised button if carrying the headlamp in a pocket or backpack.
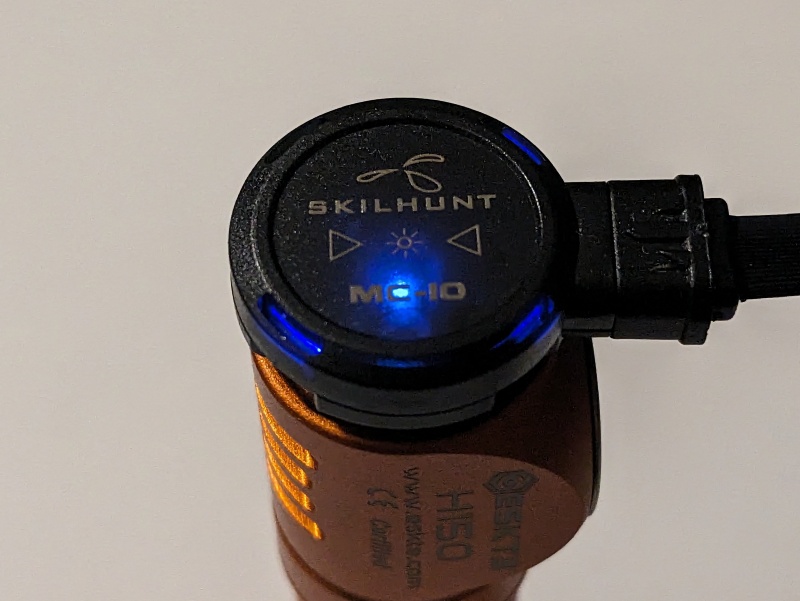
The button has a battery status indicator that turns on momentarily when the headlamp is first turned on. It also acts as a charging status indicator.
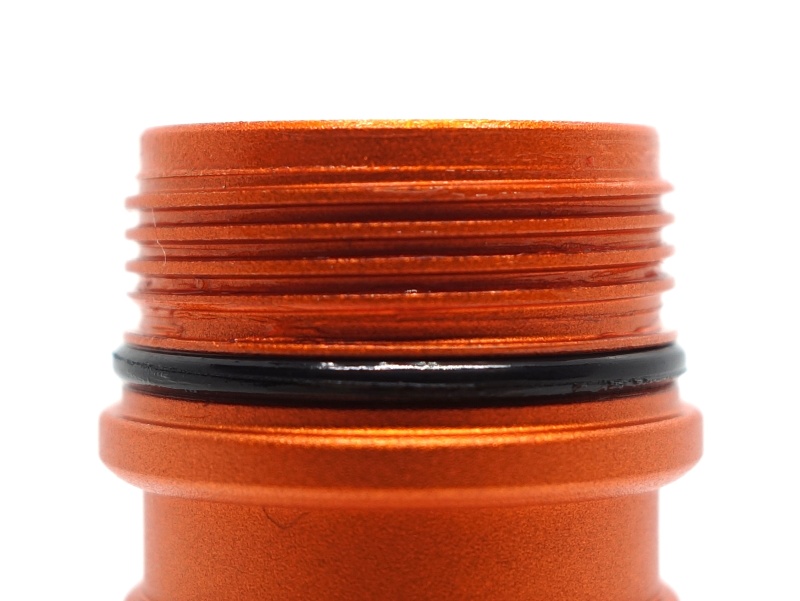
The threads have been anodised! Woo-hoo! I love being able to unscrew a tailcap slightly to disconnect the battery and prevent the torch from accidentally turning on.
The threads came very lightly lubricated.
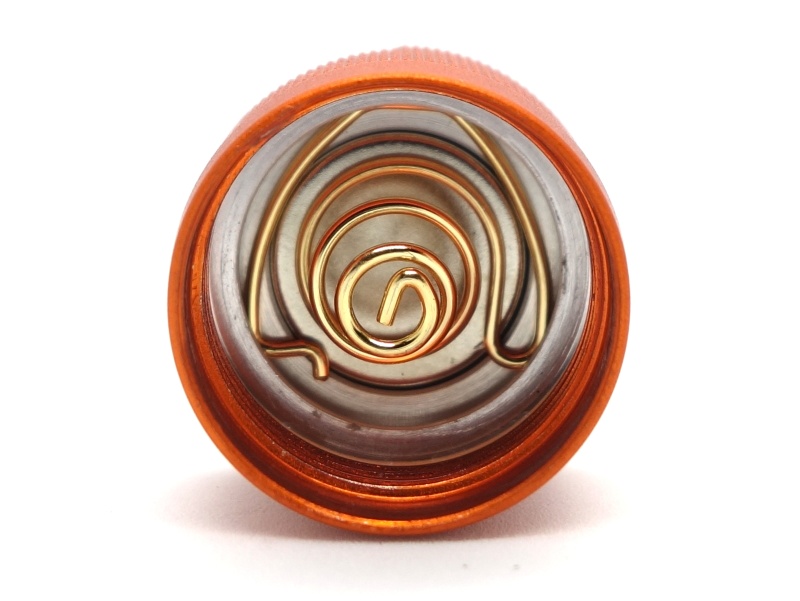
There is a magnet in the tailcap behind the spring. I like how I can use the magnet to pull the battery out.
LED, bezel, lens, reflector and beam#
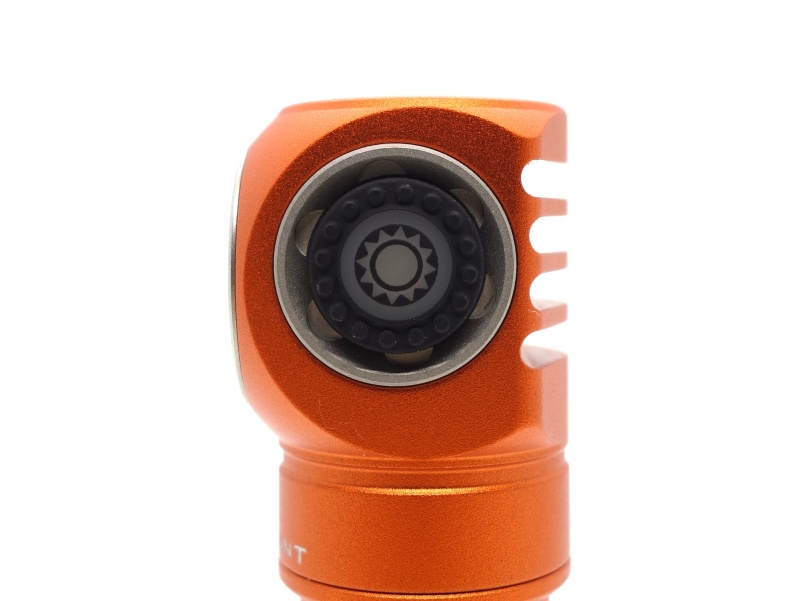
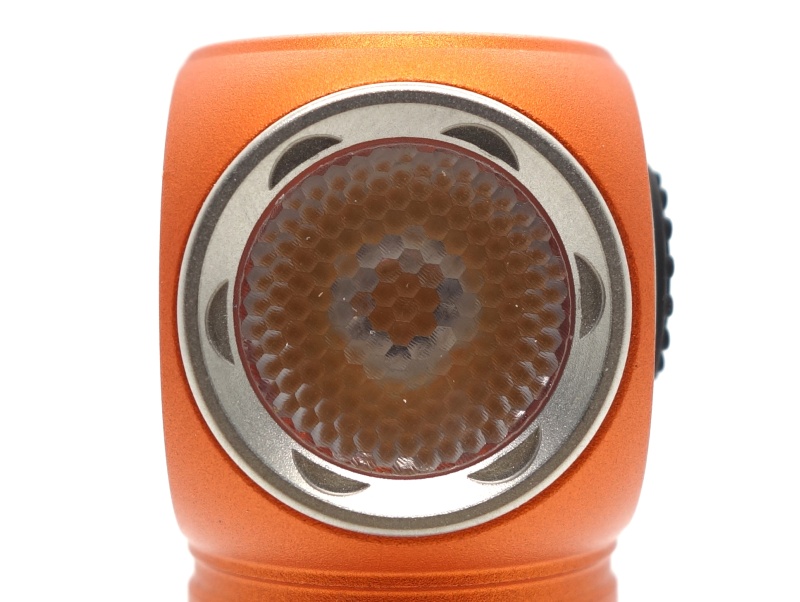
This Skilhunt H150 has a Nichia 519A 3000K emitter with a honeycomb TIR optic.
It is available with the following emitter options at the time of writing:
- CREE XP-L2 6500K
- Nichia 519A R9080 4500K
- Nichia 519A R9080 3000K
A bezel has been screwed down against the TIR optic. There is no glass lens to protect the TIR optic. Snap-ring pliers can be used to unscrew the bezel and remove the TIR optic.
CCT, CRI, and duv#
I have taken Correlated Colour Temperature (CCT) and Colour Rendering Index (CRI, RA of R1-R8) measurements with the torch positioned half a metre away from an Opple Light Master Pro III (G3).
The CCT is around 2921K. The CRI is around 96.
The Delta u, v is near zero. It is close to pure white.
The beam produced looks like a big smooth warm ball of light. The TIR optic blends the hot spot into the spill while focusing it into a relatively narrow beam.
| Cell | Mode | CCT (K) | CRI (Ra) | x | y | Duv |
|---|---|---|---|---|---|---|
| 14500 | M2 | 2915 | 96.5 | 0.4438 | 0.4071 | 0.0003 |
| 14500 | M1 | 2928 | 96.9 | 0.4429 | 0.4071 | 0.0004 |
| 14500 | H1 | 2950 | 97.1 | 0.4414 | 0.4066 | 0.0004 |
| 14500 | T1 | 2954 | 97.2 | 0.4403 | 0.4049 | -0.0001 |
| Ni-MH | M2 | 2873 | 96.8 | 0.4470 | 0.4083 | 0.0004 |
| Ni-MH | M1 | 2914 | 96.8 | 0.4438 | 0.4071 | 0.0003 |
| Ni-MH | H1 | 2907 | 96.9 | 0.4444 | 0.4074 | 0.0004 |
| Ni-MH | T1 | 2931 | 97.1 | 0.4428 | 0.4071 | 0.0004 |
Calculate Duv from CIE 1931 xy coordinates
Dimensions and size comparison#
Dimensions#
I took the following measurements using a digital caliper.
| Measurement | Unit (mm) |
|---|---|
| Length | 79.76 |
| Head width | 19.9 |
| Head depth | 21.3 |
| Tube outside diameter | 18.0 |
| Tube inside diameter | 14.71 |
| Tube pocket clip diameter | 16.7 |
| Tube pocket clip width | 3.7 |
| Tail diameter | 19.96 |
| Battery length | 50.0 |
| Battery diameter | 14.25 |
Weight#
I took the following measurements using a digital scale.
| Weight | Unit (g) |
|---|---|
| Torch | 33.3 |
| Headband | 47.53 |
| Battery | 19.21 |
| Torch with headband and battery | 100.04 |
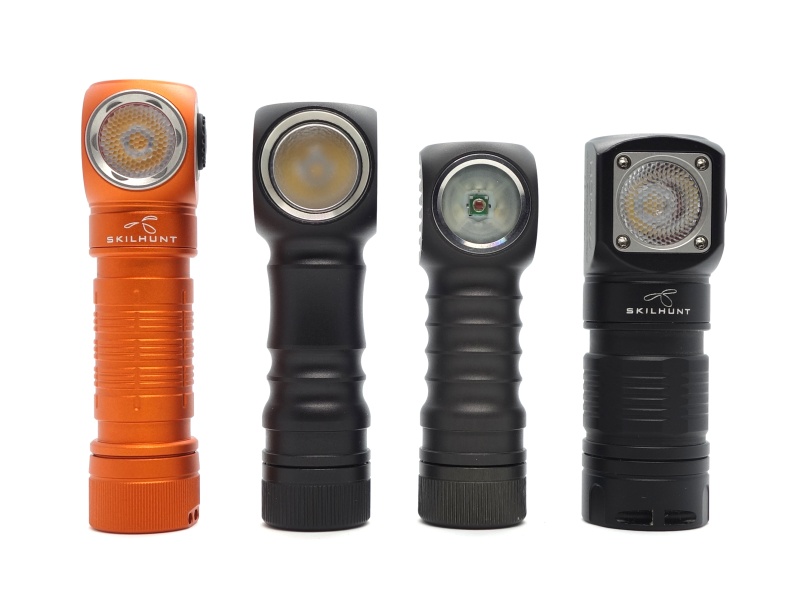
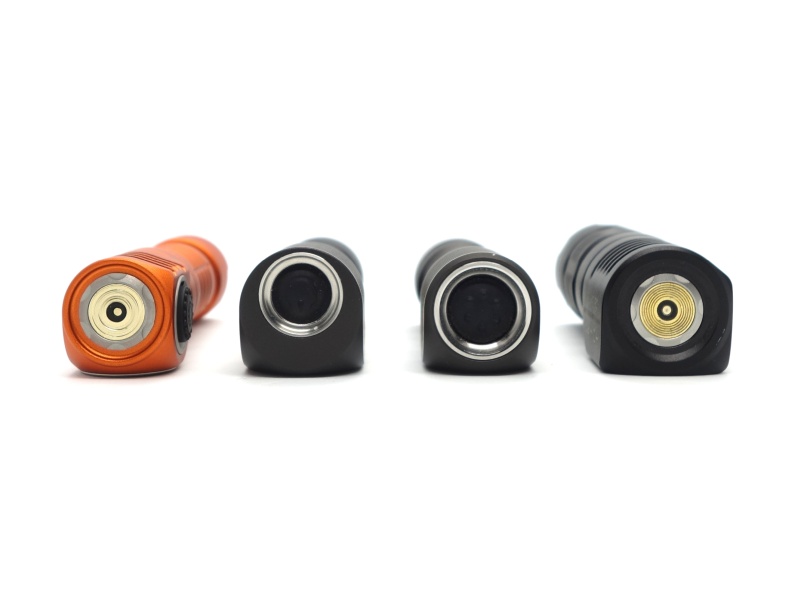
Size comparison with its competition#
From left to right: Skilhunt H150, ZebraLight H53Fc N, ZebraLight H502pr, Skilhunt H04 RC Mini
From left to right: Skilhunt H150, ZebraLight H53Fc N, ZebraLight H502pr, Skilhunt H04 RC Mini
From left to right: Skilhunt H150, ZebraLight H53Fc N, ZebraLight H502pr, Skilhunt H04 RC Mini

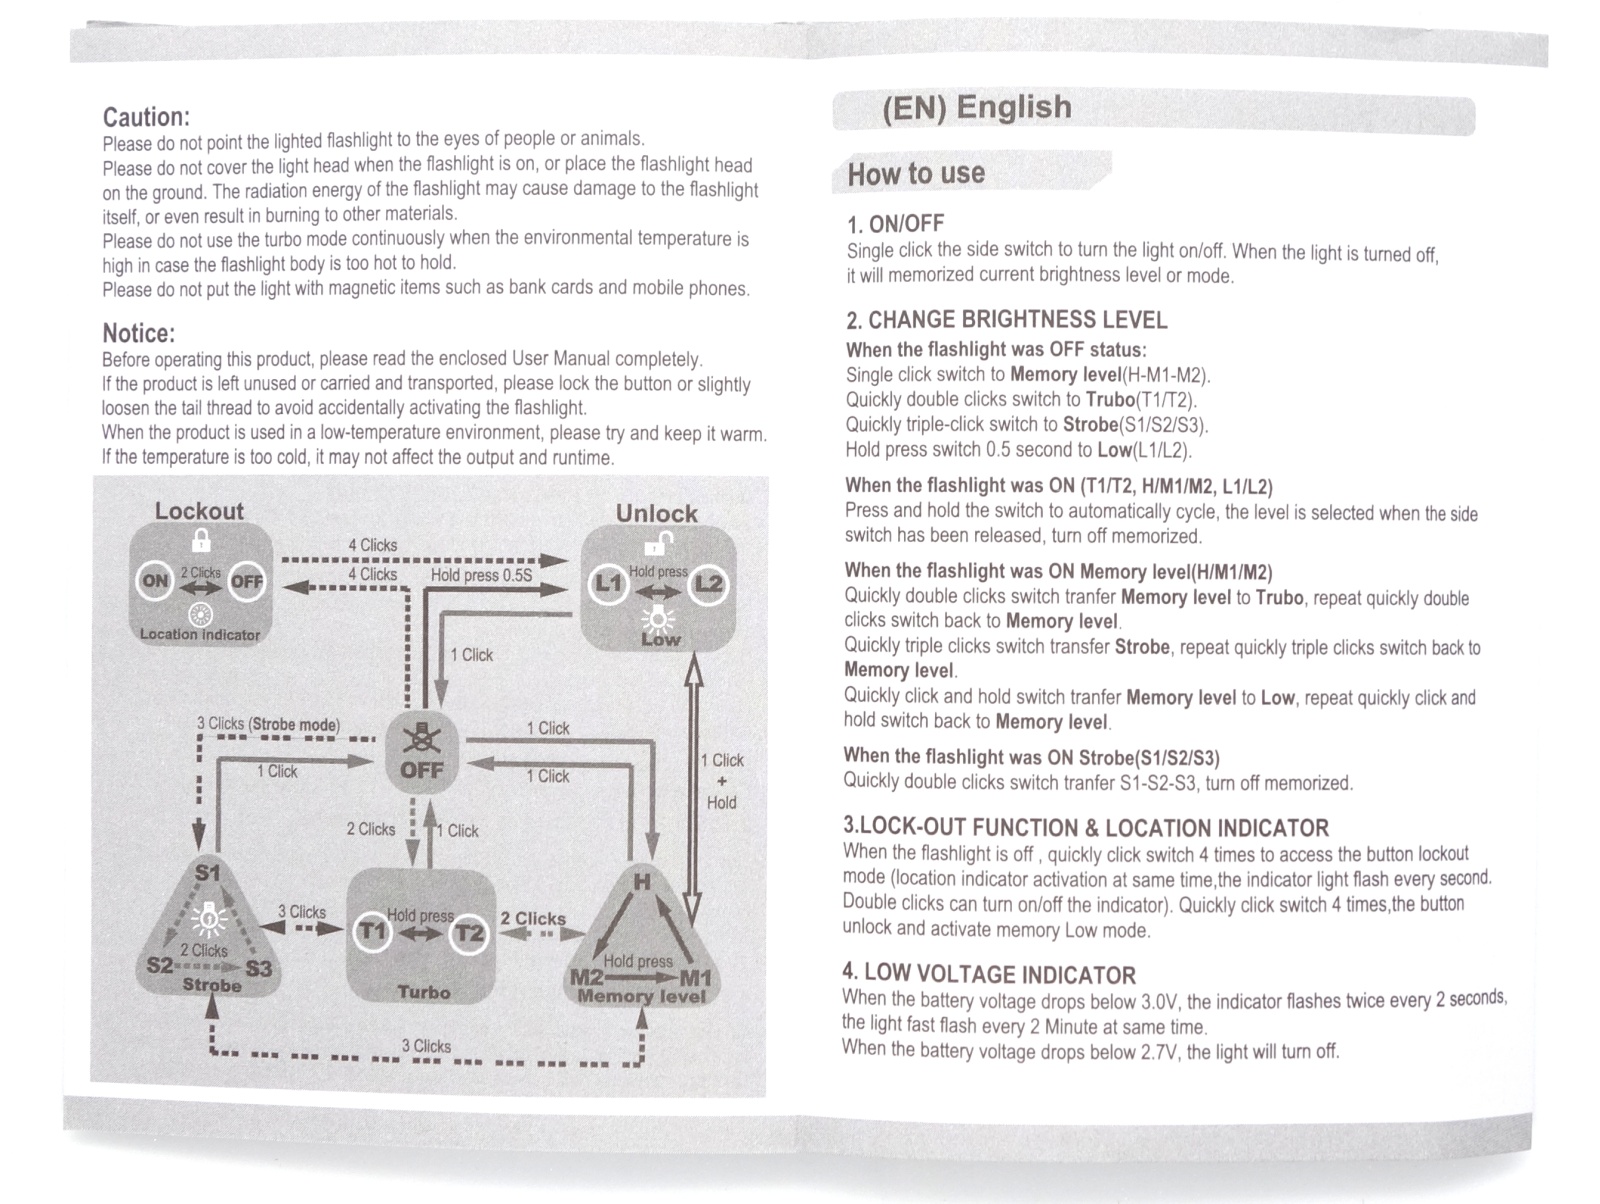
User interface#
The Skilhunt H150 is controlled by an electronic side switch.
There are seven main modes split across three groups (Low, Memory, Turbo):
- Low has: L1 and L2.
- Memory has: M1, M2 and H1.
- Turbo has: T1 and T2.
There are three blinkies: Strobe, SOS and Beacon.
There are shortcuts to Low, Turbo and Strobe from off.
| Group | State | Action | Result |
|---|---|---|---|
| Off | Click | Memory (mode memory) | |
| On | Click | Off | |
| Memory | On | Hold | Cycle (M2, M1, H1) |
| Memory | On | Two clicks and hold | Low (mode memory) |
| Memory | Off | Two clicks | Turbo (mode memory) |
| Memory | On | Three clicks | Strobe (mode memory) |
| Off | Press and hold for 0.5 seconds | Low (mode memory) | |
| Low | On | Hold | Cycle (L2, L1) |
| Low | On | Two clicks and hold | Memory (mode memory) |
| Off | Two clicks | Turbo (mode memory) | |
| Turbo | On | Hold | Cycle (T2, T1) |
| Turbo | On | Two clicks | Memory (mode memory) |
| Turbo | On | Three clicks | Strobe (mode memory) |
| Off | Three clicks | Strobe (mode memory) | |
| Strobe | On | Two clicks | Cycle (Strobe, SOS, Beacon) |
| Strobe | On | Three clicks | Previous group |
| Off | Four clicks | Lock | |
| Locked | Off | Click | Battery status indicator blinks red |
| Locked | Off | Hold | Momentary L1 |
| Locked | Off | Four clicks | Unlock and L1 |
| Locked | Off | Two clicks | Location indicator on |
| Locked | On | Two clicks | Location indicator off |
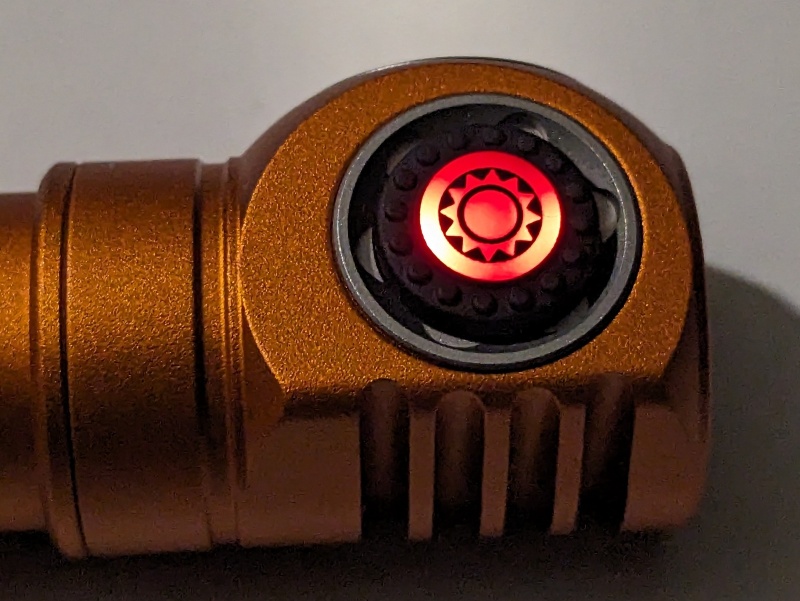
The location indicator is the red emitter in the button. It blinks like a beacon.
Strobe#
There are three different modes for Strobe: S1, S2 and S3.
- S1: Strobe with an alternating frequency.
- S2: SOS.
- S3: Beacon. Blink once per second.
The last used mode for Strobe is memorised when going back to Strobe via three clicks.
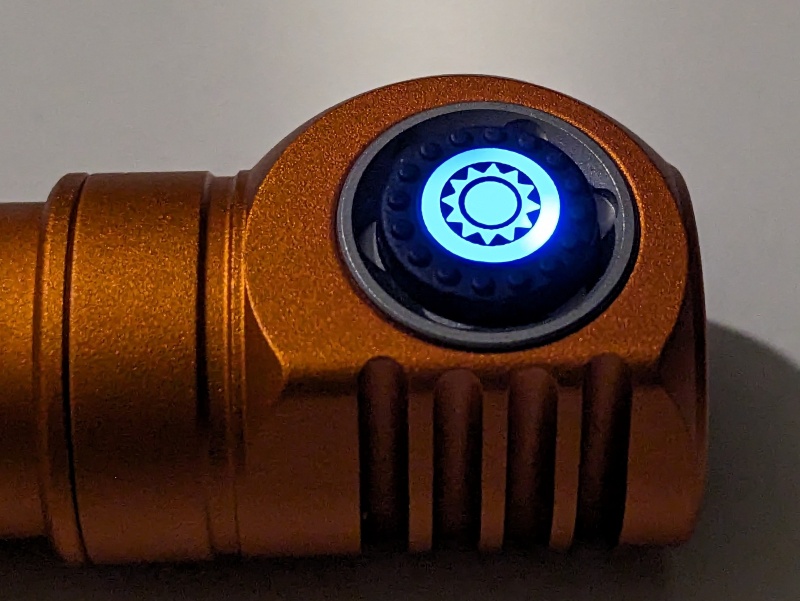
Battery status indicator#
The battery status indicator in the button will be displayed for 5 seconds when the headlamp has been turned on.
| Colour | Battery status |
|---|---|
| Blue | 80% ≥ Capacity ≤ 100% |
| Blue blink | 50% ≥ Capacity < 80% |
| Red | 20% ≥ Capacity < 50% |
| Red flash | Capacity < 20% |
Low voltage protection#
There is low voltage protection for a Li-ion cell. The light turned off at 2.75V and the current stopped.
There is low voltage protection for a Ni-MH cell. The light turned off at 0.52V and the current stopped.
I tested low voltage protection by connecting the driver of the torch to a bench power supply and then by lowering the voltage from 4.20V to 0V for a Li-ion cell and from 1.5V to 0V for a Ni-MH cell.
PWM#
I did not notice any visible PWM (flickering).
What I like about the UI#
- Shortcuts to Low, Turbo and Strobe from off.
What could be improved#
There is no way to go from off to Strobe and then to Turbo as shown in the diagram in the user manual (i.e. three clicks and then three clicks). Those shortcuts will take you to Strobe and to the Memory group.
The headlamp can go from off to Turbo, to Strobe and back to Turbo (i.e. two clicks, three clicks, three clicks). This is a long way of saying that the diagram is a bit confusing.
It would be better if the Strobe group shared the same shortcut for cycling between S1, S2 and S3 (i.e. hold instead of two clicks). Two clicks could then be used to go from Strobe to Turbo so that the user interface is more consistent.
Batteries and charging#
Battery#
The included Skilhunt 14500 BL-108 800mAh 3.7V Li-ion cell arrived with a voltage of 3.81V.
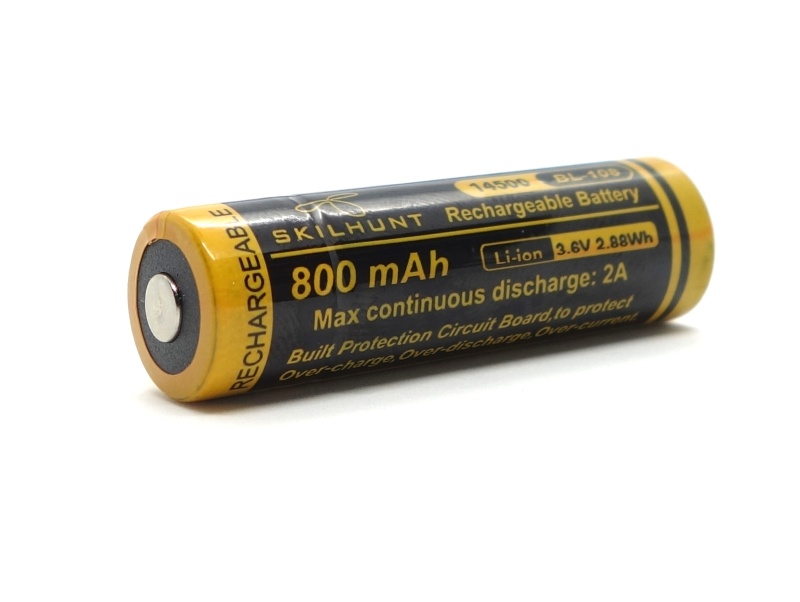
It came with a bit of plastic at the end to prevent accidental activation while in transit.
The H150 can work with a voltage between 0.8V to 4.2V.
Button top cells are required due to the reverse-polarity protection. A flat top Shockli 14500 cell worked but some flat top cells might have a wider flat top that presses against the reverse-polarity protection notch.
Charging#
The headlamp comes with a magnetic charging cable with a USB-A plug. The cable can be attached magnetically to the head of the headlamp.
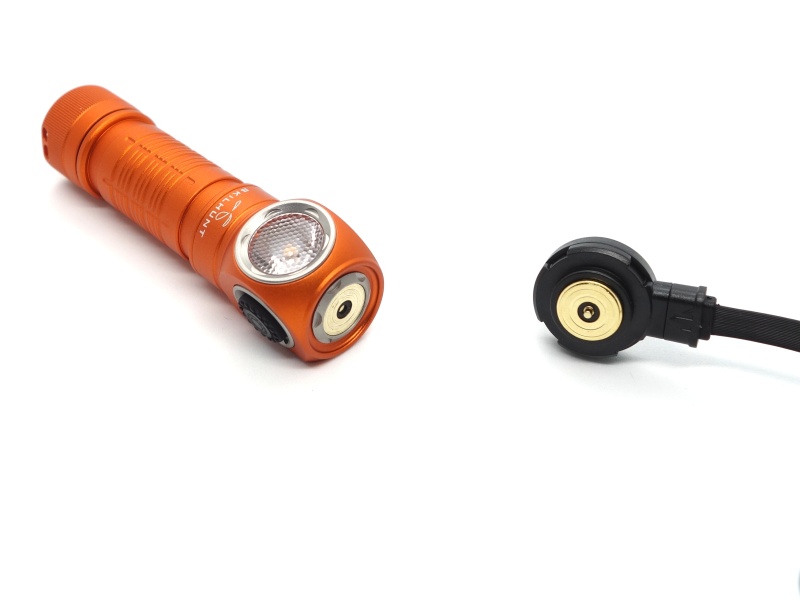
Magnetic charging only works with a 14500 3.7V Li-ion cell.
Skilhunt mention in the user manual that the charging circuit will be damaged if the battery is inserted incorrectly while charging.
Power supply: PinePower Desktop USB-C
USB Meter: AVHzY CT-3
Room temperature: 15 C
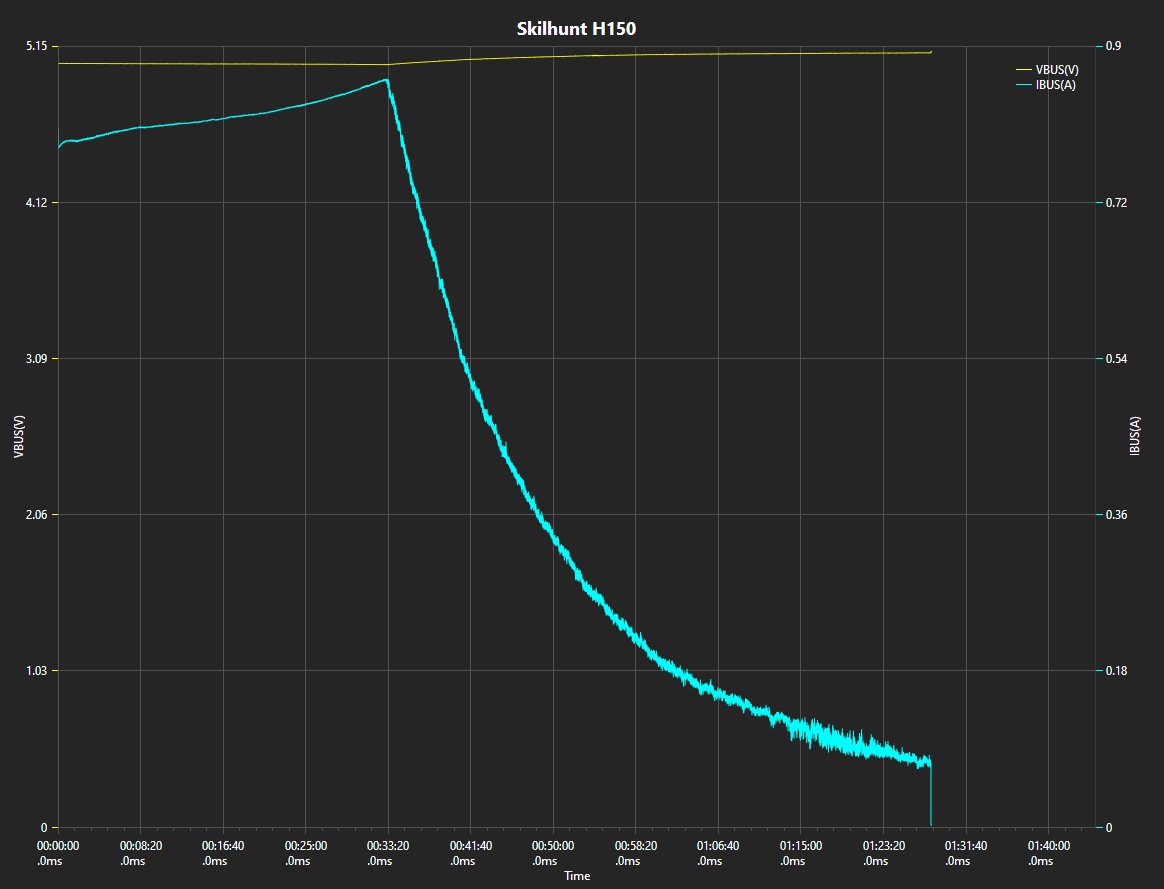
I charged the cell with the included magnetic charger from 3.30V to 4.14V. Charging completed after 1 hours 27 minutes. The charging rate was approximately 5V 1A.
Charging status indicator#
The charging indicator in the magnetic charger went red while charging and it went blue when charging was complete.

Performance#
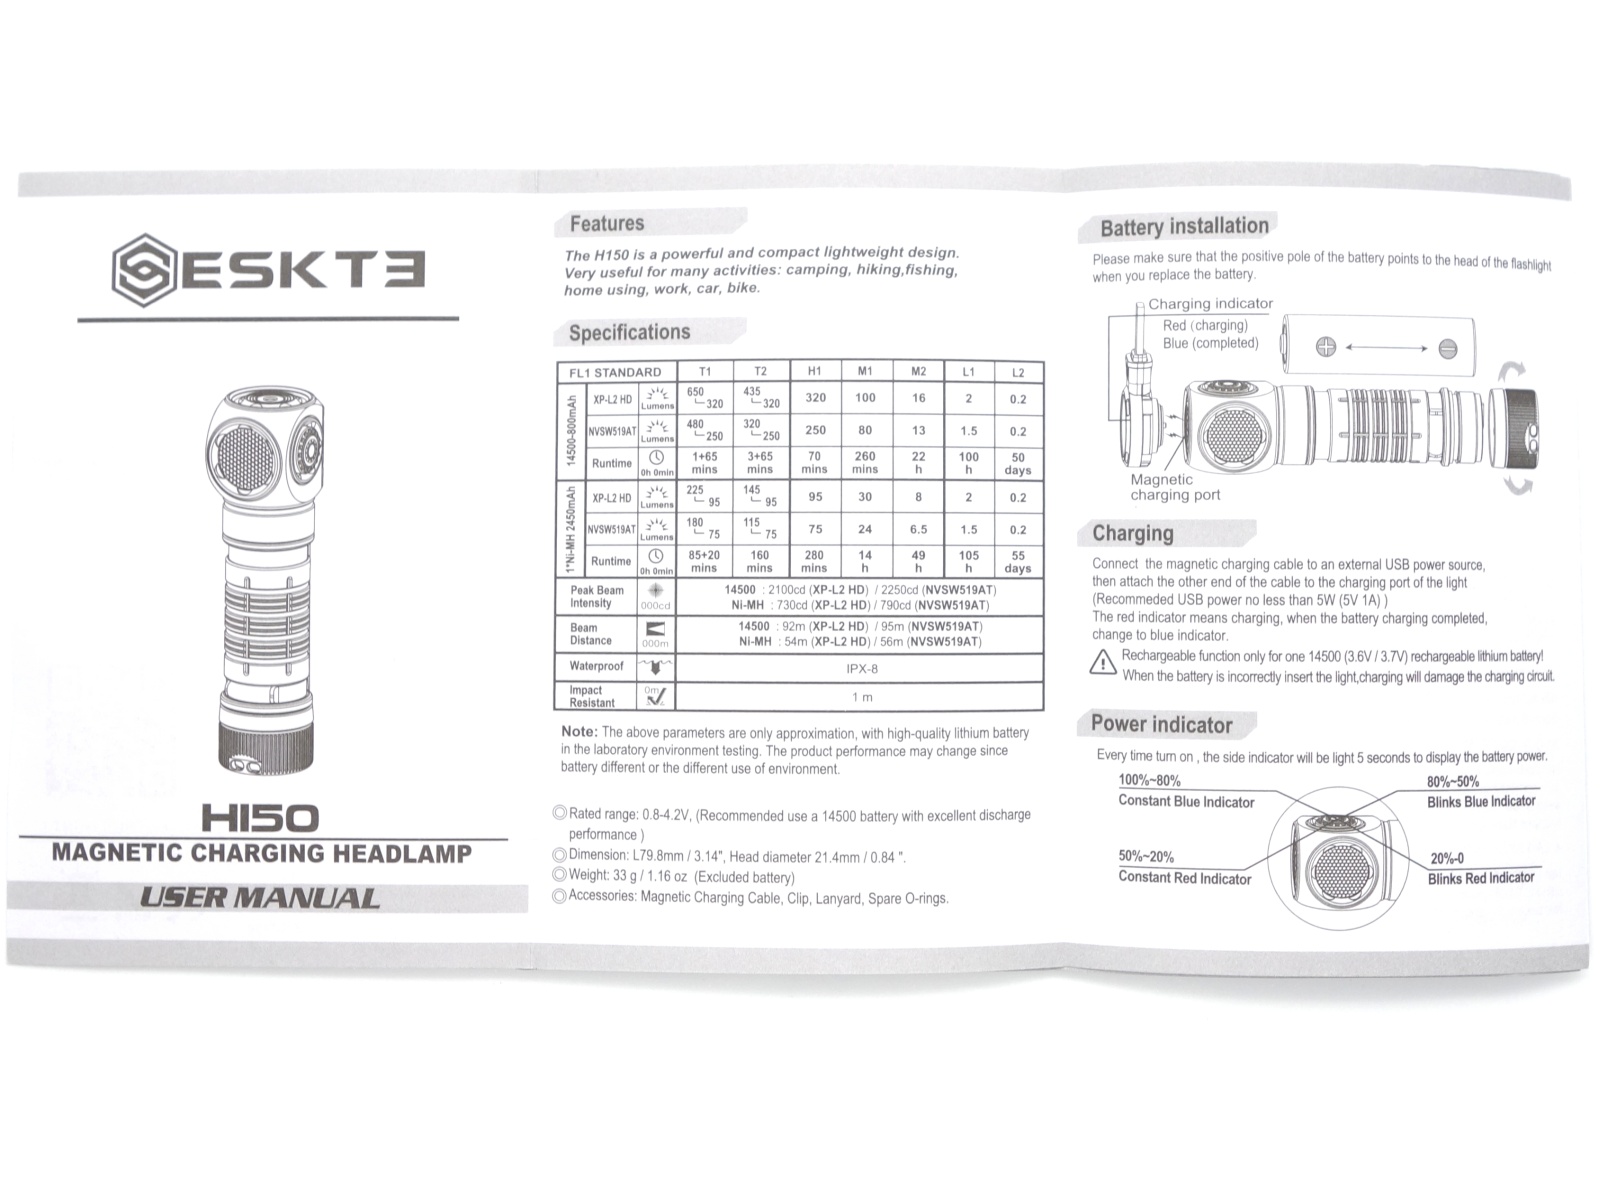
Specifications from the manual:
The following numbers are for a Nichia 519A emitter.
14500 800mAh
| FL1 STANDARD | T1 | T2 | H1 | M1 | M2 | L1 | L2 |
|---|---|---|---|---|---|---|---|
| Output (lumens) | 480 + 250 | 320 + 250 | 250 | 80 | 13 | 1.5 | 0.2 |
| Runtime | 1 + 65min | 3 + 65min | 70min | 260min | 22h | 100h | 50days |
| Beam Distance (metres) | 95 | ||||||
| Beam Intensity (cd) | 2,250 |
Ni-MH 2450mAh
| FL1 STANDARD | T1 | T2 | H1 | M1 | M2 | L1 | L2 |
|---|---|---|---|---|---|---|---|
| Output (lumens) | 180 + 75 | 115 + 75 | 75 | 24 | 6.5 | 1.5 | 0.2 |
| Runtime | 85 + 20min | 160min | 280min | 14h | 49h | 105h | 55days |
| Beam Distance (metres) | 56 | ||||||
| Beam Intensity (cd) | 790 |
I used an eneloop pro AA Ni-MH 1.2V 2450mAh cell and the included Skilhunt 14500 BL-108 800mAh 3.7V Li-ion cell for the following tests.
Lumen measurements#
I used a UNI-T UT210E clamp meter to measure the current at turn on.
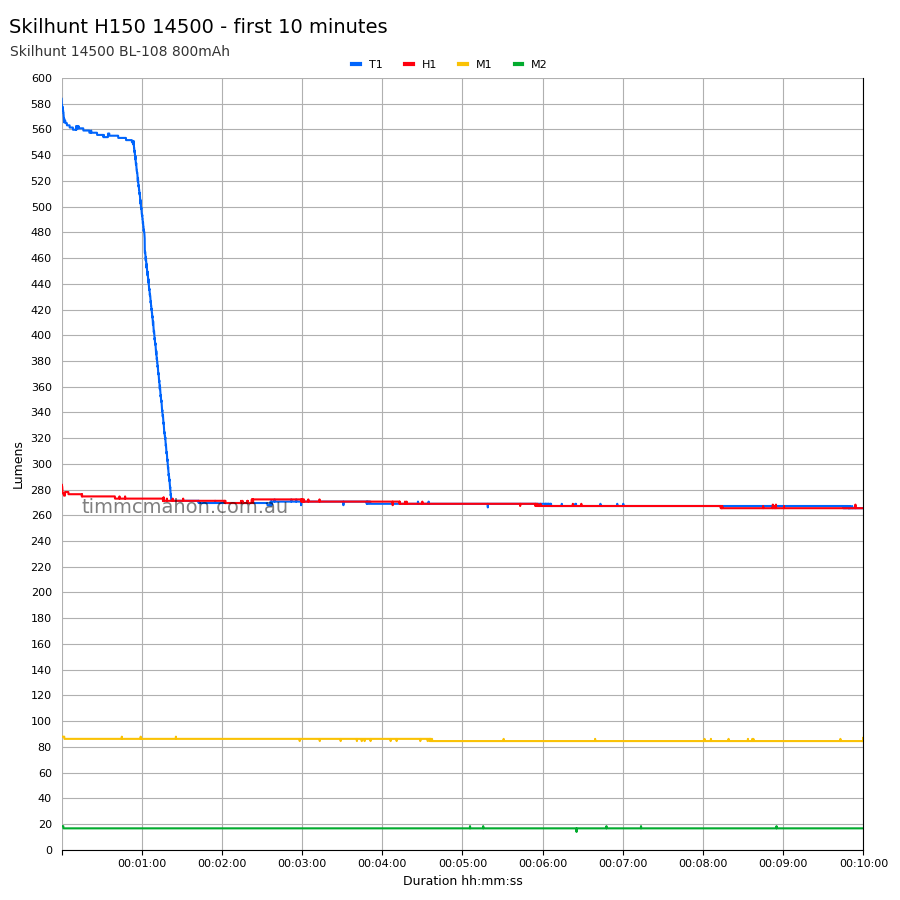
| Cell | Mode | Amps at start | Specs | Lumens @turn on | Lumens @30 sec | Lumens @10 min |
|---|---|---|---|---|---|---|
| Ni-MH | M2 | 0.05 A | 6.5 | 7 | 7 | 7 |
| Ni-MH | M1 | 0.16 A | 24 | 27 | 29 | 29 |
| Ni-MH | H1 | 0.45 A | 75 | 82 | 76 | 78 |
| Ni-MH | T1 | 1.30 A | 180 + 75 | 194 | 190 | 186 |
| 14500 | M2 | 0.04 A | 13 | 18 | 16 | 16 |
| 14500 | M1 | 0.20 A | 80 | 87 | 86 | 84 |
| 14500 | H1 | 0.73 A | 250 | 283 | 274 | 265 |
| 14500 | T1 | 1.69 A | 480 + 250 | 583 | 555 | 265 |
This is slightly better than I expected. I thought that the warmer colour temperature of 3000K would result in a lower output. The numbers in the user manual probably refer to a Nichia 519A 4500K emitter.
Standby drain#
I measured 14.3 µA with a 14500 3.7V Li-ion cell inserted.
Measurements were taken using a UNI-T UT139C digital multimeter.
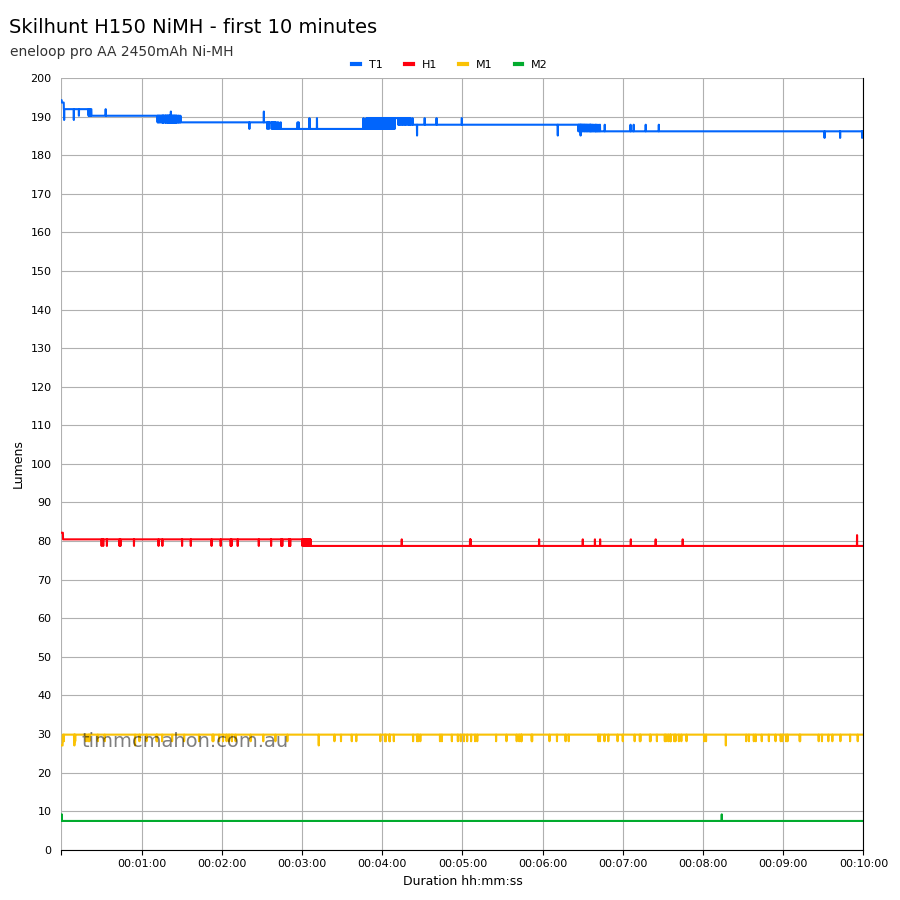
Runtime graphs#
I used my own DIY lumen tube with a TSL2591 sensor and forked bmengineer’s project RuTiTe to record runtimes.
Note: Lumen measurements may be off by 10% with my DIY lumen tube.
The room temperature was approximately 15 C.
Runtime#
Here is a summary of the runtime results:
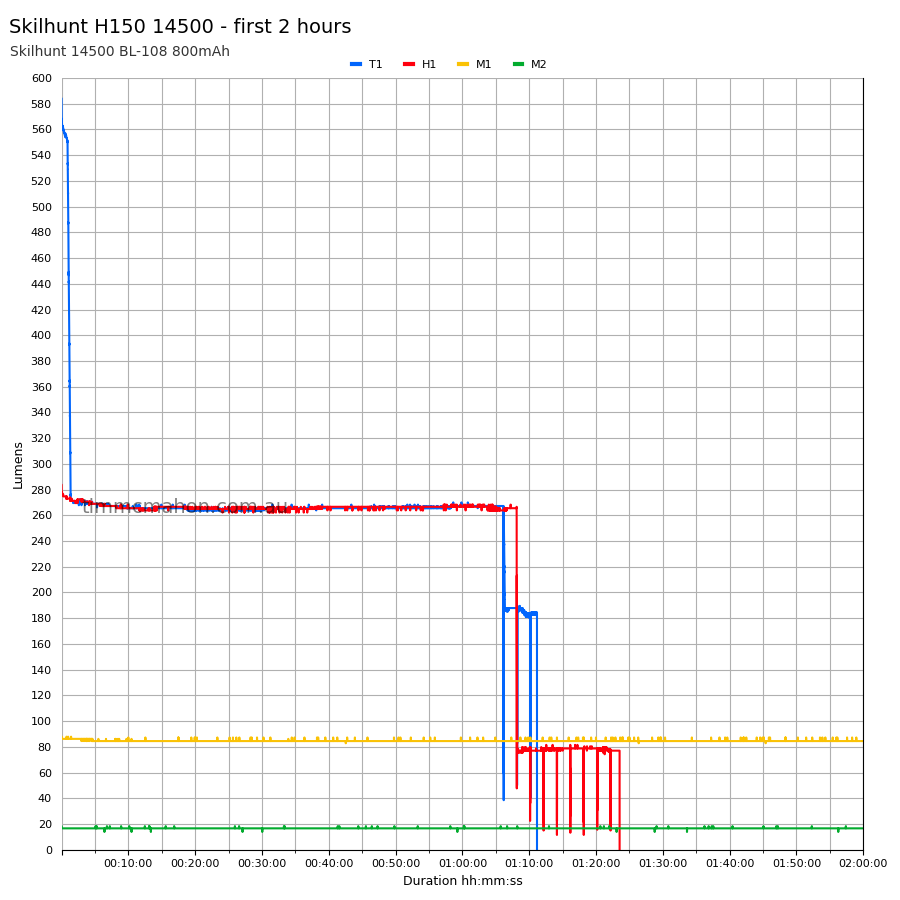
| Cell | Mode | User manual | Runtime | Turn off | Final voltage |
|---|---|---|---|---|---|
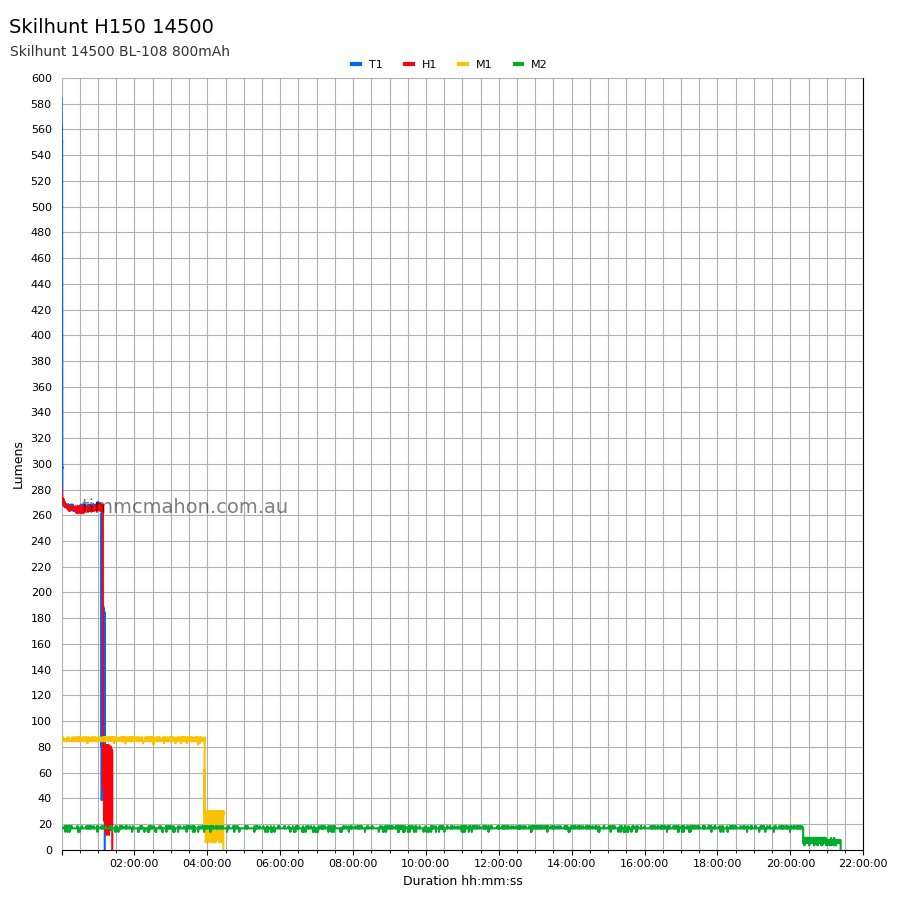
| 14500 | T1 | 1 + 65min | 1h 11min 16s | 1h 11min 16s | 3.23 |
| 14500 | H1 | 1h 10min | 1h 23min 31s | 1h 23min 31s | 3.18 |
| 14500 | M1 | 4h 20min | 4h 26min 31s | 4h 26min 31s | 3.13 |
| 14500 | M2 | 22h | 21h 22min 49s | 21h 22min 49s | 3.04 |
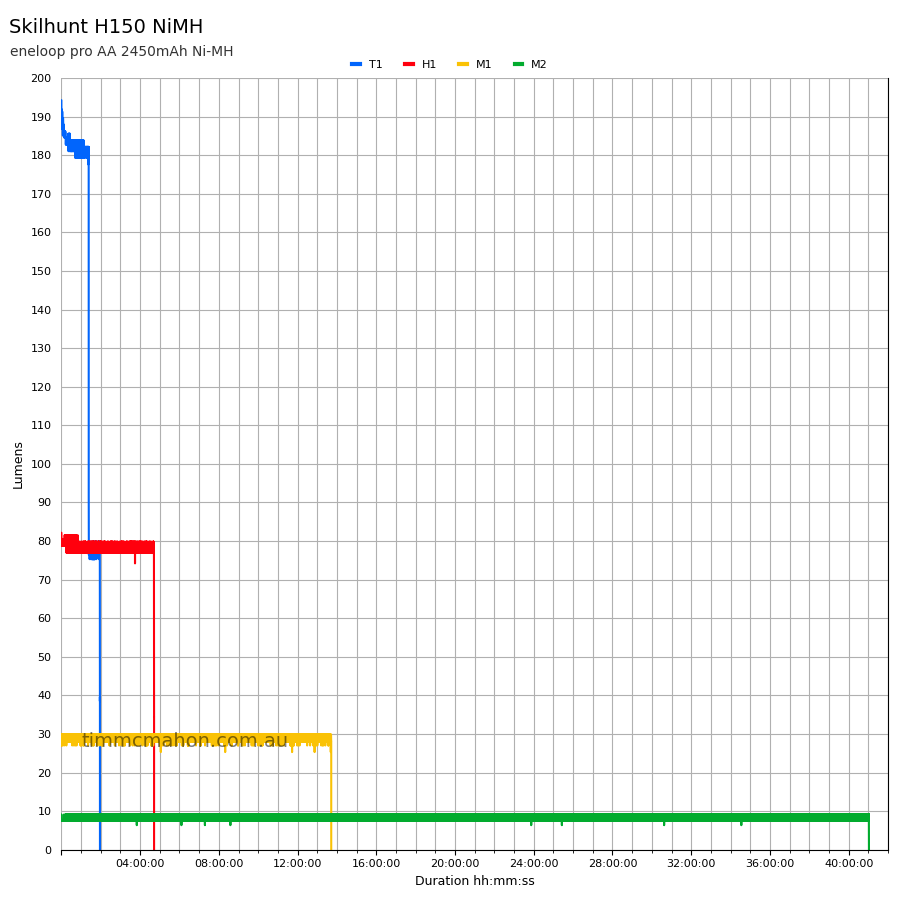
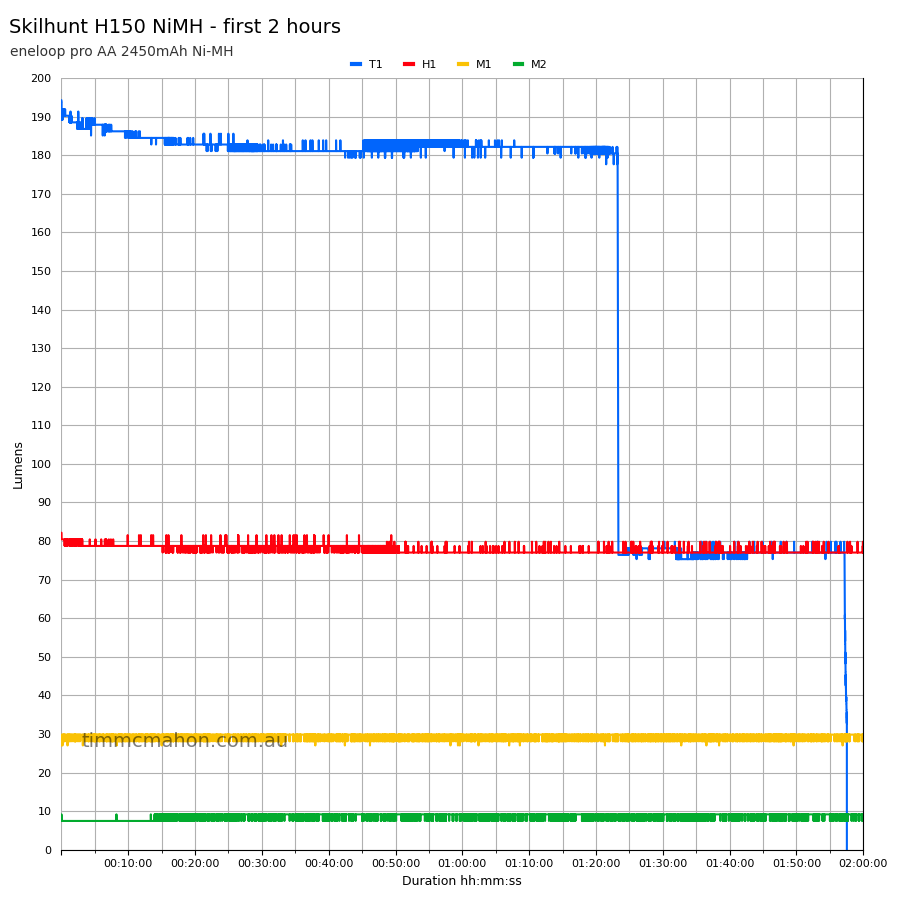
| Ni-MH | T1 | 85 + 20min | 1h 57min 34s | 1h 57min 34s | 1.15 |
| Ni-MH | H1 | 4h 40min | 4h 42min 35s | 4h 42min 35s | 1.16 |
| Ni-MH | M1 | 14h | 13h 42min 35s | 13h 42min 35s | 1.15 |
| Ni-MH | M2 | 49h | 41h 1min 59s | 41h 1min 59s | 1.20 |
“Runtime” is the time until the output reduces to 10% of the output at 30 seconds (as per the ANSI/PLATO FL1 2019 Standard).
“Turn off” is the time until my DIY lumen tube no longer detects more than 1 lumen.
“+” indicates that the light remained on after recording had stopped.
The runtime results are pretty close to what Skilhunt stated. Some of the runtimes for M1 and M2 were slightly shorter than expected (e.g. 22h vs 21h 22min 49s, 14h vs 13h 42min 35s, 49h vs 41h 1min 59s).
I am impressed by the well regulated output. Those are some straight lines!
Throw#
I took lux measurements with a UNI-T UT383BT at 30 seconds. M2, M1, H1 and T1 were measued at one metre.
| Cell | Mode | Specs (cd) | Specs (m) | Candela measured (cd) | Distance (m) |
|---|---|---|---|---|---|
| Ni-MH | M2 | 13 | 7 | ||
| Ni-MH | M1 | 54 | 14 | ||
| Ni-MH | H1 | 178 | 26 | ||
| Ni-MH | T1 | 790 | 56 | 410 | 40 |
| 14500 | M2 | 29 | 10 | ||
| 14500 | M1 | 179 | 26 | ||
| 14500 | H1 | 624 | 49 | ||
| 14500 | T1 | 2,250 | 95 | 1,308 | 72 |
The beam distance that I measured is slightly lower than the numbers in the user manual. I expected this due to the 3000K emitter.
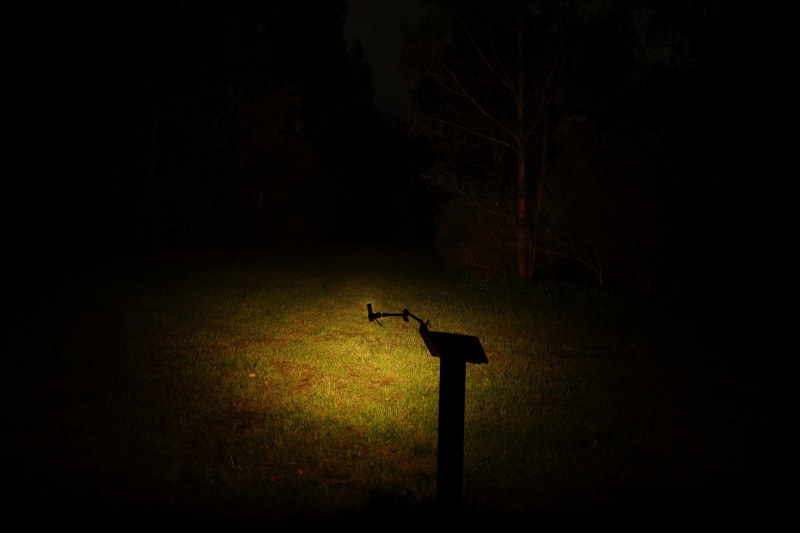
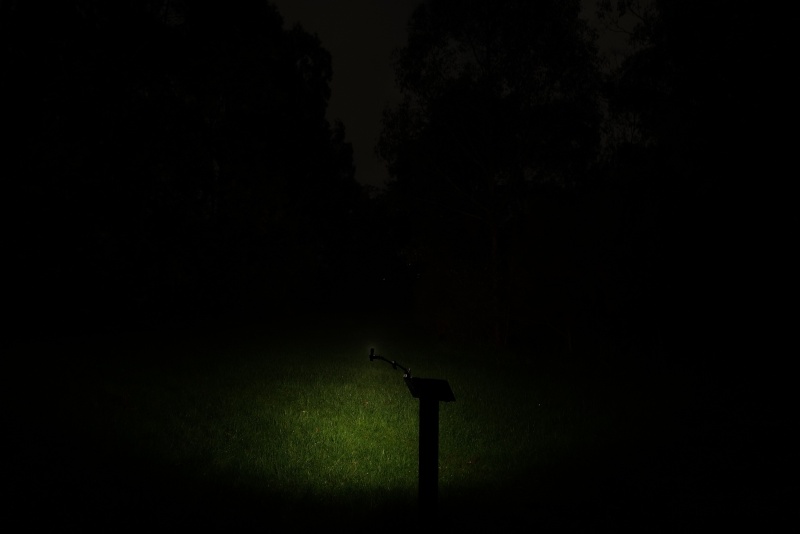
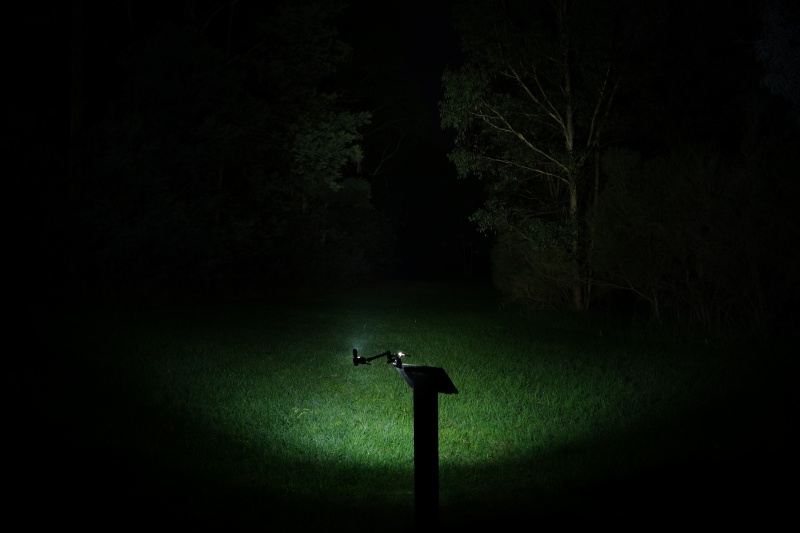
Beamshots#
I went to a local park and aimed the Skilhunt H150 at a tree 70 metres away while using T1.
Beamshots were taken using a Sony RX100M2 using 3.2", f3.2, ISO 100, 5000K WB.
Skilhunt H150 (T1)#
ZebraLight H53Fc N (H1)#
Acebeam H16 Gray (Turbo)#
Conclusion#
The Skilhunt H150 is currently my favourite AA sized multi-fuel headlamp.
The H150 supports AA Ni-MH and 14500 Li-ion cells, it is easy to modify and repair, and I like the user interface.
Despite the user interface being a bit complex to learn at first, I find it easier to use. It is nice how Skilhunt are trying to use the same user interface on their current lineup of torches.
The driver is efficient and produces a well regulated output. The runtimes look pretty similar to the ZebraLight H53Fc N.
Skilhunt are starting to spoil us for choice by offering various headlamps with Nichia 519A emitters in 4500K and now 3000K. I like the smooth warm beam produced by the 3000K emitter!
I highly recommend the Skilhunt H150 if you are looking for a AA sized headlamp.
Pros:#
- Good build quality.
- Warm colour temperature (3000K).
- High CRI.
- Great runtimes and output regulation.
- Comfortable headband with a good mount.
- Magnetic charging.
- Reversible pocket clip.
Cons:#
- Flat top 14500 cells may not work.
Price#
The Skilhunt H150 with a 14500 BL-108 battery is AU$79.15 at the time of writing.
It is sitting between the cost of an Acebeam H16 Gray and a ZebraLight H53Fc N.