Acebeam Terminator M2 EDC Torch Review

Acebeam Terminator M2#
- Specifications
- Introduction
- Torch in use
- Build quality
- LED, bezel, lens, reflector and beam
- Size and comparison
- User interface
- Batteries and charging
- Performance
- Beamshots
- Conclusion
- Price
- Product page
Specifications#
| Brand/model | Acebeam M2 |
|---|---|
| LED | Floodlight (3*Cool White 6500K), Spotlight (1*LED) |
| Maximum lumens | 3,200 lm |
| Maximum beam intensity | 62,500 cd |
| Maximum throw | 500 m |
| Battery | 1*18650 |
| Onboard charging | No (USB-C battery) |
| Material | Aluminium |
| Modes | 6 |
| Blinkies | Strobe, SOS |
| Reflector | Floodlight (TIR), Spotlight (lens) |
| Waterproof | IP68 |
| Review date | January 2024 |
Introduction#
The Acebeam Terminator M2 has a lot going on! It has a floodlight, a spotlight and an RGB AUX Light with seven colours. This EDC torch is powered by a single 18650 cell. And it is controlled by two switches.
Here is my video review of the Acebeam M2:
Acebeam kindly sent this torch for review. I have not been paid for this review nor have I held back my opinions of this torch.
Packaging#
The Acebeam M2 comes in a shiny blue and orange box with a window to see the torch.


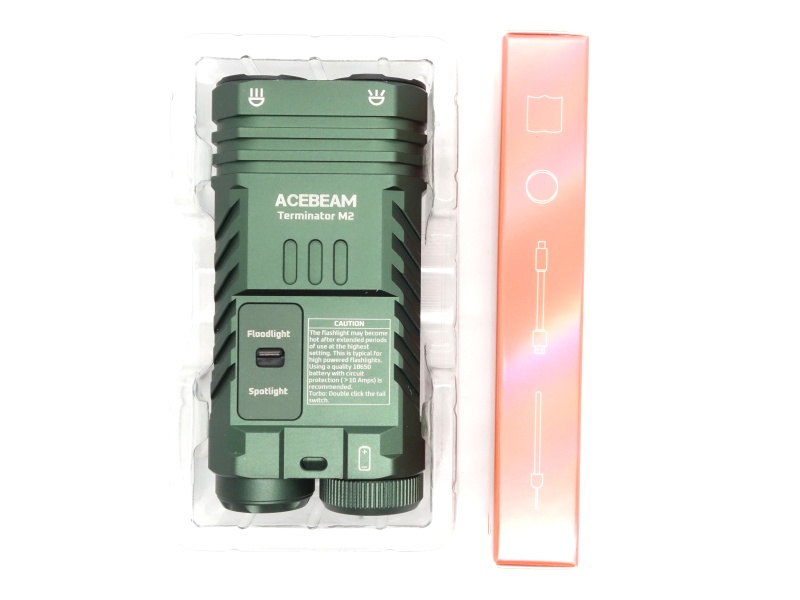
The following was included in the box:
- Acebeam M2
- Acebeam ARC18650H-310A 3100mAh battery
- USB-A to USB-C cable
- Two spare o-rings
- Lanyard
- User manual

Torch in use#
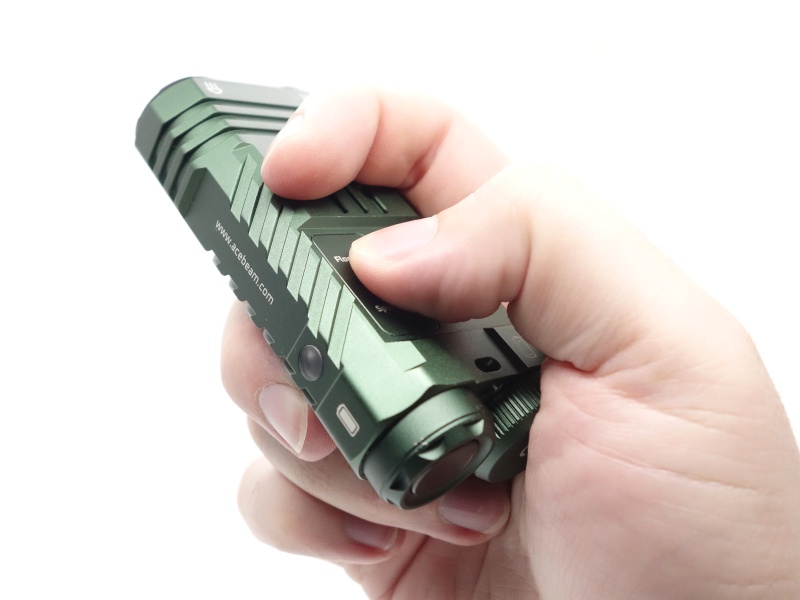
The Acebeam M2 feels compact in my hand.

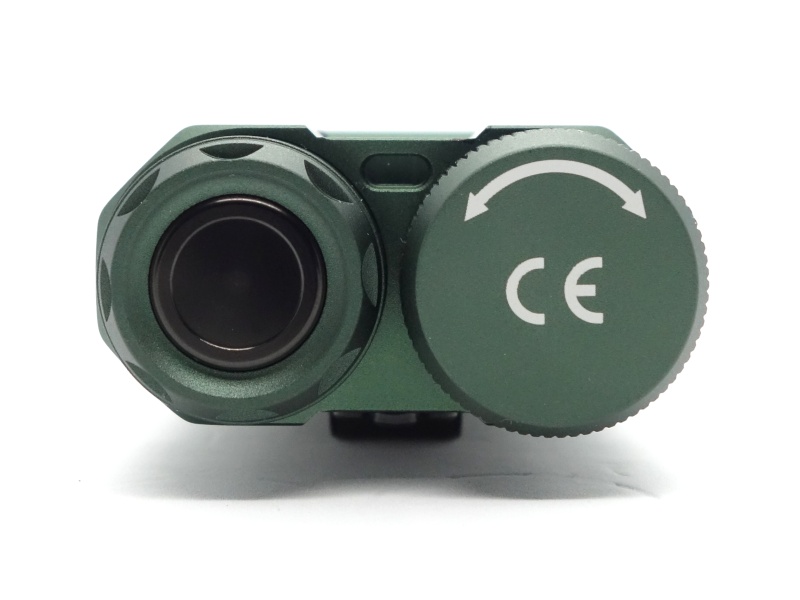
I like the symmetry of the floodlight and the spotlight.
I find myself changing from using an underhand grip, while carrying the torch, to a cigar grip while switching between the floodlight and the spotlight.
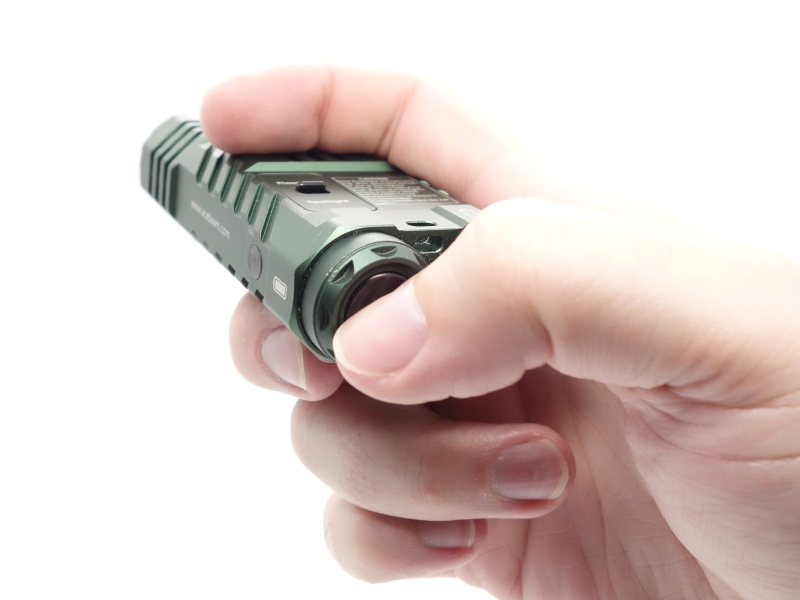
The tail button can be pressed to turn the torch on and off, and to change the brightness.
The side switch can be pushed or pulled to change between the floodlight and the spotlight.
I love being able to switch between the two! I can be walking along with a floodlight to see where I am going and then switch to a spotlight to check some noise that I hear in the distance (e.g. a kangaroo).
Here is an example of using the Acebeam M2 while lost in a park with Darren after comparing a bunch of powerful flooders and throwers.
Note: The thumbnail of that video is of a NEXTORCH T20L. Darren posted a full video of our adventure to the Maroondah Reservoir Park.
The torch can tailstand and there is a lanyard hole built into the torch.
The torch fits comfortably in my pocket.
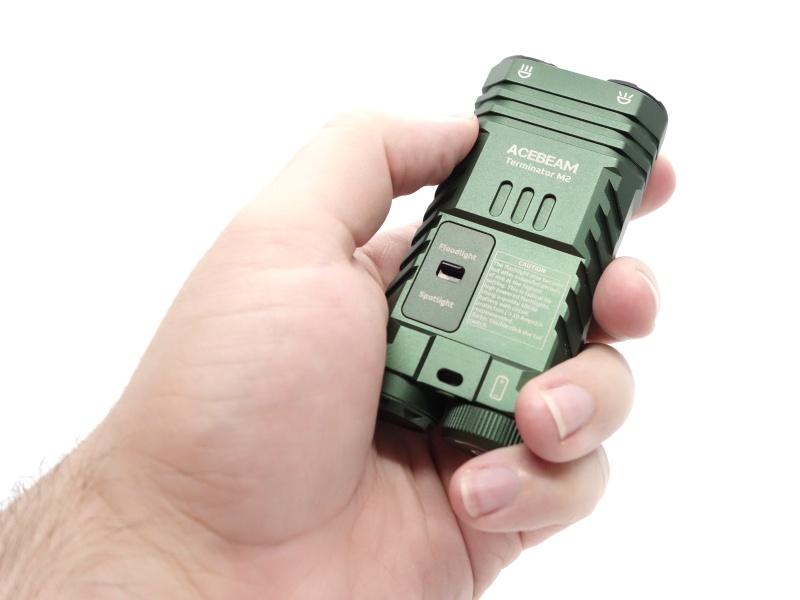
Build quality#
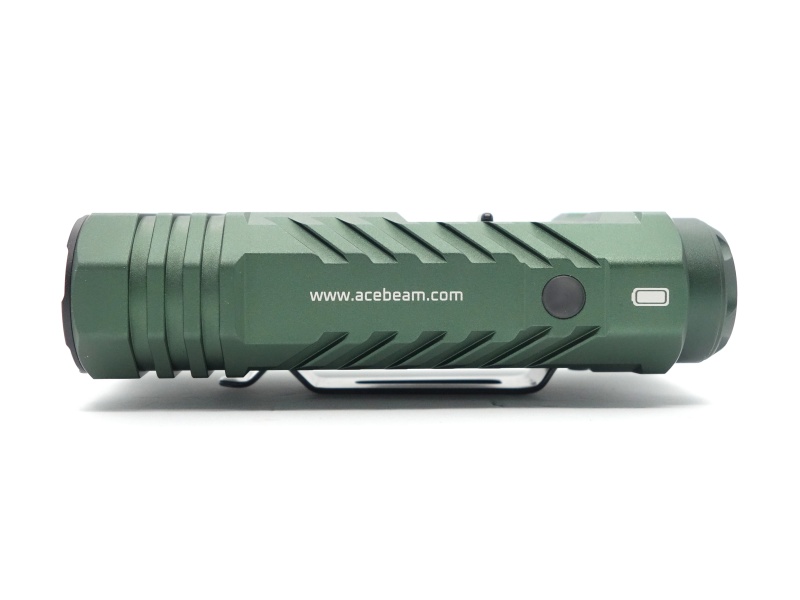
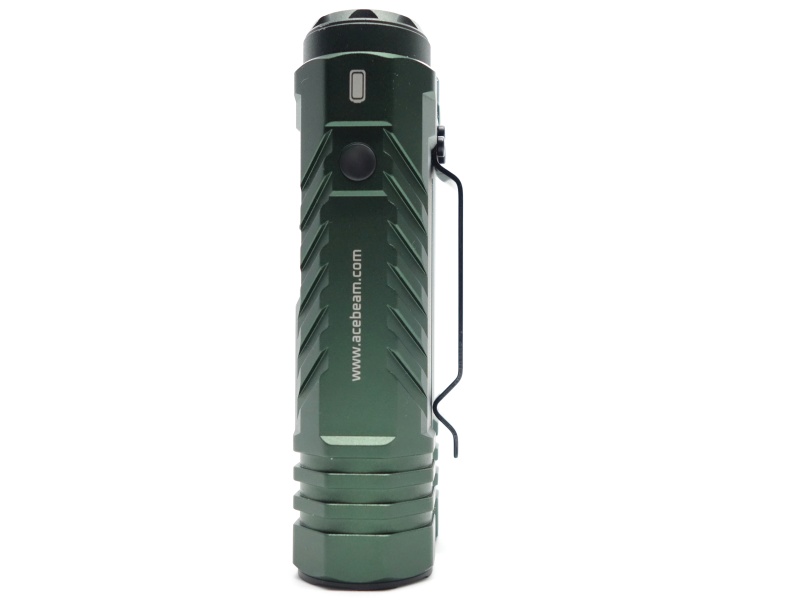
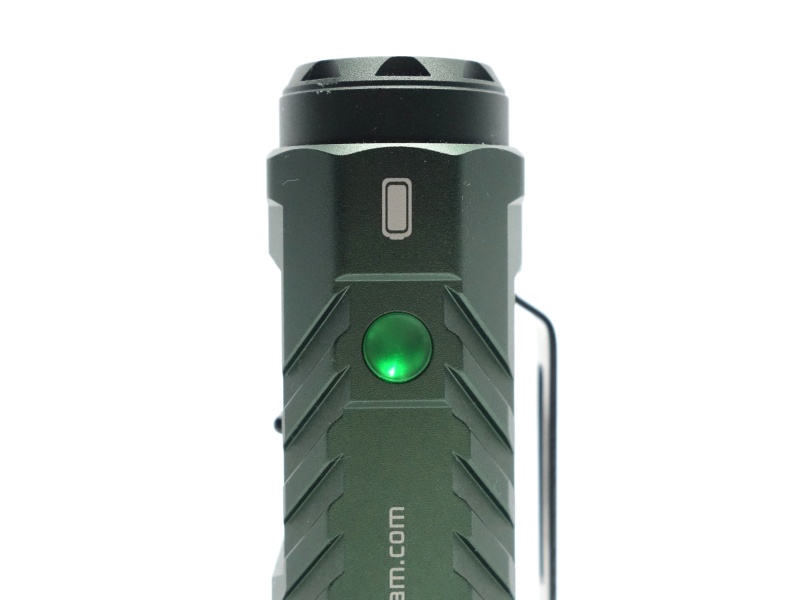
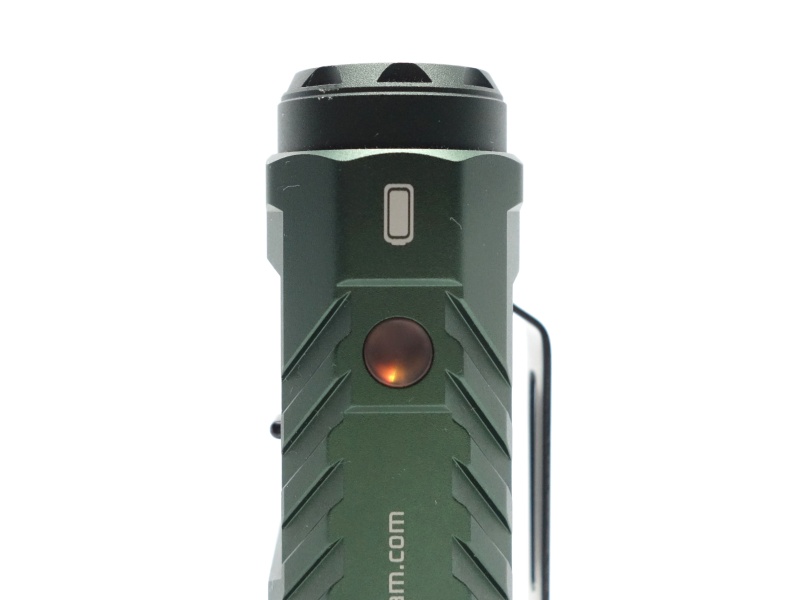
The Acebeam M2 has a matte green anodised finished. It is also available in black. There are no sharp edges.
There is plenty of grip. That said, I have dropped the Acebeam M2 a dozen times while leaning over with it in my shirt pocket.


The side switch clicks smoothly into place to switch between Floodlight and Spotlight.
There is a battery status indicator on the side of the torch. It displays green or red when the torch is on.
The tail button gives a satisfying click for an electronic switch. The button cover and bezel remind me of the Acebeam E70 Mini.
The pocket clip is ok. It is a bit stiff and does not have a deep carry design.
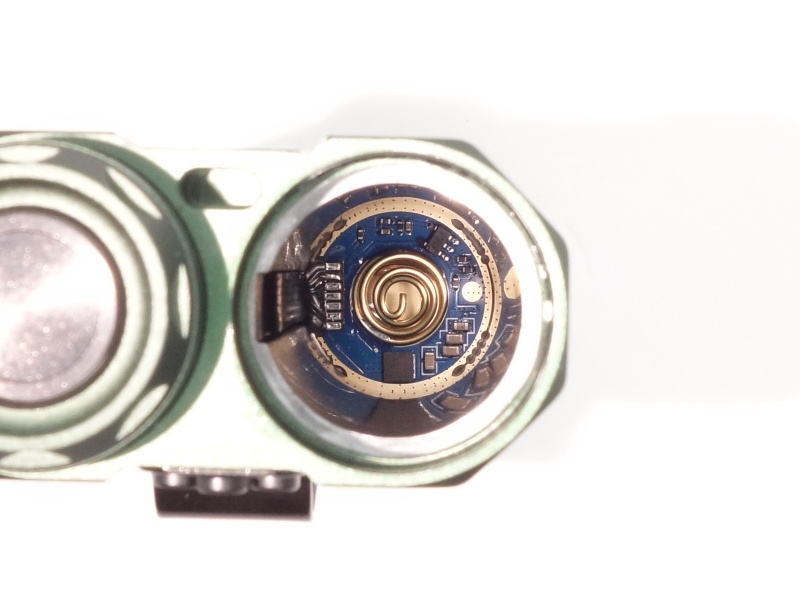
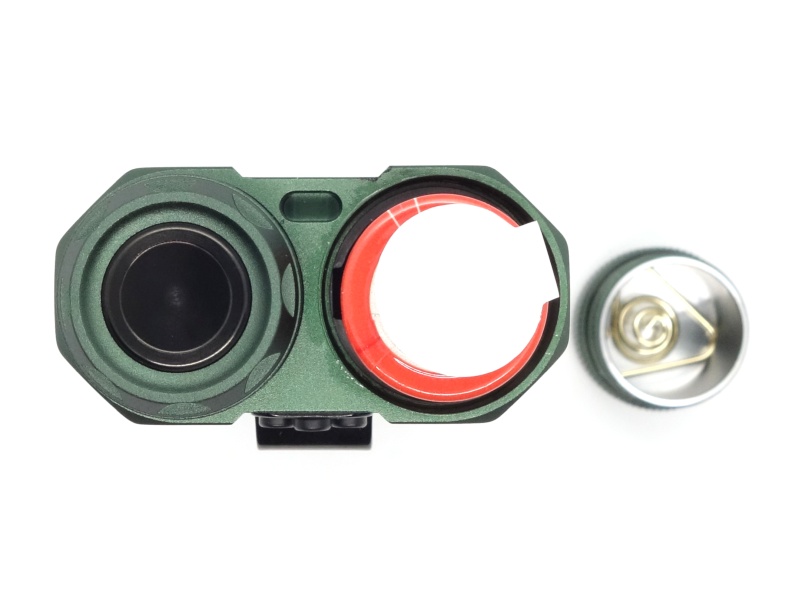
The threads have been anodised so the tailcap can be unscrewed slightly to disconnect the battery.
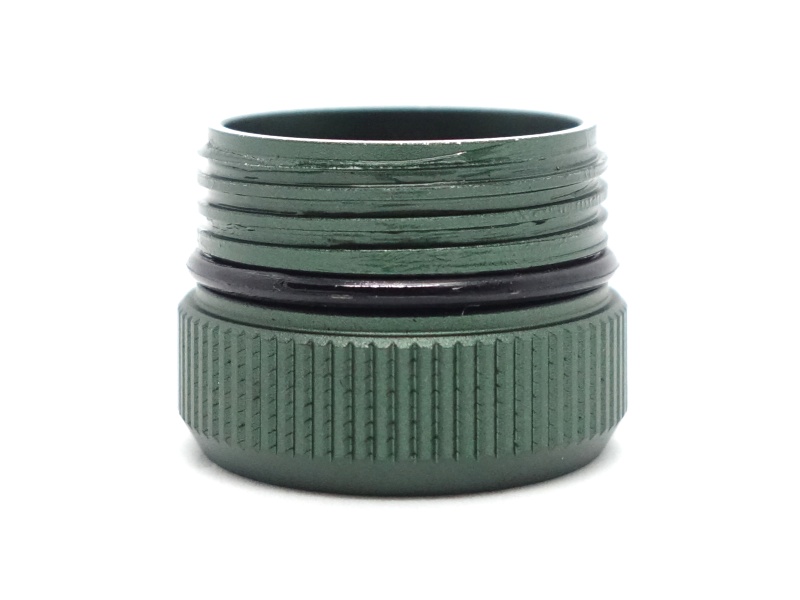
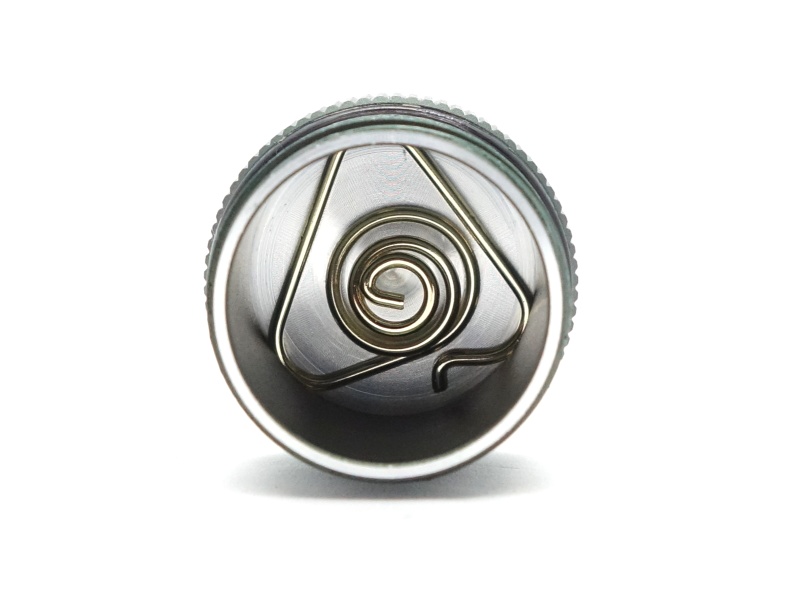
Springs at both ends allow short unprotected flat top 18650 cells to work.
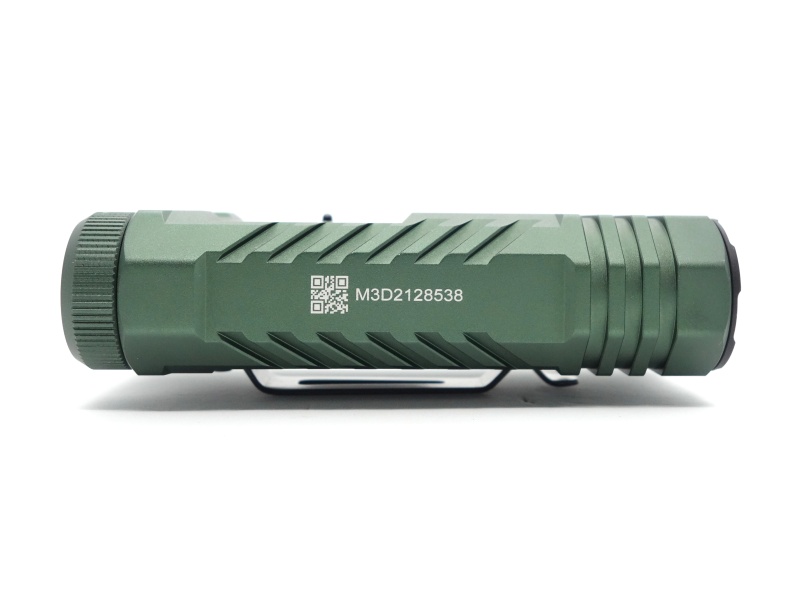
A lot of laser etching has been used.
- ACEBEAM
- Terminator M2
- Floodlight and Spotlight symbols near the emitters.
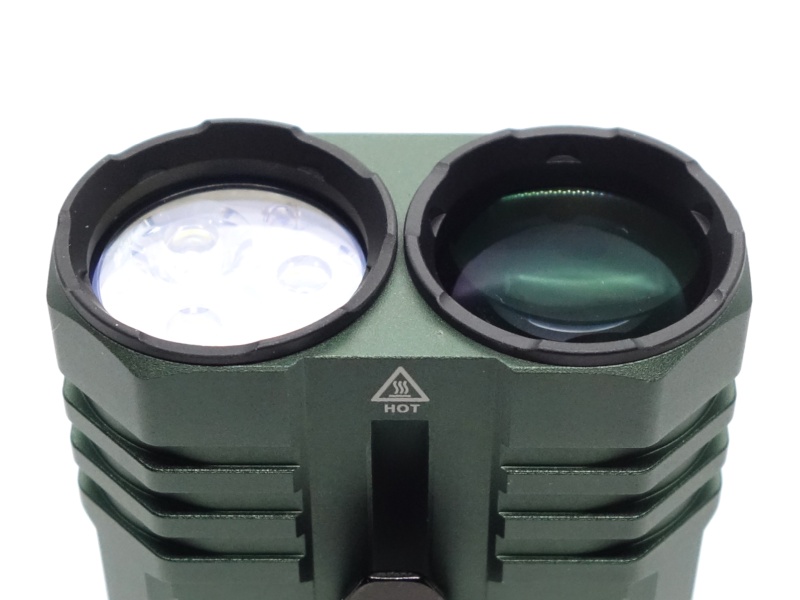
- Hot warning near the emitters.
- “Floodlight” and “Spotlight” near the side switch.
- Battery orientation symbol near the tail cap to assist with inserting a cell correctly.
- www.acebeam.com and a battery symbol near the battery status indicator.
- QR code and a serial number on the side.
- Arrow and CE symbol on the tailcap.
There is also a lot of text near the side switch:
CAUTION
The flashlight may become
hot after extended periods
of use at the highest
setting. This is typical for
high powered flashlights.
Using a quality 18650
battery with circuit
protection (> 10 Amps) is
recommended.
Turbo: Double click the tail switch.
Reverse polarity protection appears to work. I checked RPP with a digital multimeter at first to see if the battery would be shorted. I then inserted an unprotected 18650 cell in backwards and the driver did not burn nor did the battery explode (don’t try this at home).
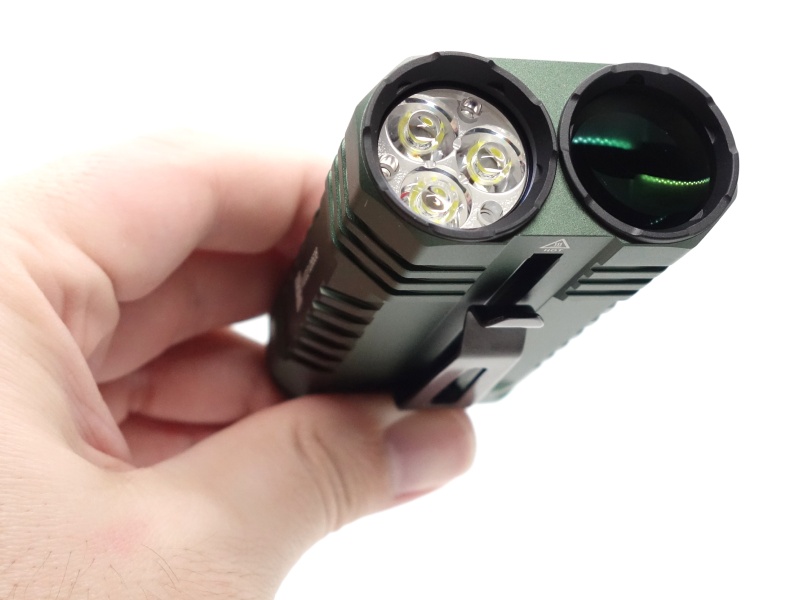
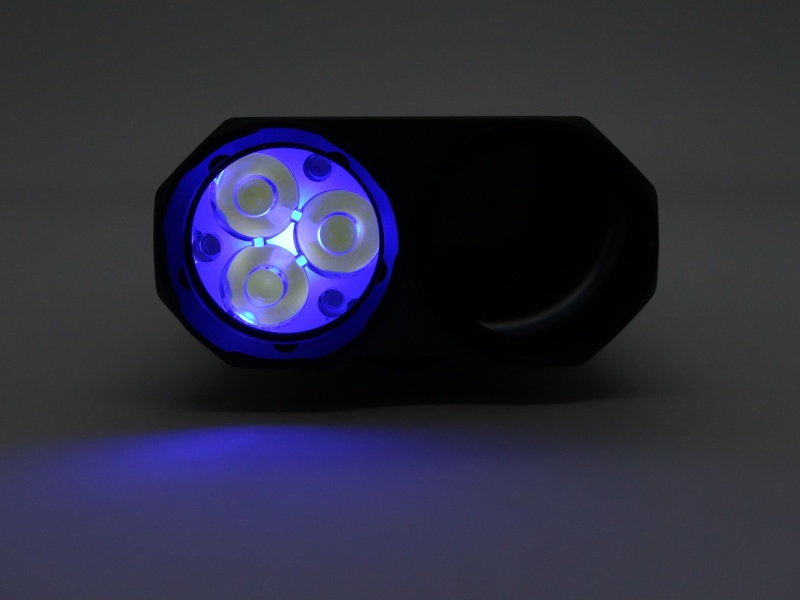
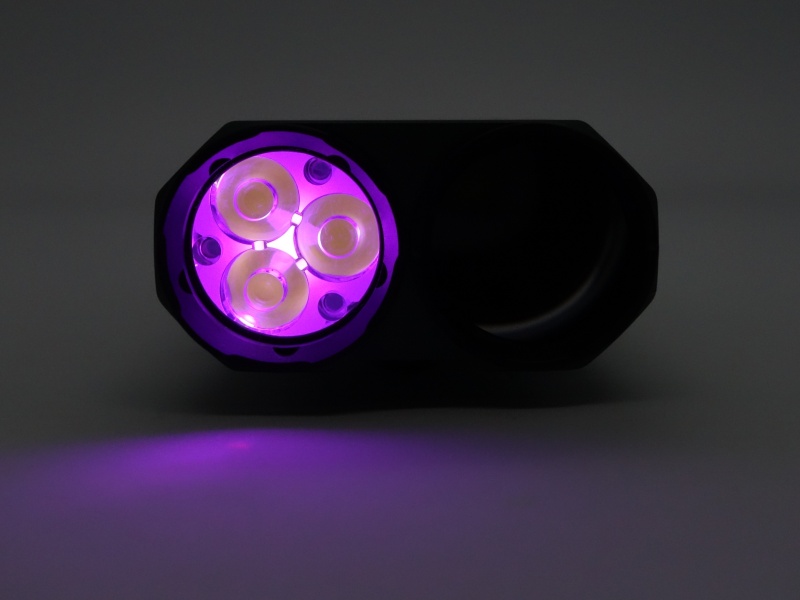
LED, bezel, lens, reflector and beam#
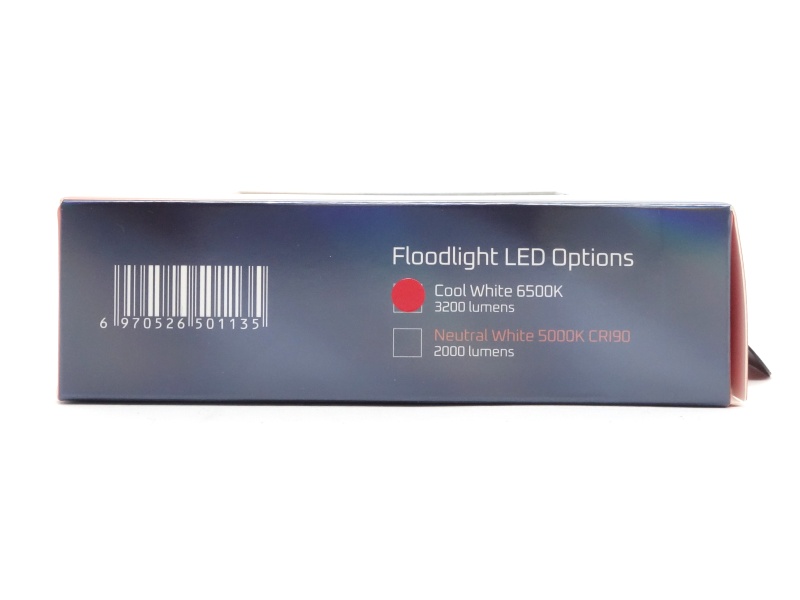
The green Acebeam M2 has three cool white 6500K emitters for the floodlight while the black Acebeam M2 has three neutral white (Nichia 519A 5000K 90 CRI) emitters for the floodlight.
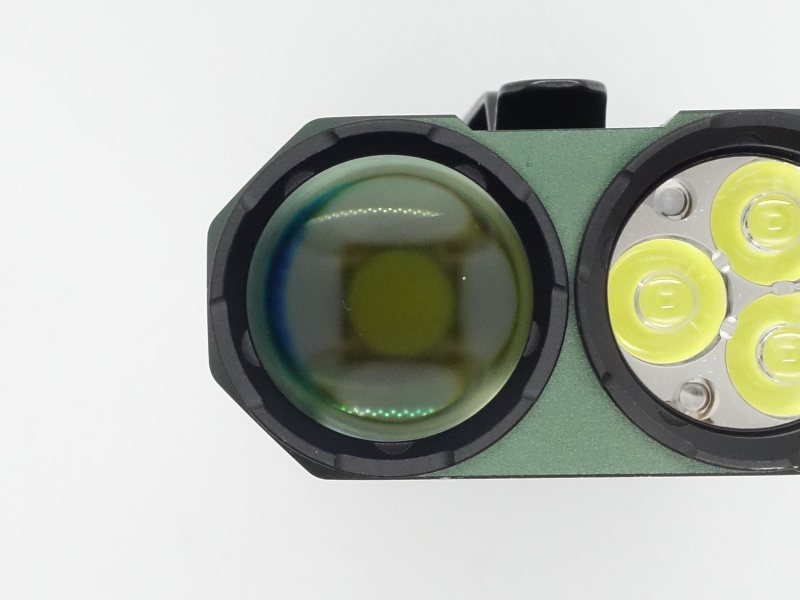
The floodlight emitters are behind a triple TIR optic.
There appears to be a glass lens with a blue anti-reflective coating in front of the TIR optic.
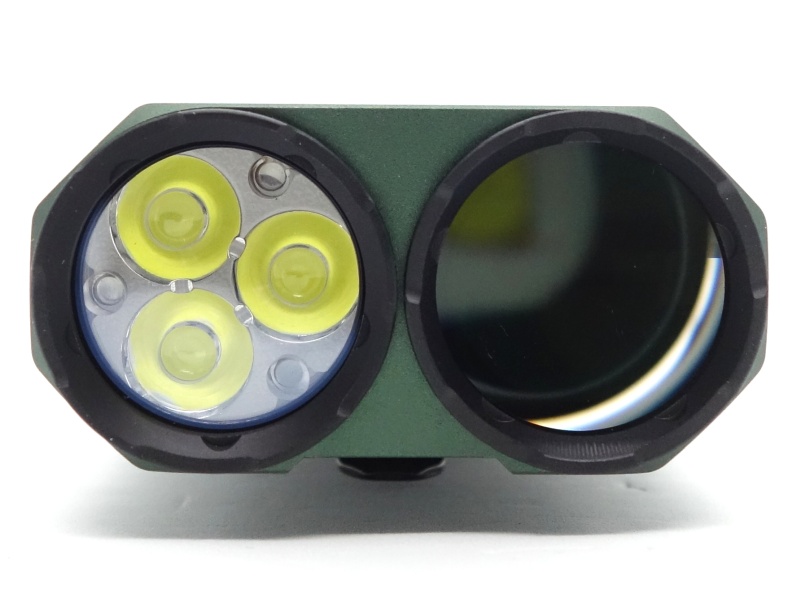
The spotlight has a throwy emitter behind a big lens.
The bezel gives a tactical look but it is not sharp.
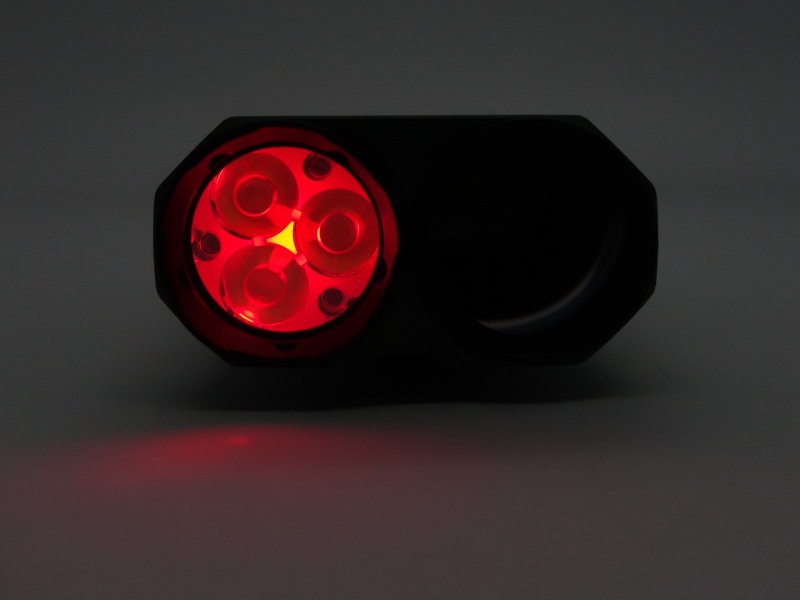
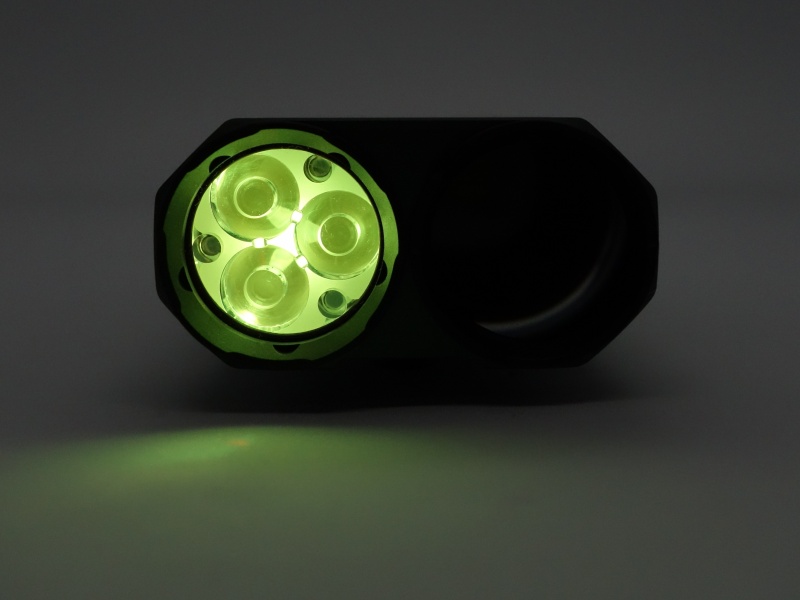
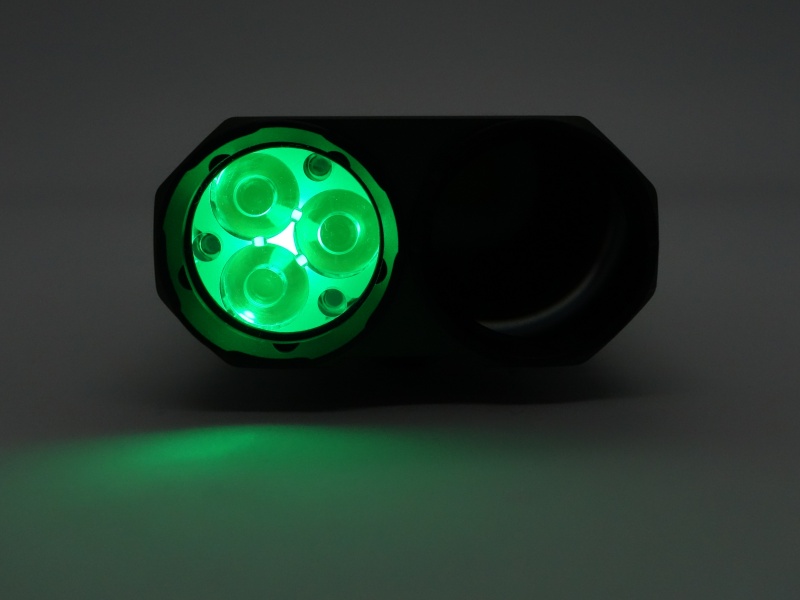
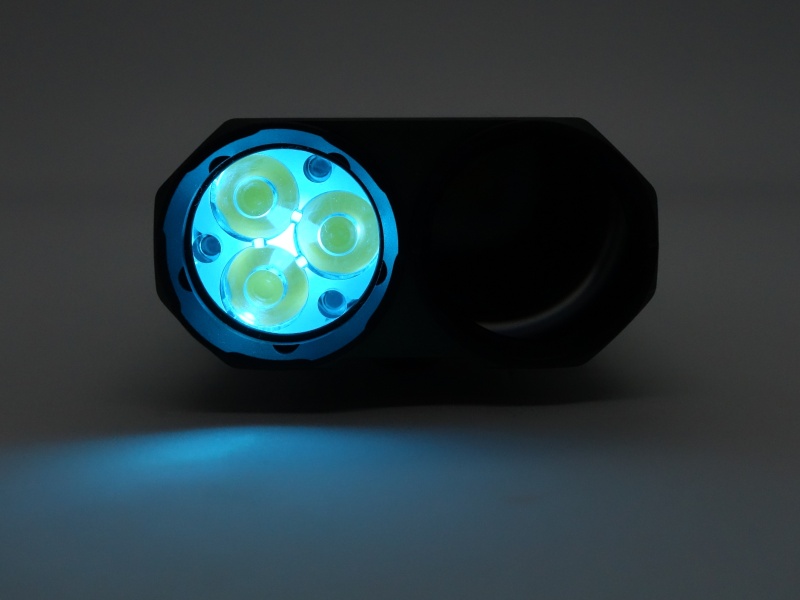
The seven colours for the AUX Light is as follows: red, yellow, green, light blue, dark blue, purple and white.

While wandering around Maroondah Reservoir Park, Darren and I compared the Neutral White and Cool White versions of the Acebeam M2:
https://www.youtube.com/watch?v=JoiVMGTQoJE&t=647s
I noticed that the spotlight on the black Acebeam M2 looked more intense at a distance of ten metres compared to the green Acebeam M2. This was a surprise. I expected them to be the same. Perhaps there is some variation with the emitter used for the spotlight.
I also noticed that the green Acebeam M2 takes almost a second to reach the maximum brightness while using Turbo (Floodlight) or Both (High). It looked almost instantaneous with the black Acebeam M2.
When Acebeam reached out, I asked for the cool white version to see if it would reach 3,200 lumens and be brighter overall. But, anecdotally, the black Acebeam M2 appears to have a more intense spotlight and the beam produced by the floodlight looks prettier (in my opinion).
CCT, CRI, and duv#
I have taken Correlated Colour Temperature (CCT) and Colour Rendering Index (CRI, RA of R1-R8) measurements with the torch positioned one metre away from an Opple Light Master Pro III (G3) for most modes. High (Spotlight) and High (Both) were measured at two metres. Moonlight (Floodlight) was measured at five centimetres.
The CCT is around 5500K for the floodlight and 6500K for the spotlight. The CRI is around 65 for the floodlight and 67 for the spotlight.
The Delta u, v is positive (green).
The beam produced by the floodlight has a big smooth hot spot. The triple TIR optic helps provide a bit of throw.
The beam produced by the spotlight is focused into a narrow hot spot. The hot spot looks like a ball of light on a wall one metre away. The centre is intense and it fades out toward the edge of the circle. There is a sharp yellow-green circle around the edge of the hot spot. A large dark donut pattern appears around the yellow-green circle.
The beam produced by both the spotlight and the floodlight looks like the beam produced by the spotlight but the dark donut pattern is filled with a floody white light.
| LED | Mode | CCT (K) | CRI (Ra) | x | y | Duv |
|---|---|---|---|---|---|---|
| Floodlight | Moonlight | 5616 | 64.9 | 0.3295 | 0.3625 | 0.0119 |
| Floodlight | Low | 5520 | 65.1 | 0.3320 | 0.3641 | 0.0116 |
| Floodlight | Med1 | 5507 | 65.4 | 0.3323 | 0.3636 | 0.0112 |
| Floodlight | Med2 | 5525 | 65.7 | 0.3318 | 0.3617 | 0.0105 |
| Floodlight | High | 5592 | 66.2 | 0.3302 | 0.3581 | 0.0095 |
| Floodlight | Turbo | 5730 | 67.4 | 0.3270 | 0.3509 | 0.0074 |
| Spotlight | Low | 5801 | 62.8 | 0.3248 | 0.3630 | 0.0142 |
| Spotlight | High | 6511 | 67.1 | 0.3118 | 0.3348 | 0.0066 |
| Both | High | 6222 | 66.5 | 0.3167 | 0.3417 | 0.0076 |
Calculate Duv from CIE 1931 xy coordinates
Dimensions and size comparison#
Dimensions#
I took the following measurements using a digital caliper.
| Measurement | Unit (mm) |
|---|---|
| Length | 97.3 |
| Width | 49.25 |
| Height | 24.69 |
| Height with clip | 29.69 |
| Button diameter | 13.45 |
| Tube inside diameter | 18.8 |
| Battery diameter | 18.7 |
| Battery length | 70.1 |
Weight#
I took the following measurements using a digital scale.
| Weight | Unit (g) |
|---|---|
| Torch | 146.59 |
| Battery | 52.56 |
| Torch with battery | 199.15 |
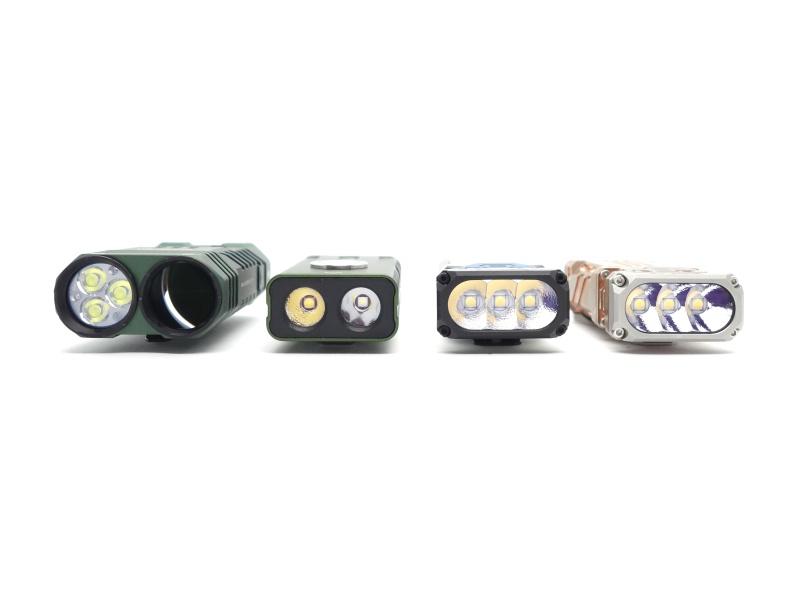
Size comparison with its competition#
From left to right: Acebeam M2, Manker F14, Wuben X2 White, Wuben X2 Copper

From left to right: Acebeam M2, Manker F14, Wuben X2 White, Wuben X2 Copper
User interface#
The Acebeam M2 has a tail switch and a magnetic control switch (side switch).
The floodlight has four main modes: Low, Med1, Med2 and High. There are also shortcuts to Moonlight and Turbo.
The spotlight has one mode: High (there is a secret Low mode).
Both the floodlight and spotlight can be turned on at the same time. It has one mode: High. There is also a Strobe mode.
The RGB Light has a Seven-Color automatic cycle and a second manual cycle group with five main modes: Red, Green, Blue, Green-Signal, Red-SOS.
Here is a quick demonstration of the user interface:
| Side Switch | State | Action | Result |
|---|---|---|---|
| Any | Off | Press and hold the tail switch for 3 seconds | Lock |
| Any | Locked | Click the tail switch | Battery level indicator flashes red and green |
| Floodlight | Locked | Press and hold the tail switch for 3 seconds | Unlock and floodlight on (Moonlight) |
| Spotlight | Locked | Press and hold the tail switch for 3 seconds | Unlock and spotlight on (Low) |
| Floodlight | Off | Press and hold the tail switch for 0.5 seconds | Floodlight on (Moonlight) |
| Floodlight | Off | Click the tail switch | Floodlight on (memory) |
| Floodlight | On | Press and hold the tail switch | Cycle (Low, Med1, Med2, High) |
| Floodlight | On, Off | Double click the tail switch | Floodlight (Turbo) |
| Floodlight | Floodlight (Turbo) | Double click the tail switch | Floodlight (memory) |
| Floodlight | On | Move the side switch to Spotlight | Floodlight off and spotlight on (High) |
| Spotlight | On | Move the side switch to Floodlight | Floodlight on (memory) and spotlight off |
| Spotlight | On | Click the tail switch | Off |
| Spotlight | Off | Click the tail switch | Spotlight on (High) |
| Spotlight | On | Press and hold the tail switch | Spotlight on (High) |
| Spotlight | On | Double click the tail switch | Nothing |
| Any | On, Off | Triple click the tail switch | Both (High) |
| Any | On, Off | Quadruple click the tail switch | Both (Strobe) |
| Any | Off | Press and hold the tail switch for 1 second | RGB Light on (Seven-Color) |
| Any | Seven-Color, RGB | Press and hold the tail switch | Cycle (Red, Green, Blue, Green-Signal, Red-SOS) |
Mode memory#
Moonlight, Turbo, Strobe, Seven-Color, Red, Green, Blue, Green-Signal and Red-SOS are not memorised.
Low, Med1, Med2 and High are memorised for the floodlight.
Strobe#
Strobe appear to have a frequency of 10 Hz.
Both the floodlight and spotlight turn on during the Strobe mode.
Battery level indicator#
The battery level indicator flashed red lights rapidly when the voltage was low.
The torch turns off when the voltage drops below 2.7V.
| Colour | Battery level |
|---|---|
| Green | Level > 20% |
| Red | 10% ≥ Level ≤ 20% |
| Red flash | Level < 10% |
Low voltage protection#
There is low voltage protection. The torch turns off around 2.67V and the battery status indicator displays red, followed by a flashing red light as the voltage drops.
I tested low voltage protection by connecting the head of the torch to a bench power supply and then by lowering the voltage from 4.2V to 0V for a 18650 Li-ion cell.
| LED | Mode | LVP? | Red light | Red flash | Cut-off |
|---|---|---|---|---|---|
| Floodlight | Moonlight | Yes | 3.19V | 2.88V | 2.71V |
| Floodlight | Low | Yes | 3.19V | 2.88V | 2.70V |
| Floodlight | Med1 | Yes | 3.21V | 2.87V | 2.69V |
| Floodlight | Med2 | Yes | 3.27V | 2.96V | 2.68V |
| Floodlight | High | Yes | 3.41V | 3.12V | 2.69V |
| Floodlight | Turbo | ? | |||
| Spotlight | High | Yes | 3.41V | 2.95V | 2.68V |
| Spotlight | Low | Yes | 3.17V | 2.86V | 2.67V |
| Both | High | ? |
Here is a video showing how I checked low voltage protection:
I have not checked low voltage protection while using Turbo (Floodlight) or High (Both) because my bench power supply has a limit of 5A and those modes require a higher current.
PWM#
I did not notice any visible PWM (flickering).
What I like about the UI#
- It is easy to switch between the floodlight and spotlight.
- Shortcut to Moonlight from off.
- Shortcut to Turbo from off.
- Shortcut to Both (High) from off.
- Shortcut to Both (Strobe) from off.
What could be improved#
- I would love to see the Spotlight have multiple levels like the Floodlight instead of just High. There is a hidden Low mode for the Spotlight after unlocking the torch, so it is possible.
- SOS should use a white light instead of a red AUX Light. It is difficult to see red in an emergency.
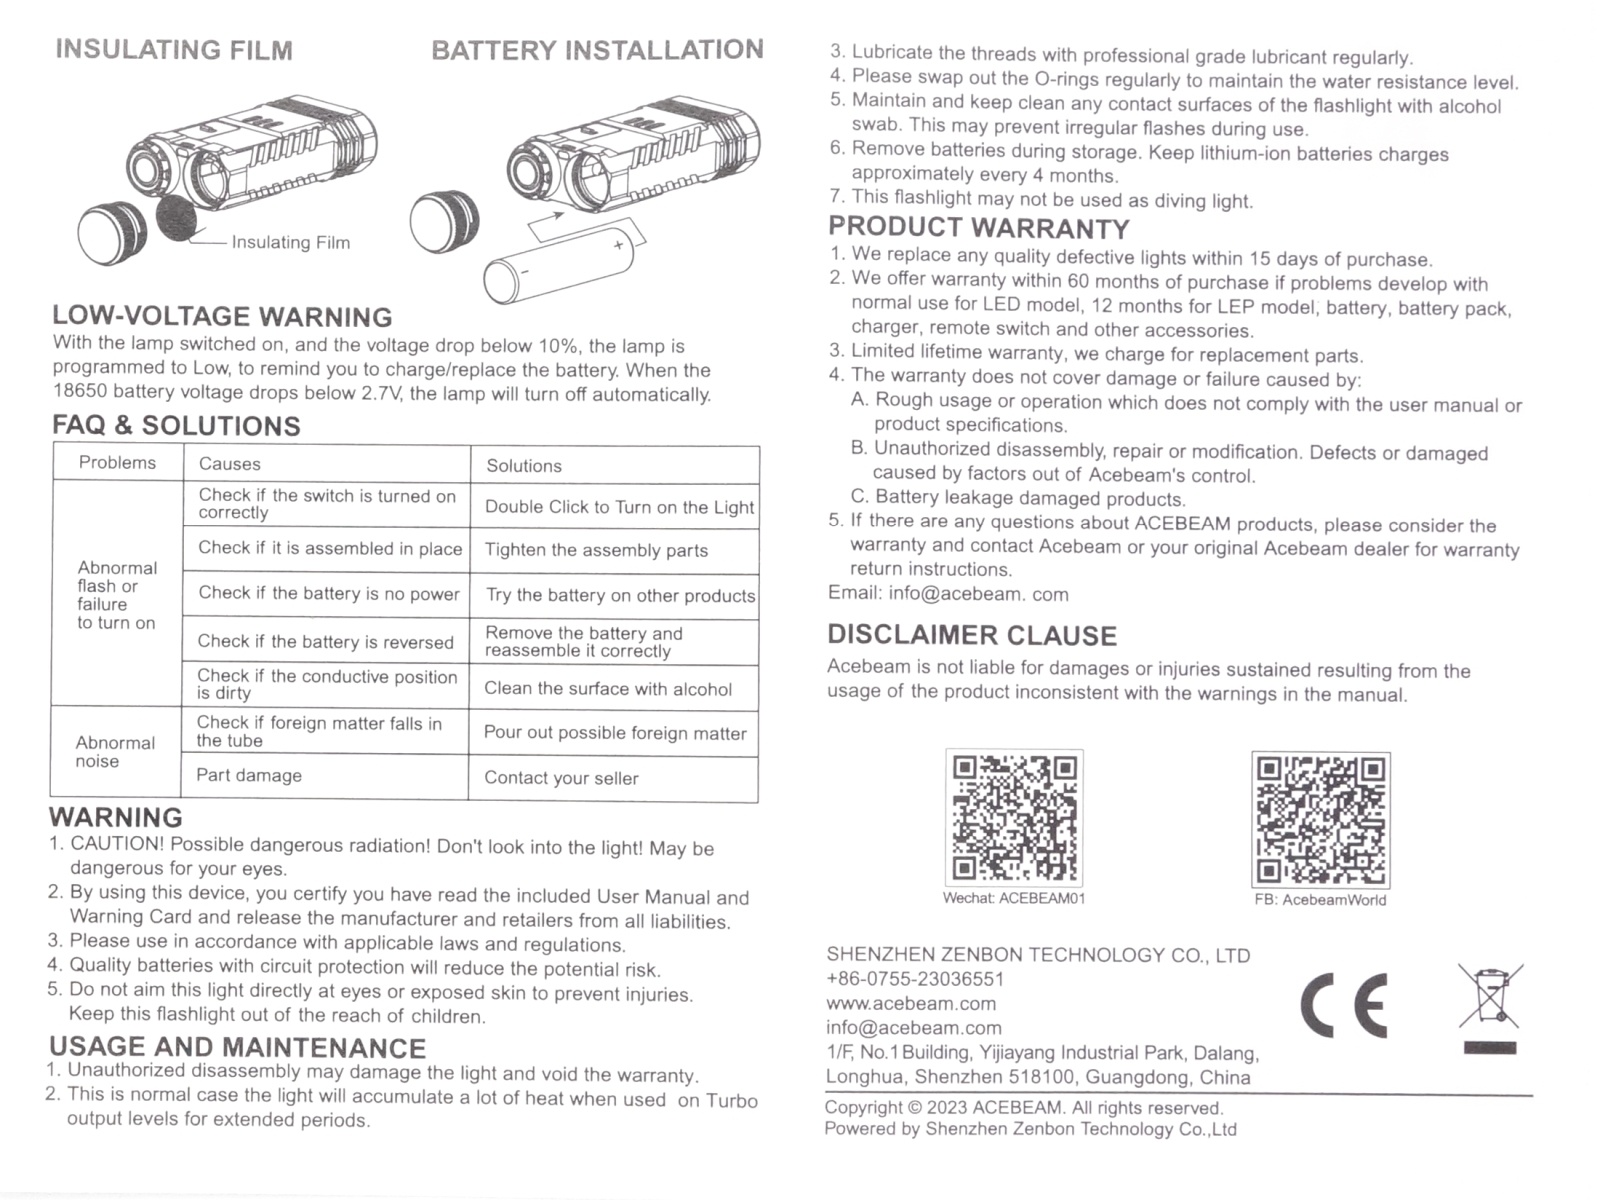
Batteries and charging#
Battery#
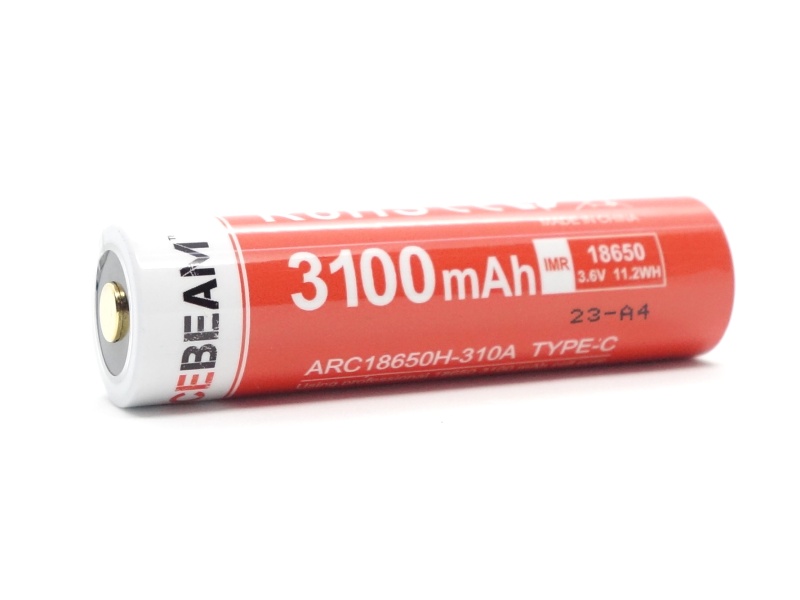
The included Acebeam ARC18650H-310A 3100mAh 3.6V Li-ion with built-in USB-C charging and protection arrived with a voltage of 3.86V.

A piece of insulating film was included to prevent the torch from being turned on while in the packaging.
I tried the following cells:
| Cell | Top | Compatible? | Comment |
|---|---|---|---|
| Acebeam ARC18650H-310A 3100mAh USB-C 23-A4 White | Button | Yes | |
| Acebeam ARC18650H-310A 3100mAh USB-C 22-J6 Black | Button | Yes | |
| Samsung 30Q 18650 3.7V Li-ion 3000mAh | Flat | Yes | |
| Panasonic NCR18650GA 3.7V Li-ion 3450mAh | Flat | Yes | |
| Protected 18650 3.7V Li-ion 2600mAh | Button | Yes |
Charging#
Power supply: PinePower Desktop USB-C
USB Meter: AVHzY CT-3
Room temperature: 20 C
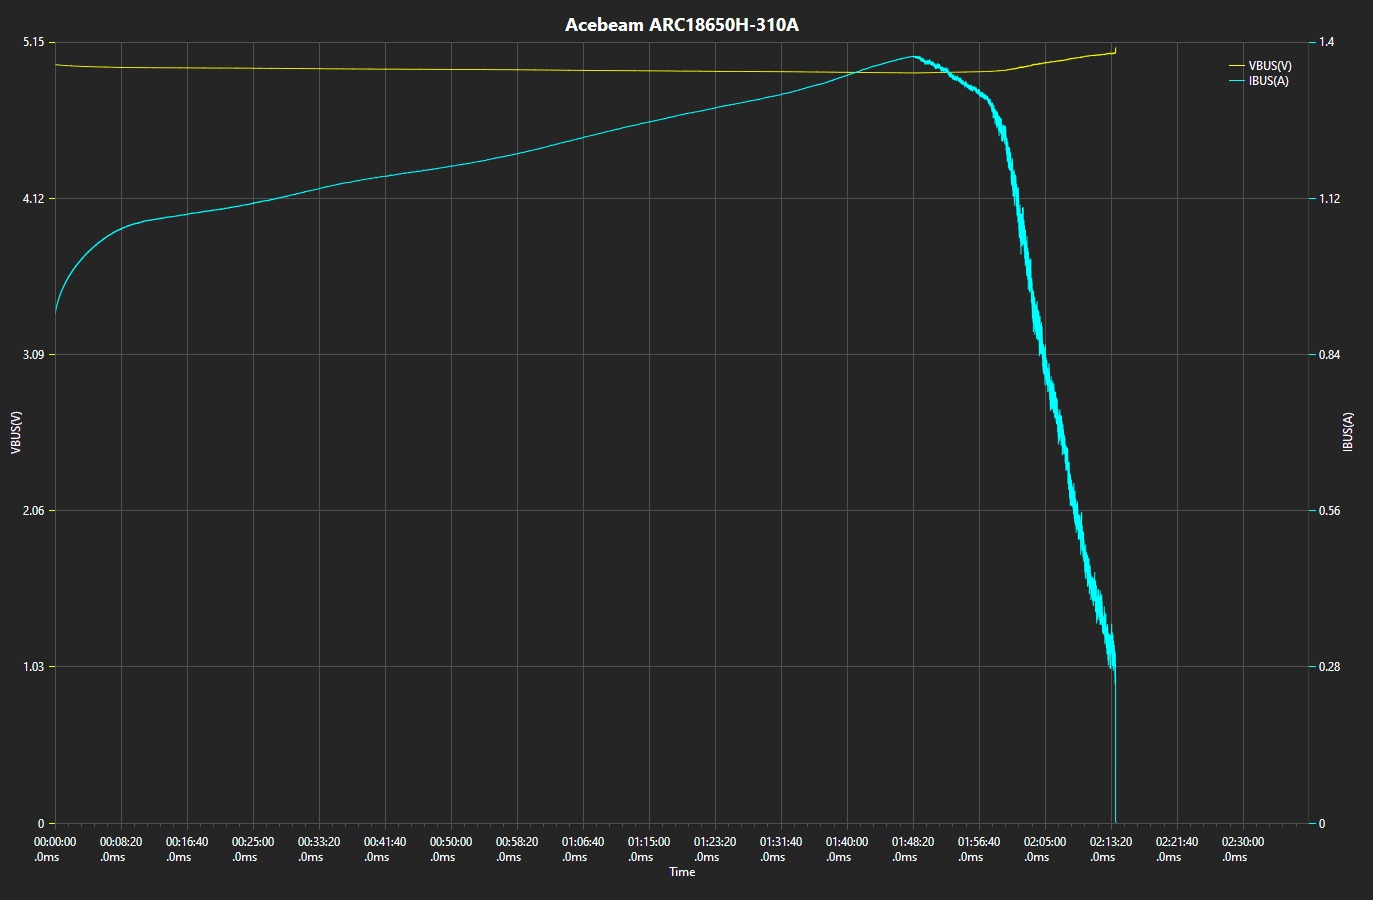
I charged the included battery from 2.85V to 4.15V using the battery’s USB-C port. It took about 2 hours 13 minutes to fully charge.
The charging rate started at around 5V 0.8A. It increased to 5V 1.4A before dropping off.
The indicator LED went red while charging and it went green when charging was complete.
There appears to be enough space on the Acebeam M2 to add built-in charging. It would be nice if any 18650 cell could be charged inside the torch instead of having to take the cell out. This is a personal preference. The anodising may eventually wear away from the threads and slightly unscrewing the tailcap to disconnect the cell as a way of locking out the torch may stop working.
Power supply compatibility#
I tried the following power supplies with the built-in USB-C charger:
| Power supply | USB Type | Protocol | Does it charge? |
|---|---|---|---|
| Apple 61W Power Adapter | USB-C | PD | Yes |
| Google Pixel Power Adapter | USB-C | PD | Yes |
| PinePower Desktop | USB-C | PD | Yes |
| PinePower Desktop | USB-A | QC | Yes |
| PinePower Desktop | USB-A | Yes |
USB-C to USB-C charging works.
Performance#
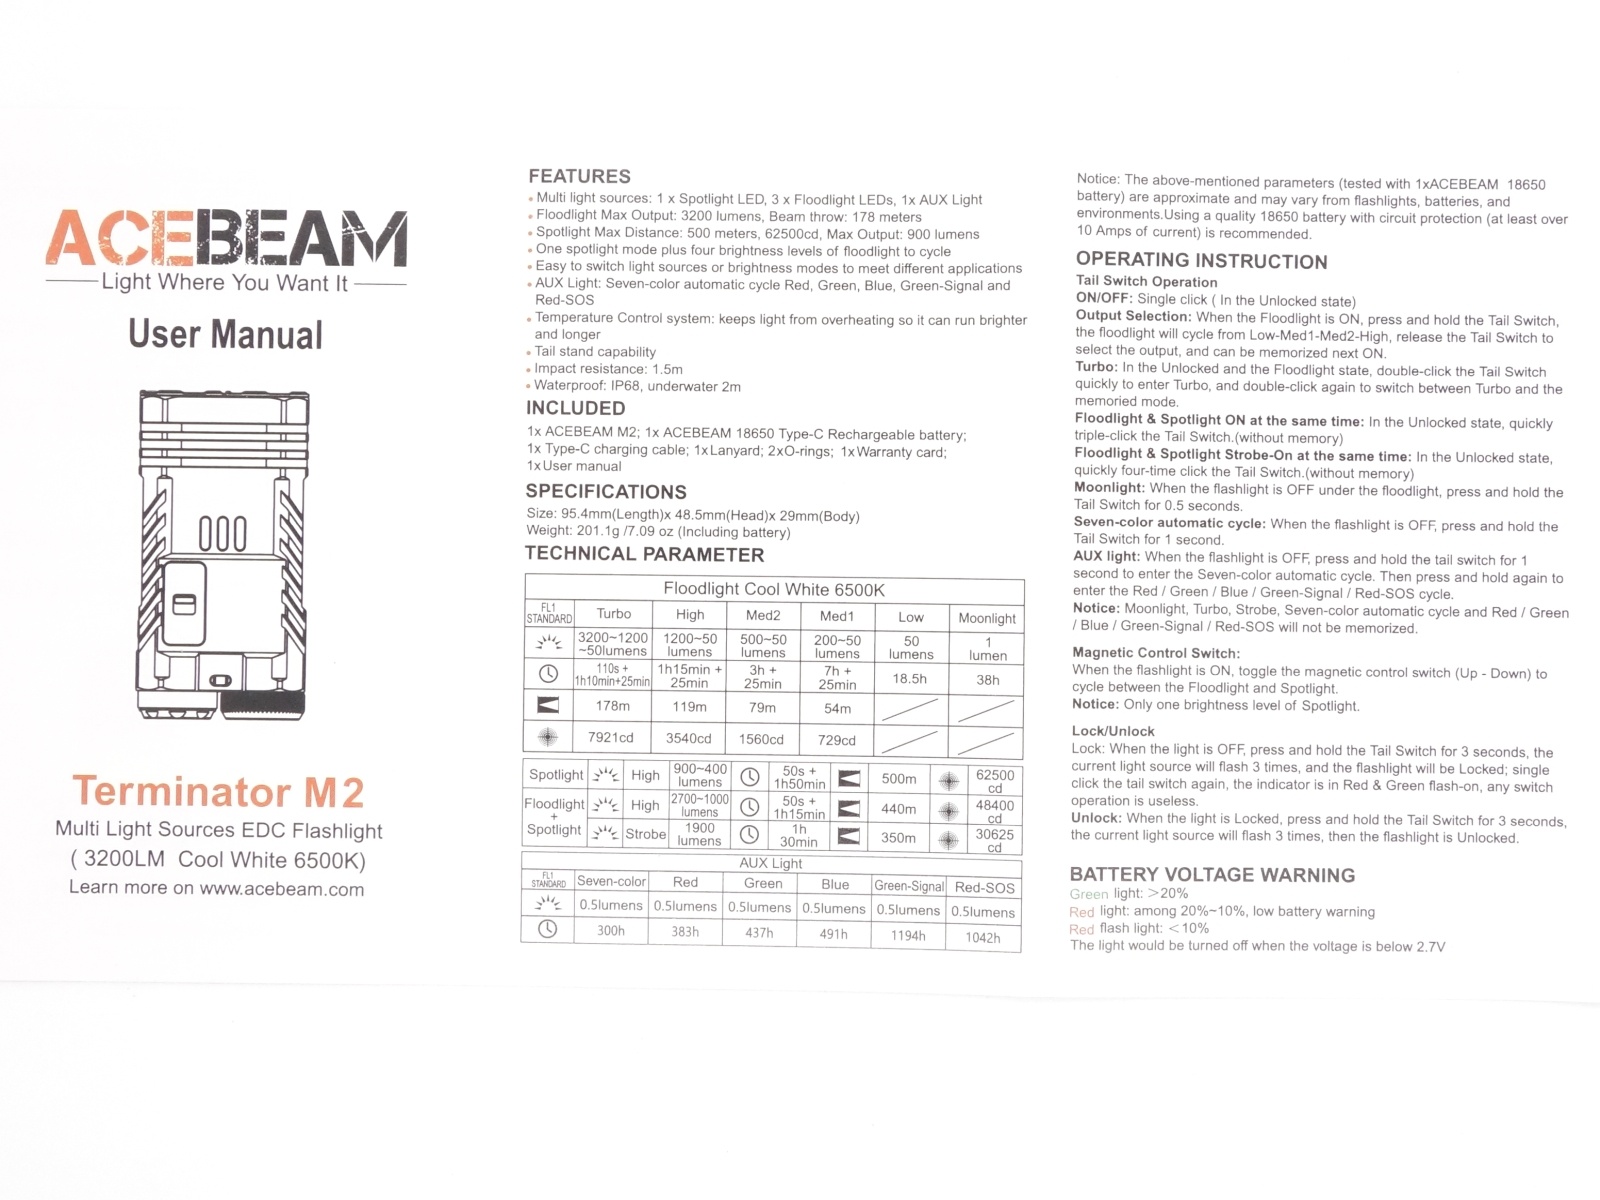
Specifications from the user manual:
Floodlight
| FL1 STANDARD | Turbo | High | Med2 | Med1 | Low | Moonlight |
|---|---|---|---|---|---|---|
| Output (lumens) | 3,200 + 1,200 + 50 | 1,200 + 50 | 500 + 50 | 200 + 50 | 50 | 1 |
| Runtime | 1min 50s + 1h 10min + 25min | 1h 15min + 25min | 3h + 25min | 7h + 25min | 18h 30min | 38h |
| Beam Distance (metres) | 178 | 119 | 79 | 54 | ||
| Beam Intensity (cd) | 7,921 | 3,540 | 1,560 | 729 |
Spotlight
| FL1 STANDARD | High |
|---|---|
| Output (lumens) | 900 + 400 |
| Runtime | 50s + 1h 50min |
| Beam Distance (metres) | 500 |
| Beam Intensity (cd) | 62,500 |
Both (Floodlight + Spotlight)
| FL1 STANDARD | High | Strobe |
|---|---|---|
| Output (lumens) | 2,700 + 1,000 | 1,900 |
| Runtime | 50s + 1h 15min | 1h 30min |
| Beam Distance (metres) | 440 | 350 |
| Beam Intensity (cd) | 48,000 | 30,625 |
AUX Light
| FL1 STANDARD | Seven-Color | Red | Green | Blue | Green-Signal | Red-SOS |
|---|---|---|---|---|---|---|
| Output (lumens) | 0.5 | 0.5 | 0.5 | 0.5 | 0.5 | 0.5 |
| Runtime | 300h | 383h | 437h | 491h | 1194h | 1042h |
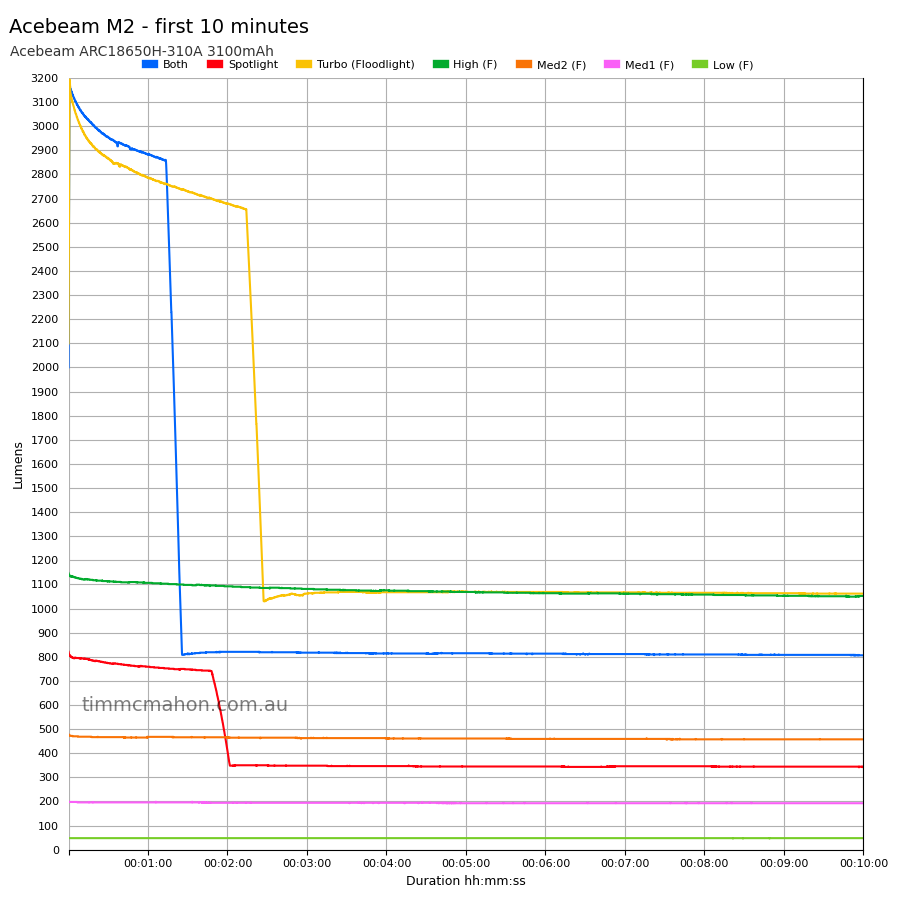
Lumen measurements#
Note: Lumen measurements may be off by 10% with my DIY lumen tube. Output measured from TIR optics may be lower than normal with my lumen tube.
I used a bench power supply to measure the current at turn on.
| LED | Mode | Amps at start | Specs | Lumens @turn on | Lumens @30 sec | Lumens @10 min |
|---|---|---|---|---|---|---|
| Floodlight | Moonlight | 0.06 A | 1 | |||
| Floodlight | Low | 0.13 A | 50 | 48 | 48 | 48 |
| Floodlight | Med1 | 0.35 A | 200 + 50 | 199 | 196 | 192 |
| Floodlight | Med2 | 0.79 A | 500 + 50 | 478 | 466 | 457 |
| Floodlight | High | 2.15 A | 1,200 + 50 | 1,146 | 1,112 | 1,052 |
| Floodlight | Turbo | 5A+ | 3,200 + 1,200 + 50 | 2,099 | 2,867 | 1,061 |
| Spotlight | High | 4.93 A | 900 + 400 | 820 | 773 | 342 |
| Spotlight | Low | 0.04 A | 17 | 17 | 17 | |
| Both | High | 5A+ | 2,700 + 1,000 | 2,000 | 2,954 | 806 |
Both (High) ramped up to 3,183 lumens within the first second.
Floodlight (Turbo) ramped up to 3,193 lumens within the first second.
The lumen output is pretty close to what Acebeam claimed.
Standby drain#
72.6 µA
Runtime graphs#
I used my own DIY lumen tube with a TSL2591 sensor and forked bmengineer’s project RuTiTe to record runtimes.
The room temperature was approximately 22 C.
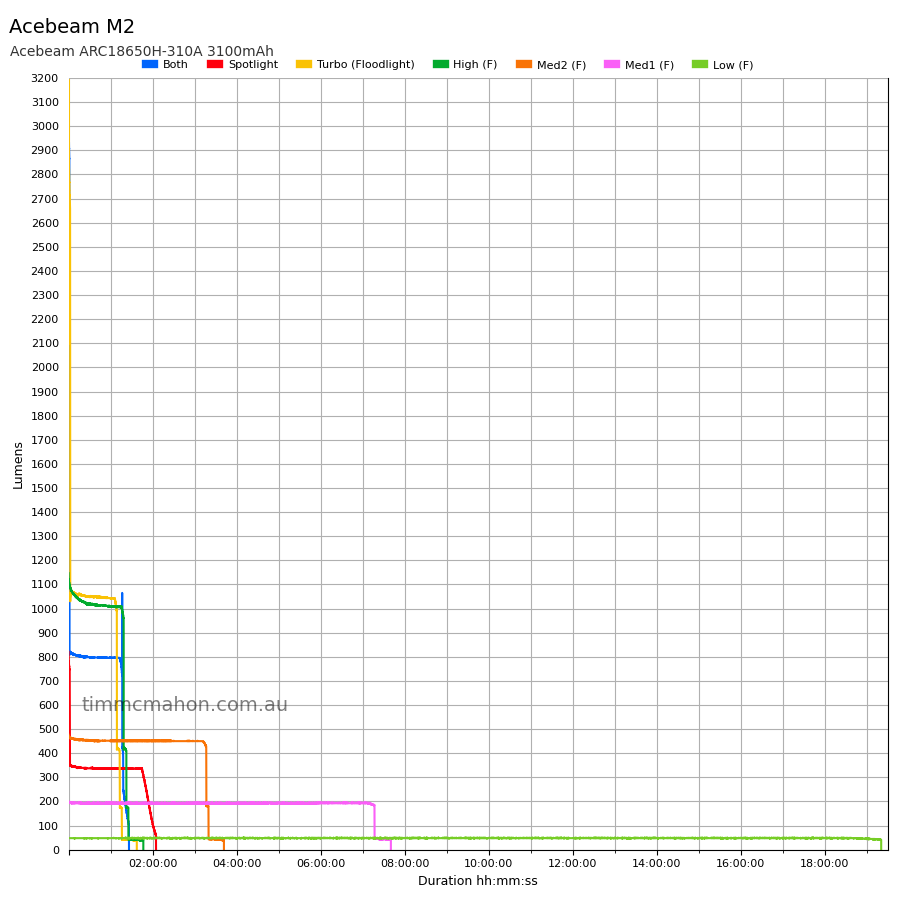
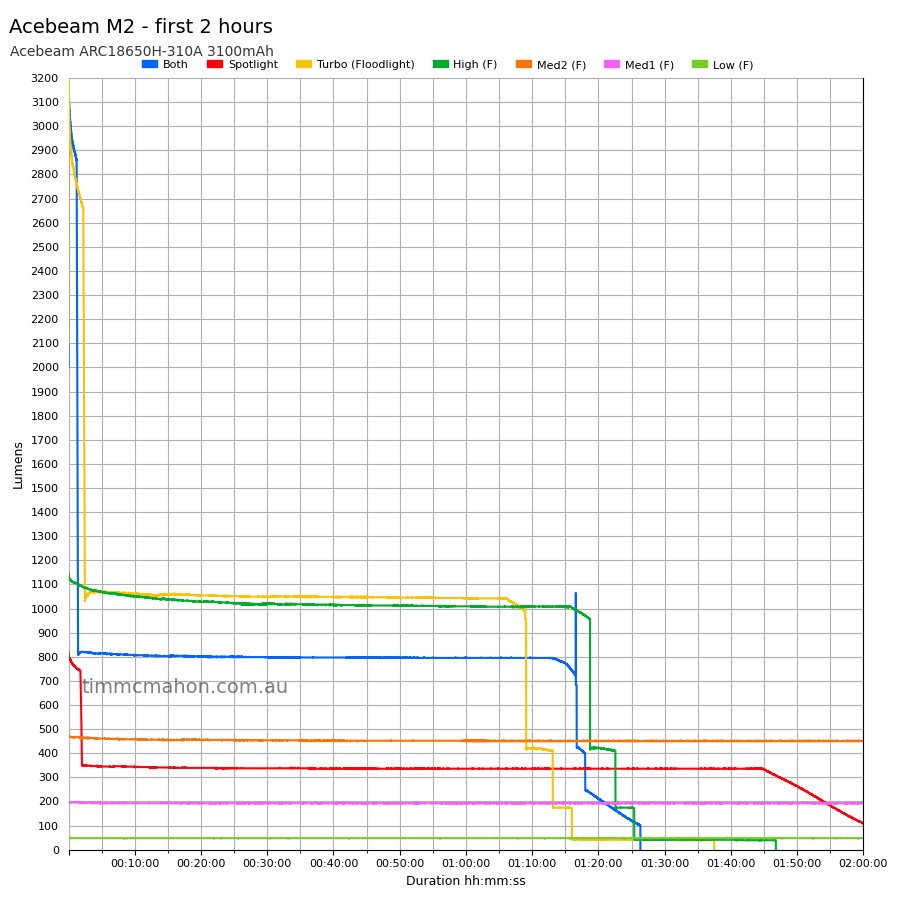
Runtime#
Here is a summary of the runtime results:
| LED | Mode | User manual | Runtime | Turn off | Final voltage |
|---|---|---|---|---|---|
| Both | High | 50s + 1h 15min | 1h 17min 53s | 1h 26min 14s | 2.91V |
| Spotlight | High | 50s + 1h 50min | 2h 2min 47s | 2h 4min 51s | 2.85V |
| Floodlight | Turbo | 1min 50s + 1h 10min + 25min | 1h 13min 0s | 1h 37min 22s | 2.79V |
| Floodlight | High | 1h 15min + 25min | 1h 25min 18s | 1h 46min 41s | 2.86V |
| Floodlight | Med2 | 3h + 25min | 3h 19min 41s | 3h 41min 47s | 2.90V |
| Floodlight | Med1 | 7h + 25min | 7h 40min 17s | 7h 40min 17s | 2.88V |
| Floodlight | Low | 18h 30min | 19h 20min 16s | 19h 20min 16s | 2.78V |
| Floodlight | Moonlight | 38h | 10min+ | 10min+ |
“Runtime” is the time until the output reduces to 10% of the output at 30 seconds (as per the ANSI/PLATO FL1 2019 Standard).
“Turn off” is the time until my DIY lumen tube no longer detects more than one lumen.
“+” indicates that the light remained on after recording had stopped.
The runtime results are slightly better than expected.
I really like the stable output!
Throw#
I took lux measurements with a UNI-T UT383BT at 30 seconds. Moonlight and Low for the floodlight were measured at one metre. Other modes were measured at five metres.
| LED | Mode | Specs (cd) | Specs (m) | Candela measured (cd) | Distance (m) |
|---|---|---|---|---|---|
| Floodlight | Moonlight | ||||
| Floodlight | Low | 112 | 21 | ||
| Floodlight | Med1 | 729 | 54 | 400 | 40 |
| Floodlight | Med2 | 1,560 | 79 | 1,150 | 67 |
| Floodlight | High | 3,540 | 119 | 2,875 | 107 |
| Floodlight | Turbo | 7,921 | 178 | 7,625 | 174 |
| Both | High | 48,000 | 440 | 57,200 | 478 |
| Spotlight | Low | 1,350 | 73 | ||
| Spotlight | High | 62,500 | 500 | 64,750 | 508 |
Moonlight was too low to detect at one metre.
The beam distance is similar to what Acebeam claimed.
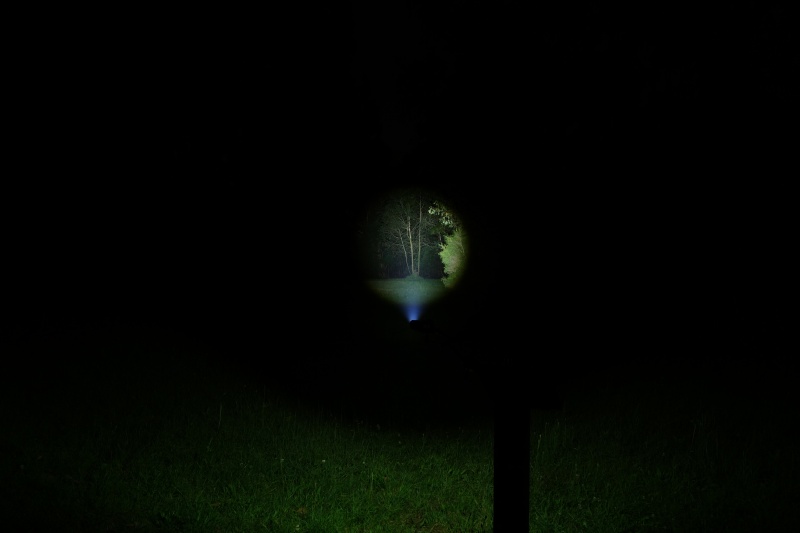
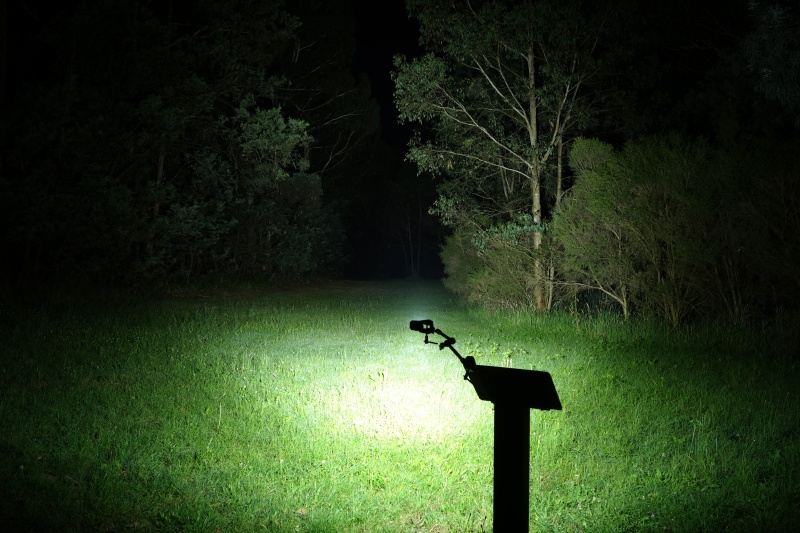
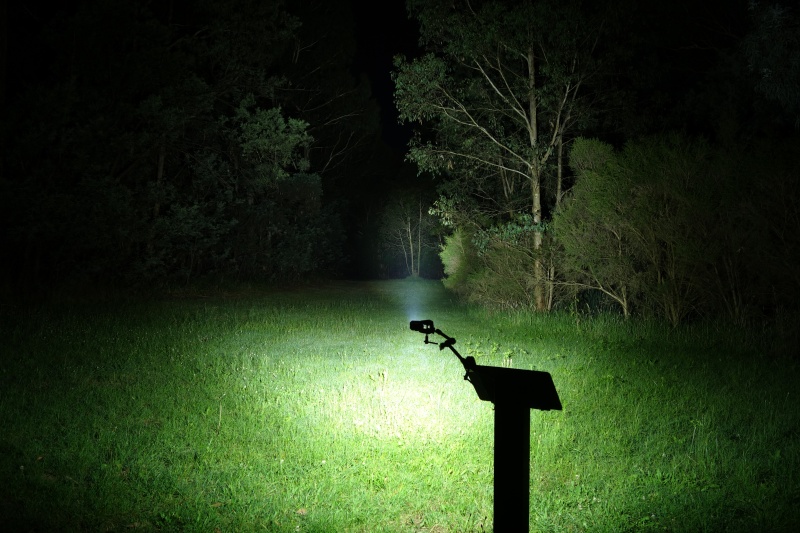
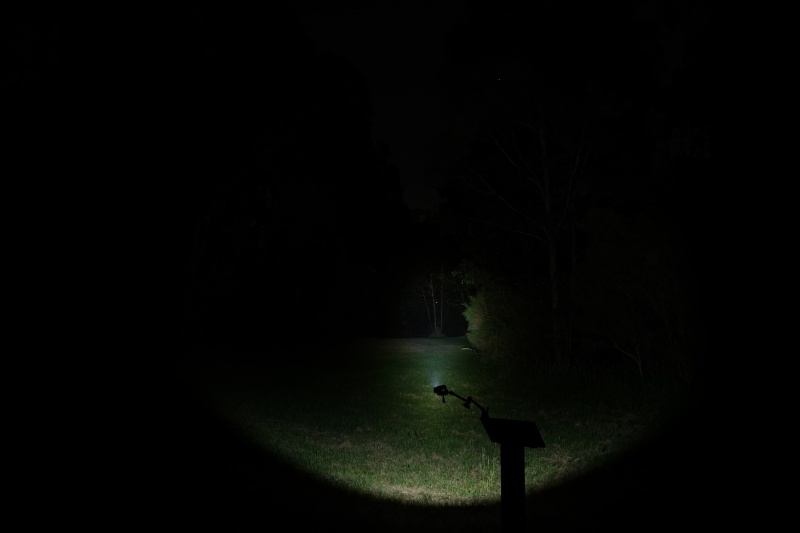
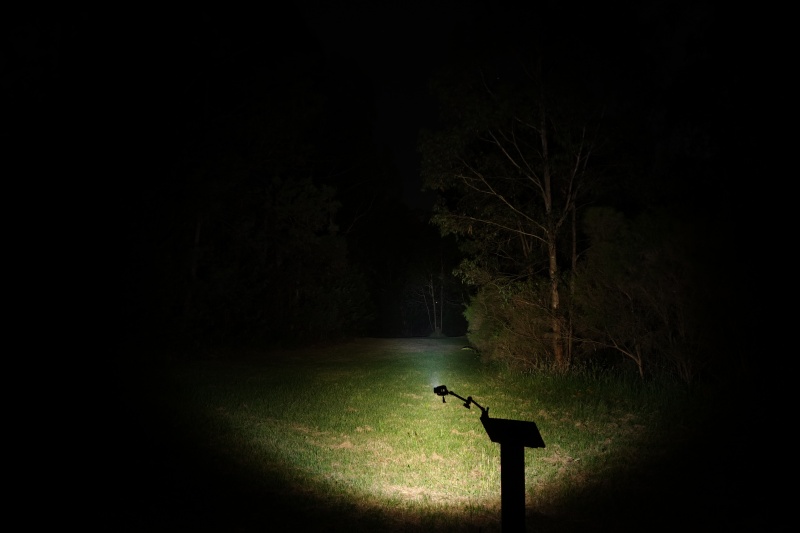
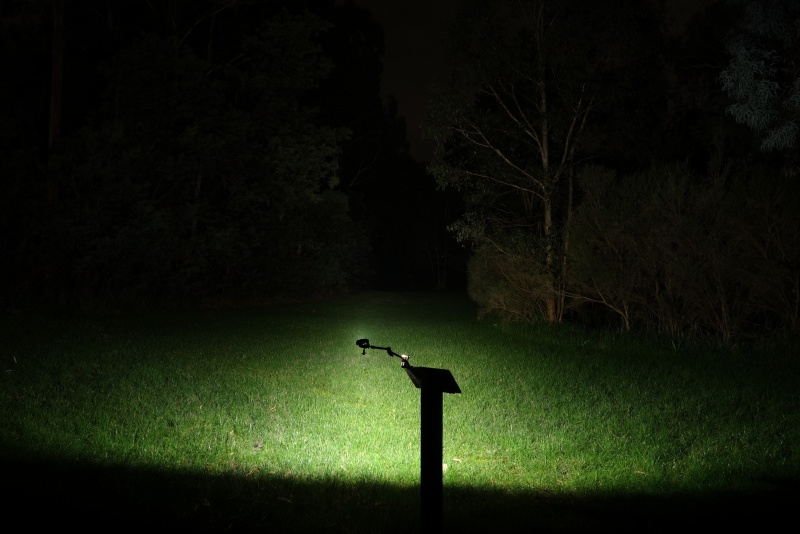
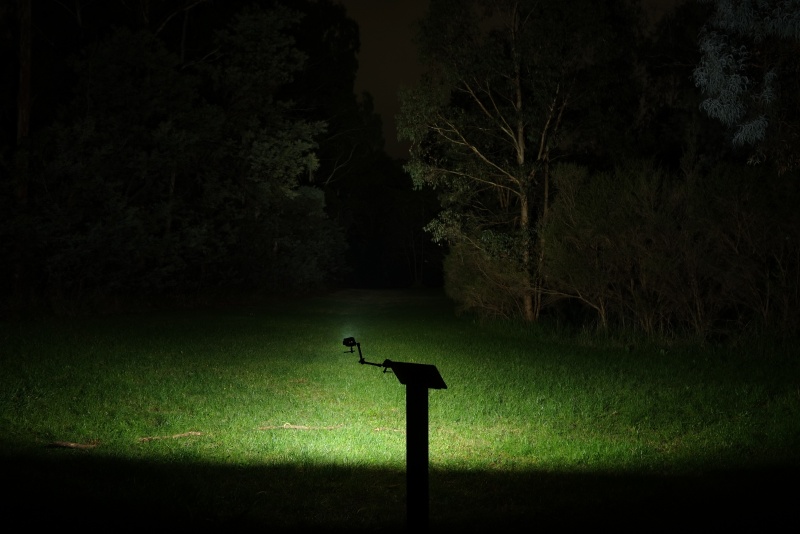
Beamshots#
I went to a local park and aimed the Acebeam M2 at a tree 70 metres away.
Beamshots were taken using a Sony RX100M2 using 3.2", f3.2, ISO 100, 5000K WB.
Acebeam M2 Spotlight (High)#
Acebeam M2 Floodlight (Turbo)#
Acebeam M2 Both (High)#
Manker F14 Spotlight (Turbo)#
Manker F14 Floodlight (Turbo)#

Manker F14 Both (Turbo)#
Wuben X2 White (Turbo)#
Wuben X2 Copper (Turbo)#
Here is a video demonstrating the Acebeam M2:
Conclusion#
The Acebeam M2 is a pretty solid dual beam EDC torch. It has an excellent build quality.
I personally prefer to carry smaller AAA and AA sized torches for my every day carry.
The M2 is something that I would put in my jacket pocket and then pull out when walking around a park at night. It is great for spotting wildlife!
The user interface is relatively simple to use. The side switch definitely makes it easier to switch between the floodlight and the spotlight.
I do wish that the spotlight had more than a High mode. There is a hidden Low mode but it would be even better if it had Low, Med1, Med2 and High like the floodlight.
I would highly recommend the black Acebeam M2 if you are looking for something with a warmer beam and a higher CRI. This green Acebeam M2 is great if you prefer a cool white floodlight at night.
Pros:#
- Excellent build quality.
- The hotspot of the spotlight is big and practical.
- Good beam distance.
- Good runtimes.
- Light output is well regulated.
- Low voltage warning.
- Low voltage protection.
Cons:#
- Spotlight has one mode: High (and a secret Low mode). It’d be better with more modes.
- Red SOS.
- Low CRI (there is a high CRI version).
- Pocket clip isn’t deep carry.
Price#
The Acebeam Terminator M2 is about AU$200 from acebeam.com.au (affiliate link)
If you are going to carry the M2 in your jacket, then you might as well consider getting the slightly larger and much more powerful Acebeam M1. The M1 has a zoomable LEP and a larger 21700 cell.
Product page#
Promo code: TorchHacker
Acebeam M2 at acebeam.com (affiliate link)
Acebeam M2 at acebeam.com.au (affiliate link)
Acebeam M1 at acebeam.com.au (affiliate link)
I may earn a commission if you use an affiliate link or a promo code. This will help fund future torch reviews and tutorials.